
Magento 2 Store Locator

- for Magento 2.4.x (CE, EE)
By displaying all store locations on a separate page, the Magento 2 Store Locator extension assists customers in locating all physical stores more efficiently.
By displaying all store locations on a separate page, the Magento 2 Store Locator extension assists customers in locating all physical stores more efficiently.


User Guide
By displaying all store locations on a separate page, the Magento 2 Store Locator extension assists customers in locating all physical stores more efficiently.Store Locator, when integrated with Google Maps, provides more concise results for wonderful experiences
Features
- Add, edit, and delete store location information such as addresses and images.
- Show the store’s opening and closing times, as well as lunch breaks.
- Display the working and closing days of the store.
- Search functionality for current location and nearby stores
- Make Google Maps your default map.
- Each location will be labeled with an image and a brief description.
- Mark each location with an image and a brief description
Steps:

Extension Installation
- Download the zip file
- Extract and put it into /app/code/
- Open Cli in the Magento directory and follow the below commands:
- php bin/magento s:up
- php bin/magento s:d:c
- php bin/magento s:s:d -f
- php bin/magento i:rei
- php bin/magento c:f
- php bin/magento cron:install
- php bin/magento cron:run
-
Configuration:
-
STEP 1
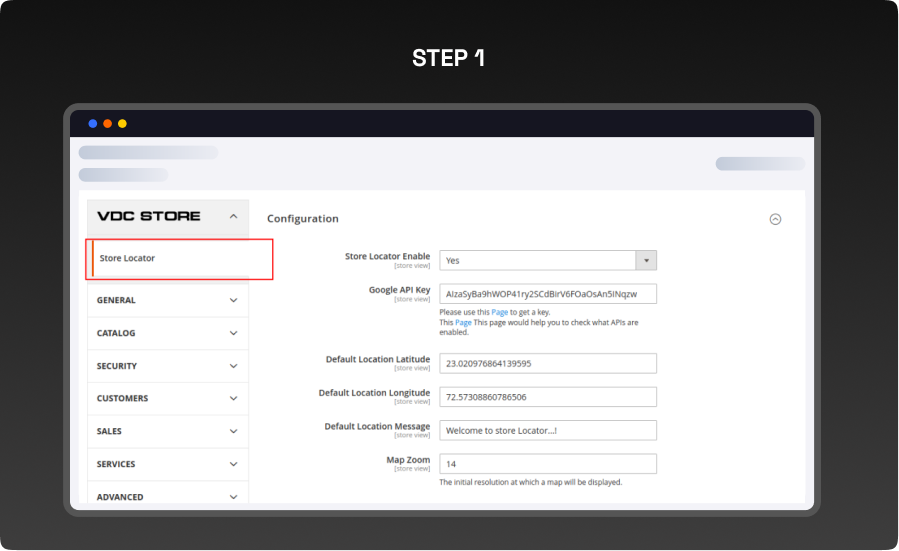
- Go to Stores > Configuration > VDC STORE.
- Store Locator Enable: Enable/disable the extension
- Google API Key: This setting is only relevant for store owners who have customer heavy stores with 25k+ Google Map loads per day; You do not need to enter the Google Maps API if you do not have this many loads.
- Default Location Latitude: Enter the Latitude of the store’s location.
- Default Location Longitude: Enter the Longitude of the store’s location.
- Default Location Message: The default Welcome message will be shown on Google Maps.
- Map Zoom: Enter the value of the zoom for the map feature.
-
STEP 2
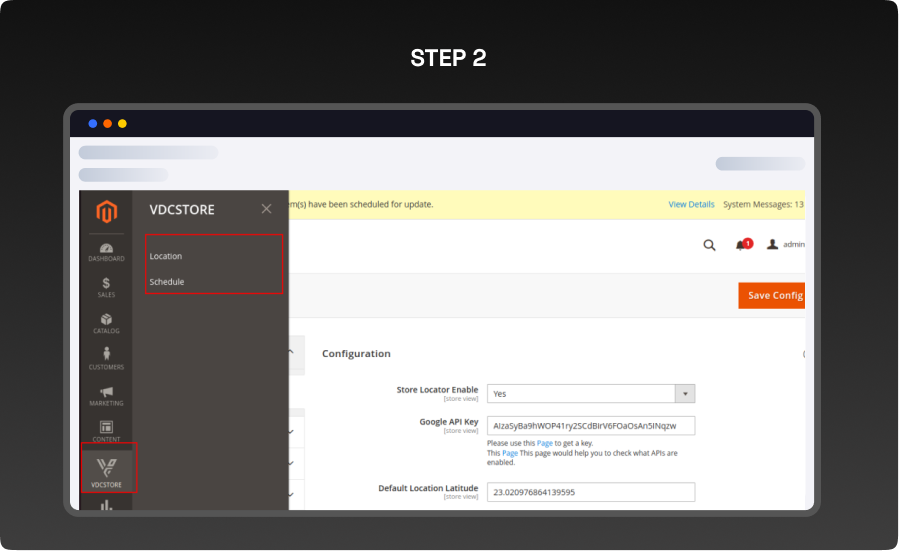
- Once the extension is enabled, the above shown custom menu will be displayed.
- Location and Schedule are the sub menu options.
- Upon clicking on the Location , the user can edit/delete and add new locations.
-
Location Grid
-
STEP 3
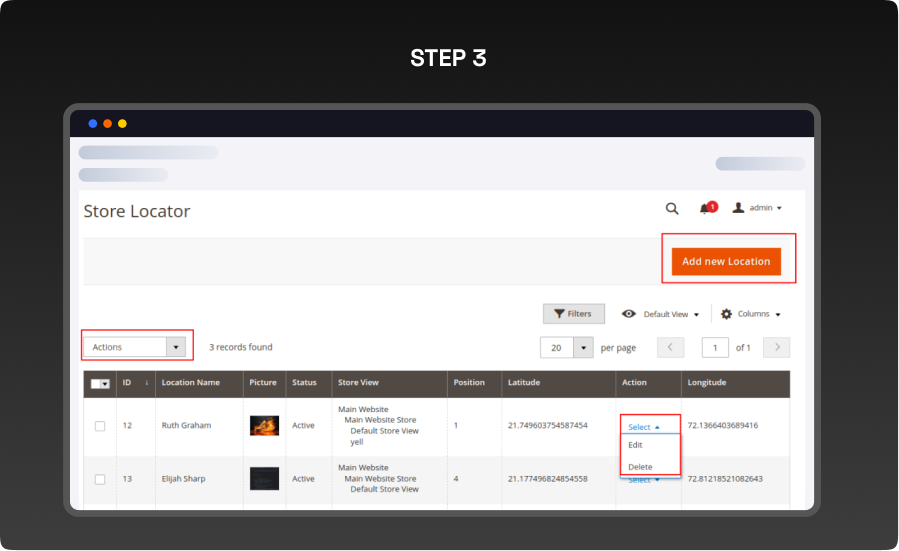
- The saved data will be displayed in the tabular grid as shown in the image.
-
STEP 4
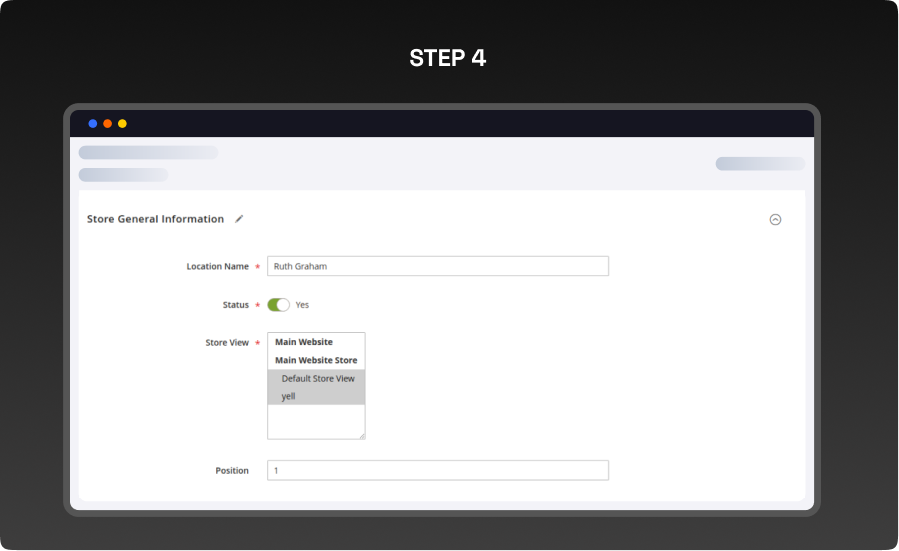
- Enter the general information of the store like Location name,status, store view and position that you want the selected store to be displayed on.
-
STEP 5

- Enter the short and long description of the store
-
STEP 6
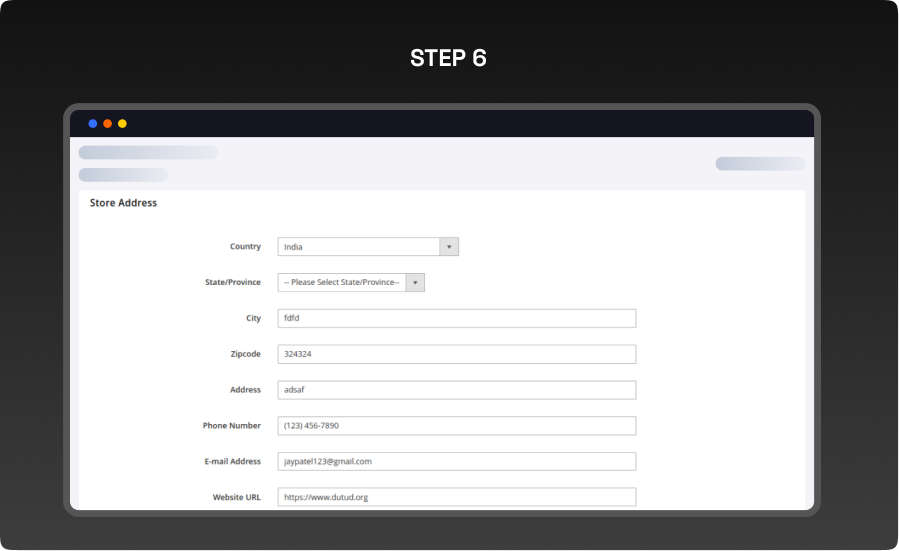
- Enter the store address and contact details as prompted.
-
STEP 7
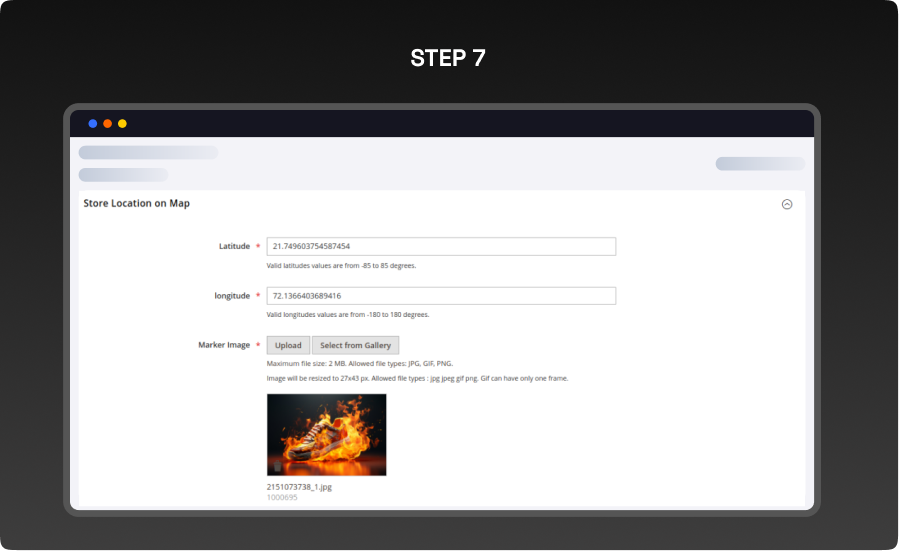
- Enter the latitude and longitude of the nearby stores.
- Upload the image that you want the store to be identified from.
-
STEP 8
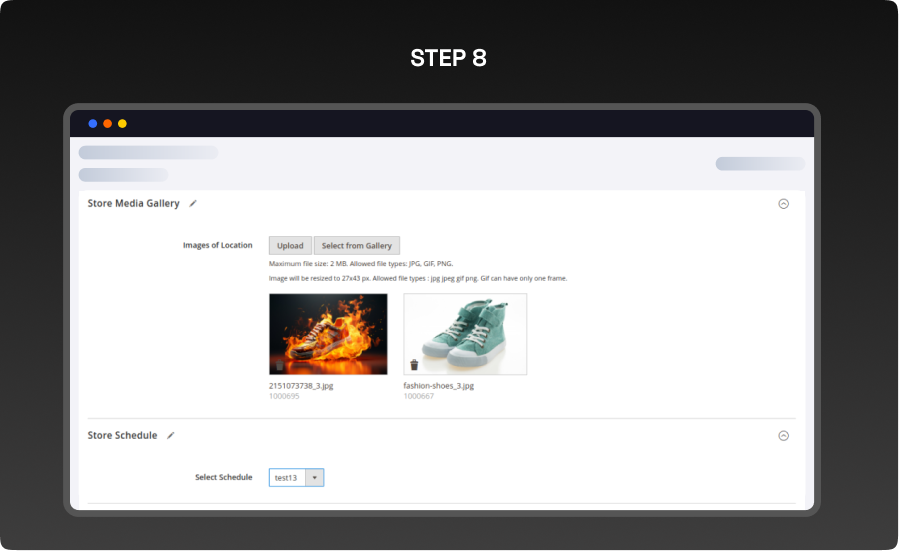
- Upload the store images/identifier images in the store media gallery.
- Select the desired schedule which will display the store s opening/closing times etc.
-
STEP 9
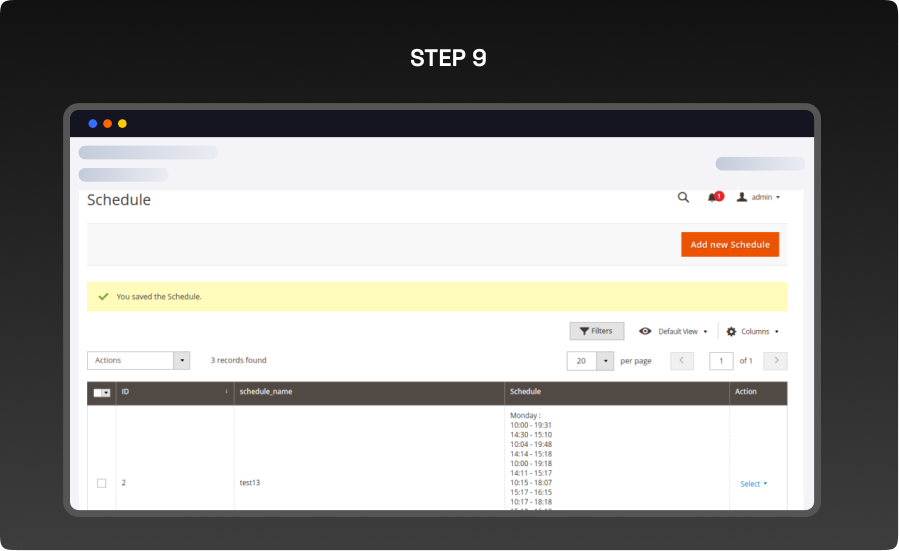
- The schedules can be edited, deleted or added here.
-
STEP 10
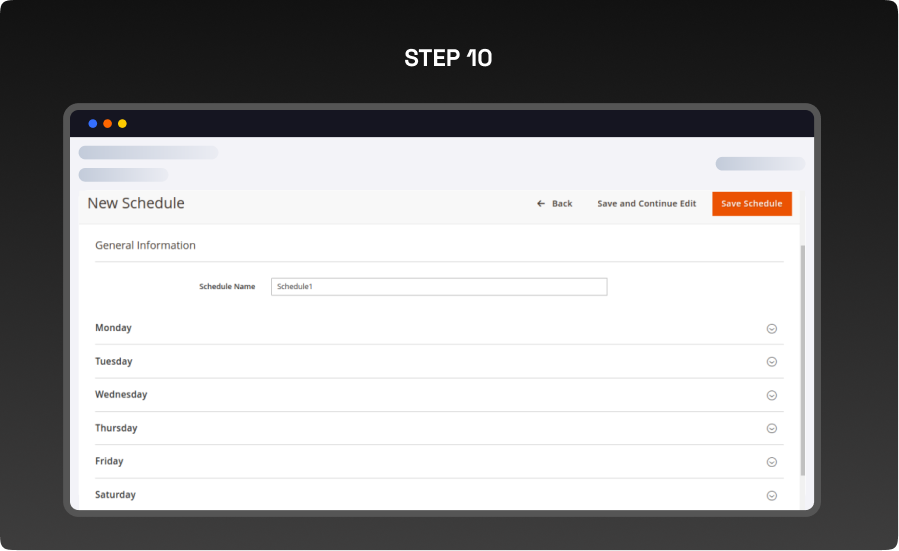
- This is the representation of the schedule name list that the user will be able to see.
-
STEP 11
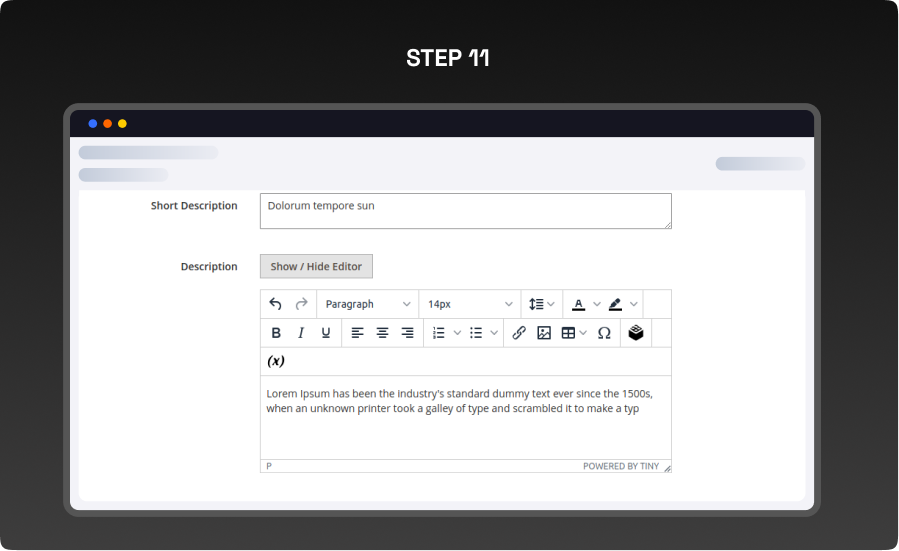
- Enter the details of the store s schedule as shown in the image.
-
The Frontend
-
STEP 12
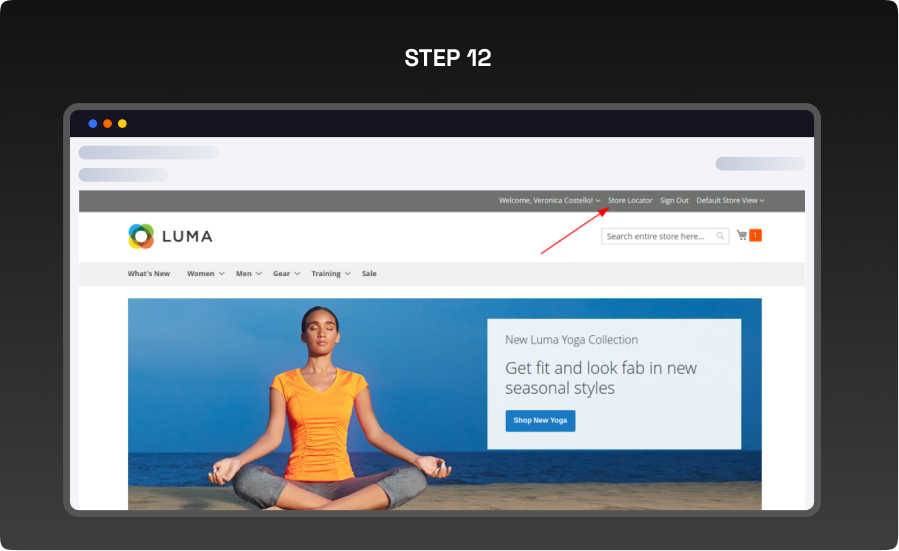
- The link of the store locator will be displayed on the front end site as pointed out in the image.
-
STEP 13
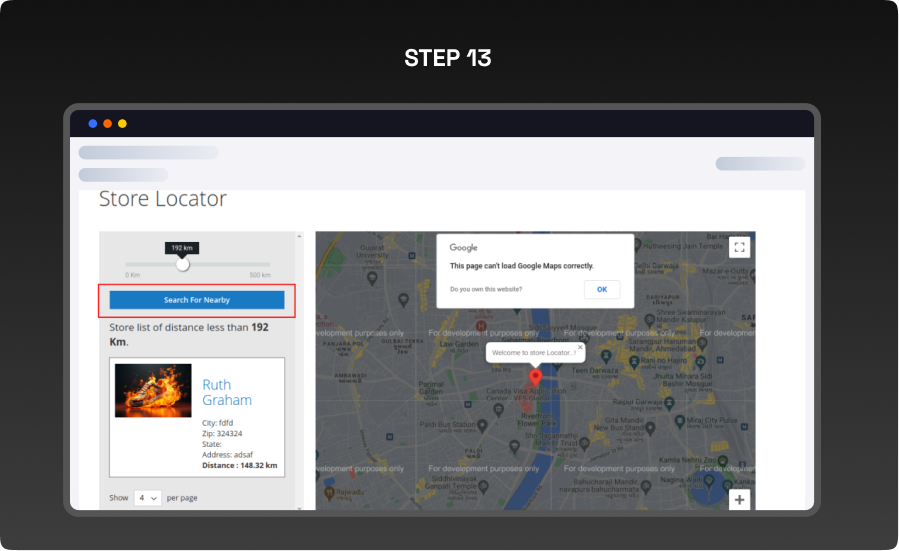
- Upon setting the distance radius and clicking on Search For Nearby , the saved stores within that radius will be shown on the map.
- The latitude and longitude added in the configuration will be counted as the current location by default.
-
STEP 14
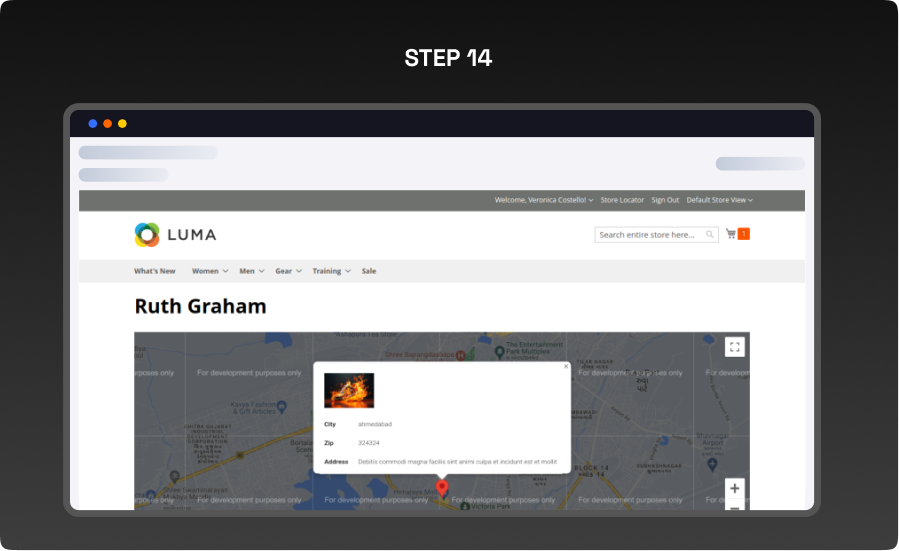
- The entire store details entered in the configuration will be displayed as per the above image.
What you'll obtain with our Magento Technical Audit
With VDC Store's Magento eCommerce technical audit you'll gain expert separate in-depth analysis with an exhaustive summary of the state of your store's code grade and overall usability.

-

An organizational summary of discoveries with preferences and a brief overview
-
3rd party extensions initial review
-
An exact description of results and suggested solutions
-
Database innocence review (to secure that data is recorded precisely as planned)
-
Top preferences for your architects
-
Code quality examination (periodic reflection of your store source code)
-
Examination of possible Magento core design changes
-
Speed and execution analysis (HTTP requests, optimizations, exhale headers…)
By a technical appraisal, the client not only obtains information about the issues the store is facing but also this examination by VDC Store allows them to acquire beneficial information and concepts for setting up programs to enhance sales and conversion drivers.
Our analysis appreciates the essence of your business. We are not utilizing an automatic procedure that is used in every case. We want to make sure you end up with suggestions based on the exact condition of your store. Start the discussion about the Magento technical audit you're curious in by filling out the Contact Us form.
Why Choose the VDCStore Magento 2 Store Locator Extension
Helping customers find your physical locations quickly and easily builds trust, drives foot traffic, and enhances your omnichannel strategy. The VDCStore Magento 2 Store Locator Extension empowers Magento merchants to showcase all of their store locations on an interactive, mobile-friendly map right within the storefront. Whether you operate a single showroom or a global network of retail outlets, this extension makes it simple for customers to search by city, ZIP/postal code, or distance — bringing relevant store information front and center. With features like custom pins, search radius filters, directions links, and location details like contact info and opening hours, this extension upgrades the customer experience, boosts in-store visits, and aligns your digital presence with real-world engagement. Easy to configure, fully compatible with Magento 2, and performance-optimized, it’s a must-have tool for brands that want to bridge online and offline shopping seamlessly.
FAQs

Live Demo


Explore Our Customer Reviews
Dr Zahid
 Verified
Very happy with the website service!
Very happy with the website service. Great communication, high-quality design, and timely delivery. Everything was handled professionally, and the end result exceeded our expectations. Would definitely recommend.
Ravinder Gupta
VerifiedGreat experience
Great experience working with this software company. The team is professional, responsive, and delivered exactly what was promised.
Erel Support
VerifiedExtremely satisfied
I am extremely satisfied with the website they built for us. They listened carefully to our ideas, suggested improvements, and delivered a site that perfectly represents our brand.The process was smooth,strees-free,well organized.Great attention to detail and excellent support even after launch
Anurag Kumar
VerifiedGreat experience working with this team
We had a great experience working with this team for our website. They were Professional, responsive, and clearly understood our requirements from the start. The final website looks clean and modern and works perfectly across all devices. Communication was smooth throughout the project, and everything was delivered on time. Highly recommended for anyone looking for reliable website services and extensions.
Amol Bhoyate
VerifiedReliable, Professional, and High-Quality Web Development
We had a great experience working with VDC Store for our website development needs. From the very beginning, their team was professional, responsive, and attentive to our requirements. They clearly understood our vision and delivered a modern, user-friendly website that aligns perfectly with our business goals.
Comparison
Explore Our Hyvä Theme Demos
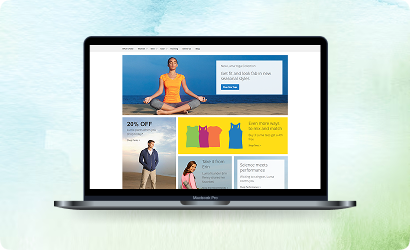
Fashion Store
Experience lightning-fast browsing and seamless product discovery in our Fashion demo, designed for smooth navigation and instant page loads.

Jewelry Store
Experience a sleek, lightning-fast browsing experience with our Jewelry demo — optimized for smooth navigation and instant product loading. Modern design meets high performance for flawless shopping.
Furniture Store
Our Furniture demo delivers fast, responsive pages and seamless product filtering, letting users explore large collections without delay. Performance-driven design for ultimate online convenience.
Electronics Store
Explore the Electronics demo with blazing-fast load times and smooth interactive features, ensuring a high-speed, immersive shopping experience. Optimised for tech-savvy customers.

Fitness Store
The Fitness demo combines speed and responsiveness with effortless navigation, making it easy to browse workout gear and accessories quickly. Built for fast, engaging online fitness shopping.

Beauty Store
Enjoy instant load times and smooth interactions in our Beauty demo, designed for a seamless, high-performance shopping journey. Perfect for browsing beauty products without interruptions.
B2B Store
Our B2B demo emphasizes speed and efficiency, handling bulk catalogs and quick ordering without lag. Engineered for high-performance business-to-business operations.
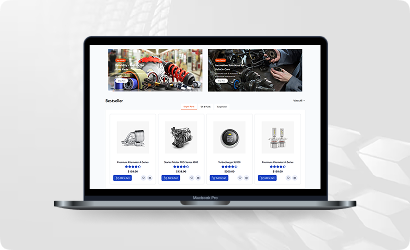
Auto Store
The Auto demo offers responsive navigation and rapid product searches, making car parts and accessories easy to find. Optimized for high-speed, performance-driven shopping.
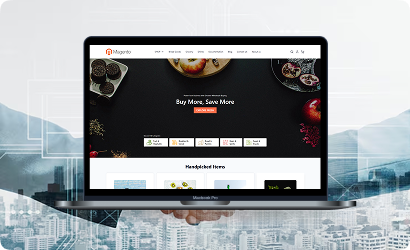
Hyvä Demo Store
Experience the Hyvä demo’s cutting-edge performance with near-instant page loads, smooth animations, and superior responsiveness. Designed for modern, lightning-fast eCommerce.
FANTASTIC AND PREMIUM CLIENTS
Trusted by
Need More Help?
Save time by starting your support request online and we'll connect you to an expert. Save time by starting your support request.