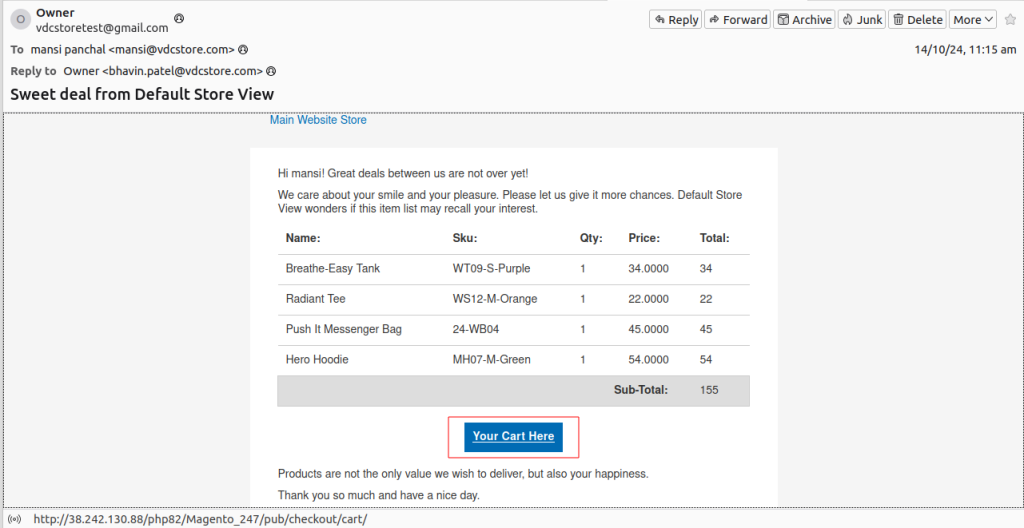
A cart abandonment occurs when the customers add items to the cart but leave the website without completing the purchase. This problem is solved by the Abandoned Cart Email extension for Magento 2 that tracks abandoned carts and automatically sends reminder emails. Motivate customers to recover their carts and finish the checkout process. Using this strategy can lead to a dramatic increase in order values, increase sales and increase profitability by getting more customers to complete their purchase.
Table of Content
Features
- Product Sync: Manually or automatically sync selected or all products from Magento 2 to Salesforce CRM.
- Customer Sync: Transfer specific or all customers to Salesforce Leads, Contacts, and Accounts, either manually or automatically.
- Order Sync: Sync individual or all orders to Salesforce Orders and Opportunities, manually or automatically.
- Campaign Sync: Update campaigns and subscribers from Magento 2 to Salesforce CRM, with both manual and automatic options.
- Smart Mapping: Map Magento 2 attributes to Salesforce fields manually.
- Log Viewing: Check synchronization logs for data transfer details.
- Queue Management: Monitor and manage sync tasks in the queue.
- Request Reports: Track sync requests from Magento 2’s backend.
- Account Linking: Connect Salesforce Contacts with Accounts.
- Personal Account Support: Compatible with personal accounts.STEP 35STEP 35
Steps:
- Extension Installation Guide
- How to Use
- Configuration
- Frontend
- Extension Installation
- Download the zip file
- Extract and put it into /app/code/
- Open Cli in the Magento directory and follow the below commands:
- php bin/magento s:up
- php bin/magento s:d:c
- php bin/magento s:s:d -f
- php bin/magento i:rei
- php bin/magento c:f
- php bin/magento cron:install
- php bin/magento cron:run
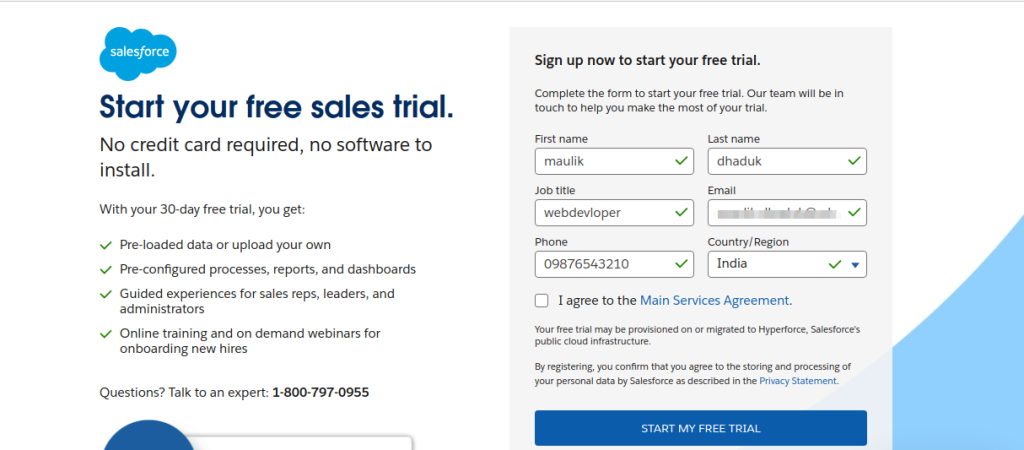
- STEP 1

-> Click on the link to create an account first.
https://www.salesforce.com/form/signup/freetrial-sales-ee
-> Click on the link to create an account first.
https://www.salesforce.com/form/signup/freetrial-sales-ee
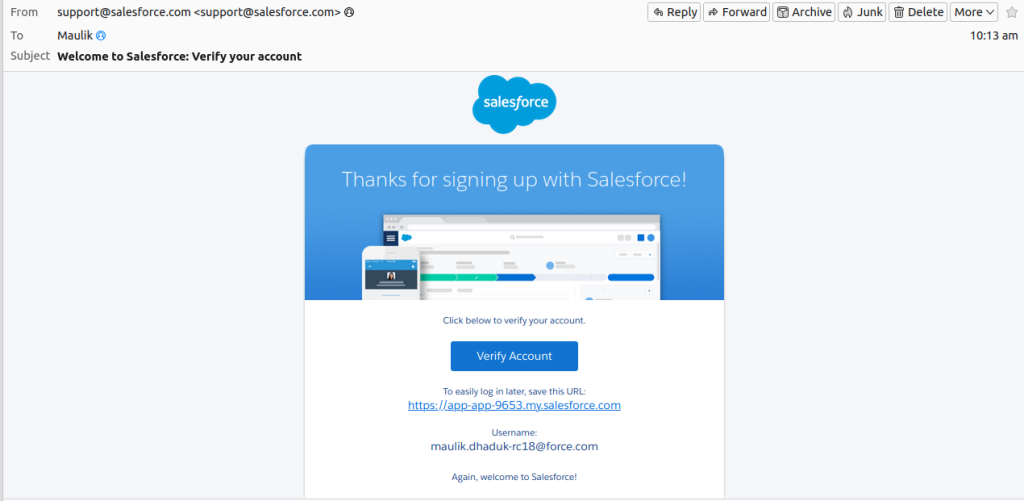
- STEP 2

-> Check your email and verify your account by clicking on ‘Verify Account to set a new password or you can click on the below URL to log in.
STEP 3
STEP 35
-> Navigate to Setup > Apps > App Manager > New Connected App, then click “New Connected App in the top right corner to create a new app.
STEP 4
CRM Integration
Providing the required information:
->Connected App Name: Enter name for your connected app
->API Name: This will auto-populate based on the Connected App Name
->Contact Email: Your Salesforce email address
->Contact Phone: Enter your phone number
->Enable OAuth Settings: Enable API OAuth Settings by ticking on the box
->API (Enable OAuth Settings): Enable all the settings below to proceed
Enable OAuth Settings:
-> Callback URL: For the Callback URL, use the format provided in the reference link.
https://developer.salesforce.com/.
-> Selected OAuth Scopes: Choose the ‘full access option and Perform requests on your behalf at any time (refresh_token, offline_access) to submit requests on your behalf whenever needed.
-> Require Secret for Web Server Flow: Select Require Secret for Web Server Flow.
-> Configure ID Token: Click on the check box. Now set Token Valid for in minutes (For example you set for 00 minutes then type into the box)
-> ID Token Audiences => https://test.salesforce.com, https://login.salesforce.com, and click on checkboxes such as ‘Include Standard Claims’, ‘Include Custom Attributes, and ‘Include Custom Permissions.
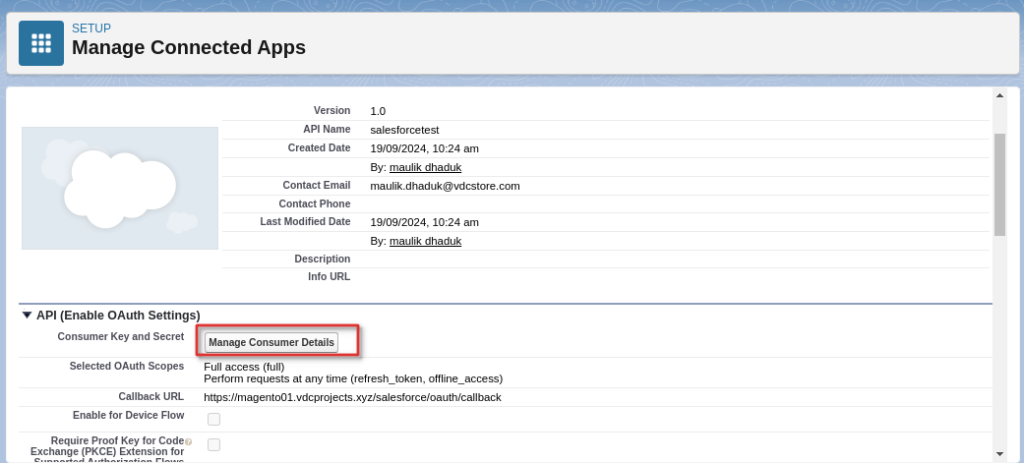
STEP 5

->After filling out all the details, the output will appear as above.
->Also, you can manage your Consumer Key and Secret by clicking on Manage ConsumerDetails .
STEP 6
Salesforce
Existing custom-> Go to open user profile > Go to settings > My Personal info > reset my security token.Click on “Reset Security Token : Check your email after clicking this option.ers who are already logged in will receive a notification and can click on ‘View Cart Here’ to see their cart and the products they’ve added.

-> Go to open user profile > Go to settings > My Personal info > reset my security token.Click on “Reset Security Token : Check your email after clicking this option.
STEP 7

-> A new security token will be sent to your registered email.
-> Use the Security Token: You ll need this token for configuration purposes.
STEP 8

-> Setup and Authentication of SalesforceCRM account > Go to Admin > VDC STORE > Salesforce Integration > Configuration.
-> Username: Enter your Salesforce login username.
-> Password: Enter your Salesforce password.
-> Consumer Key: Locate this in Salesforce by navigating to Home > Platform Tools > Apps >App Manager, and select your app. Refer to the guide Get consumer key and consumer secret by connected app for details.
-> Consumer Secret: Similarly, find this under Home > Platform Tools > Apps > App Manager for your app. Consult the guide mentioned above.
-> Obtain Security Token: Refer to the guide “Reset Security Token to receive a new securitytoken, which will be sent to your registered email.
-> Select Salesforce Environment: Choose either the sandbox environment or the productionenvironment.
-> Enable Debugging: If needed, enable debugging to log data responses to the salesforce.log file on your system.
-> Save Configuration: Click Save Config. If necessary, Refresh the cache, click Get Access, andcomplete the setup
NOTE:
-> Save the configuration before clicking the Get Access button to prevent a consumer key error.
STEP 9

-> The admin will be redirected to the verification page.
-> Click the Allow button to proceed. Wait a few minutes for the process to complete, and then review all features of the module to ensure everything is functioning correctly.
STEP 10

-> The Connection Status will change from “Not Connected to “Connected,” displaying all relevant information as shown in the image above
-> Once the integration is successful, the admin can map fields from Salesforce to Magento and synchronize data between Magento and Salesforce.
STEP 11

How to synchronize data from the Magento 2 store to the Salesforce CRM accountSetting Up Field Mapping
-> First, you must create the necessary field mappings to accurately synchronize data fields fromyour Magento 2 store to Salesforce CRM.
-> Navigate to Field Mapping: Go to Admin >Salesforce Integration > Setup Field Mapping. -> Choose Data Type In the Mapping Management section, the data type you want to map, such as Accounts, Contacts, Campaigns, Leads, Products, Orders, or Opportunities select ‘Account’.
-> Note: Field mapping is not required for Subscriber data.
-> For each field in Magento, select the corresponding field in Salesforce to synchronize data.
-> Field Description: Describe the purpose of each mapped field.
-> Default Value: Define a default value for objects without data to sync. If no default value is set,the field will be empty.
-> Status: Enable or disable the field mapping as needed.
-> Note: Salesforce has field-level security that can restrict access to certain fields. If some fieldsdo not appear in the backend, you may need to adjust Salesforce permissions to make themvisible.
STEP 12

Synchronization Setting
-> In the Synchronization Settings tab, you can configure synchronization for various data types: Account, Campaign, Opportunity, Contact, Lead, Product, Order, and Subscriber.
-> Enable Sync: Set to Yes to activate synchronization for the selected data type. Once enabled, choose the sync mode:
-> Add to Queue: Adds data to the queue before synchronization. Choose the Queue Auto SyncTime from:
Sync Manuall
5 minute
1 houz
2 hours
-> Click Sync All Now to add all records of the selected data type to the queue.
-> Select Date Range: Use the data filter to limit records based on their Created Date(except forCampaigns, filtered by Start Date and End Date).
-> Default Value: If the process completes successfully, a widget will notify you and allow you to view the SyncQueue.
Unique Field
->Enable Personal Account: Select this option if your Salesforce account uses Person Accounts
-> Link Contact with Account: When enabled, the module will attempt to sync records to a Salesforce Account before syncing them to Salesforce Contact.
STEP 13

-> Go to Admin > Salesforce Integration > Queue Page, and select Actions > Delete to remove anydata you do not wish to sync. Then, click the Sync Now button to immediately synchronize theremaining data to Salesforce.
-> Note: Synchronization time may vary depending on the amount of data being processed.
STEP 14

-> Go to Admin > Salesforce Integration > View Report
-> Once the synchronization process is complete, navigate to Salesforce Integration > View Report to view the list of synchronized records.
-> If the data is successfully synced, the Status will show as ‘Success’. If there is an issue duringsynchronization, the Status will be Error’, and the Message column will provide details of the error
-> Additionally, you can review the synchronization status using the ‘View Request Daily’’ buttons.
STEP 15
STEP 35
-> Go to Admin > Salesforce Integration > Request Daily Report.
-> To monitor synchronization, go to Salesforce Integration > Request Daily Report to track the status of your synchronization efforts.
STEP 16

-> Magento Product: Go to Admin > Catalog > Products.
-> Synchronization and updating of specific or all products from your Magento 2 store to Salesforce CRM Products. When a new product is added or an existing product is edited, a corresponding record with its price will be created in Salesforce Products.
STEP 17

-> To sync the data add all products or select a specific product action option to ‘Add Products toSalesforce Queue on the Product Listing page.
STEP 18
This will start tracking once you enable configuration, use the Magento 2 Google Tag Manager extension. This module integrates seamlessly with Google Analytics and Google Tag Manager offering detailed reports on Shopping Behavior, Checkout Behavior, and Product Performance. With just a few clicks, you can easily monitor website traffic and assess how effectively visitors are being converted into customers. This tool simplifies tracking and provides actionable insights to optimize your online store’s performance.
-> Navigate: Go to Admin > Catalog > Products.
-> Edit Product: Select and sync a particular single product.
-> Locate Section: Scroll down to find the Salesforce Integration section.
-> View IDs: Check the Salesforce ID for the product and price.
-> Sync Product: Click the Sync Now button to sync theproduct with Salesforce.
-> Check History: Review the product s sync history after synchronization.
STEP 19

Salesforce Products
-> Synchronize particular or all customers from Magento 2 to Salesforce CRM and update Leads, Contacts, and Accounts. New/updated customer accounts in Magento automatically sync in Salesforce. A Salesforce Integration tab on each customer’s profile offers individual syncing abilities.
STEP 20

Salesforce Products
-> Create a new customer account and fill in all the necessary details and then click on ‘Create anAccount’.
STEP 21

Salesforce Products
-> Magento Customer : Go to Admin > Customers > All Customers.
-> Add a mass action option called ‘Add Customers to Salesforce Queue on the Customer Listing page.
STEP 22

Salesforce Products
-> Navigate: Go to Admin > Customers > All Customers.
-> Edit Customer: Select and sync a particular single Customer.
-> Locate Section: Scroll down to find the Salesforce Integration section.
-> View IDs: Check the Salesforce ID for the Lead, Contact, and Account.
-> Sync Customer: Click the Sync Now button to sync the customer with Salesforce.
-> Check History: Review the customer sync history after synchronization.
STEP 23

Salesforce Products
-> Salesforce Leads: You can track Salesforce Leads.
STEP 24

-> Salesforce Leads: You can track Salesforce Leads.
STEP 25

-> Salesforce Accounts: You can view Salesforce accounts or those who viewed recently. Enable the Cynchronization of specific or all orders from your Magento 2 store to SalesforceCRM, including Orders and Opportunities, both manually and automatically. When a customerplaces an order, the details will be synced to Salesforce s Orders and Opportunities.
STEP 26

-> Go to Admin > Sales > Orders.
-> Add a mass action option labeled ‘Add Order to Salesforce Queue on the Order Listingpage.
STEP 27

-> Navigate: Go to Admin > Sales > Orders.
-> Edit Order: Select and sync a particular single Order.
-> Locate Section: Scroll down to find the Salesforce Integration section.
-> View IDs: Check the Salesforce ID for the Order, and Opportunity.
-> Sync Order: Click the Sync Now button to sync the order with Salesforce.
-> Check History: Review the order sync history after synchronization.
STEP 28

-> Get your Salesforce Order Information.
STEP 29

->Get your Salesforce Order Opportunities.
STEP 30

->Magento 2 Catalog Price Rule: Go to Marketing > Catalog Price Rule.
-> Enable synchronization and updating of promotions from your Magento 2 store to Salesforce CRM Campaigns, including manual and automatic synchronization. When a store owner launches a new promotion or updates one, Salesforce will include the corresponding campaign.
-> NOTE: Changing the rule name during a campaign update will create a new campaign in Salesforce.
STEP 31

-> Here you can check your Salesforce Campaigns.
STEP 32

-> Go to Customers > All Customers.
Click on Fetch Customers From Salesforce to fetch your customers from the list.
STEP 33

->You can retrieve your customers by selecting a date from the ‘Choose Date option and clicking the Fetch button in the top right corner.
STEP 34

->Go to Sale > Orders Fetch Orders from the salesforce by clicking on the top of the right option Fetch Orders FromSalesforce
STEP 35

->You can retrieve orders by selecting a date from the ‘Choose Date option and clicking the Fetch button in the top right corner.
