Restricted Zip Code extension for Magento 2 empowers the admin to control and limit which zip codes are eligible for purchases on stores or from websites. The admin can create his list of permitted and prohibited zip codes. Before placing an order, customers can check and verify if delivery is possible at their location. Enhancing customer satisfaction, you can provide estimated delivery time and necessary information about their preferred locations.Magento 2 Restricts Zip Code prevents invalid zip codes from ordering goods from the store.Admins can customize messages about their availability, delivery time, other specifications,and so on.
Table of Content
Features
- Admins have the right to switch the module (enable/disable).
- Orders are based on Zip Codes and are restricted.
- Admins have the choice to display category and product pages.
- Website visitors can check delivery availability.
- Customers can see their estimated time of delivery.
- It can be set as an estimated delivery time with the pin-code-wise.
- Import CSV file with approved Zip codes.
- Admin can customize messages for zip-code checker, empty input zip-code message, delivery availability, and unavailability message.
Steps:
- Extension Installation Guide
- Configuration
- Frontend
- Extension Installation
- Download the zip file
- Extract it and put it into /app/code/
- Open Cli in the Magento directory and follow the below commands:
- php bin/magento setup:upgrade
- php bin/magento setup:di:compile
- php bin/magento setup:static-content:deploy
- php bin/magento cache:clean
- php bin/magento cache:flush
- Configuration:
- STEP 1
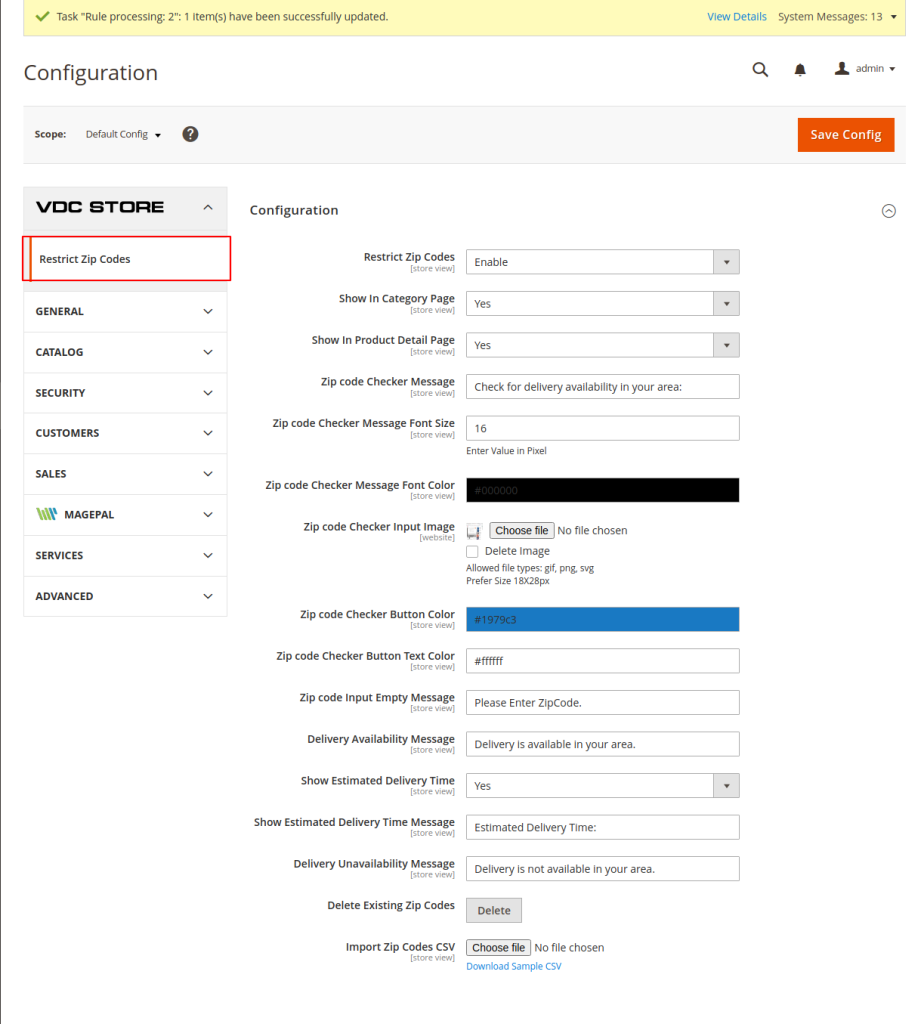
- Go to Admin > Stores > Configuration > VDC STORE > Restrict Zip Codes
- Restrict Zip Codes: Enable the Restrict Zip Codes.
- Show In Category Page: Select Yes or No.
- Show In Product Detail Page: Select Yes or No.
- Zip Code Checker Message: Drop a message to check your available delivery area.
- Zip Code Checker Font Size: Admin can customize their font size as per theirconvenience
- Zip Code Checker Message Font Colour: Select your Zip Code Checker color.
- After filling in all the necessary details you can Import the Zip Code CSV (if you need Sample CSV then you can click on Download CSV File).
- And then click on the top of the right button Save Configure .
- STEP 2
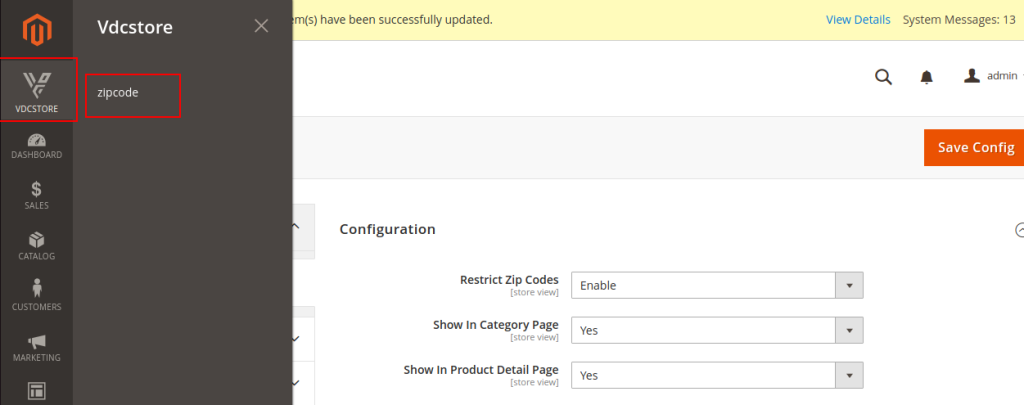
- Go to VDC STORE > Zipcode
- STEP 3
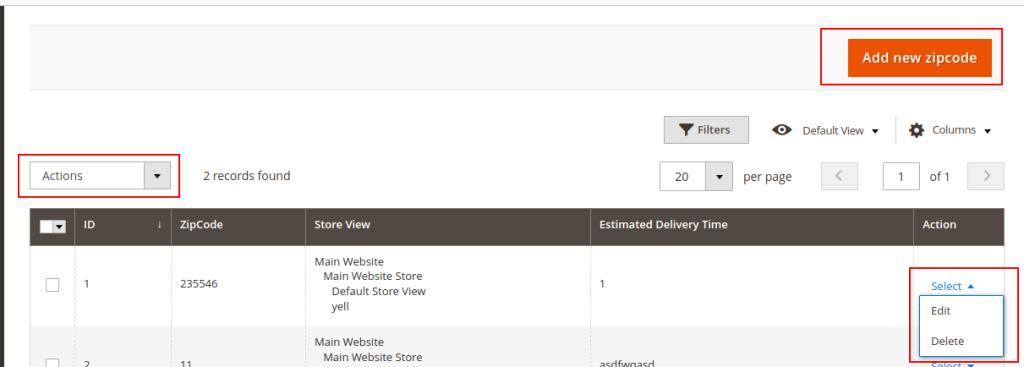
- Here you will be able to see your default entries and listing page.
- You select your Actions such as Edit or Delete if you need to change anything from your listing page.
- Also, the admin can Add a New Zip Code by clicking on the top of the right button to add a new zip code.
- STEP 4

- This is the Sample of the Download CSV File.
- STEP 5
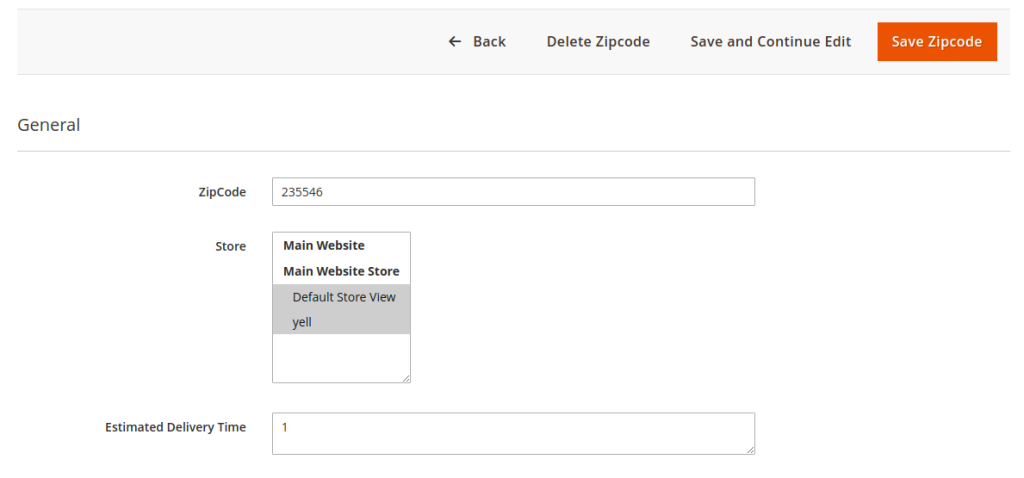
- ZipCode: Here you can enter your ZipCode.
- Store: You can select available stores such as:
- Main Website
- Main Website Store
- Default Store View
- Yell
- Estimated Delivery Time: After that, you can mention the possible estimateddelivery time.
- Frontend
- STEP 6
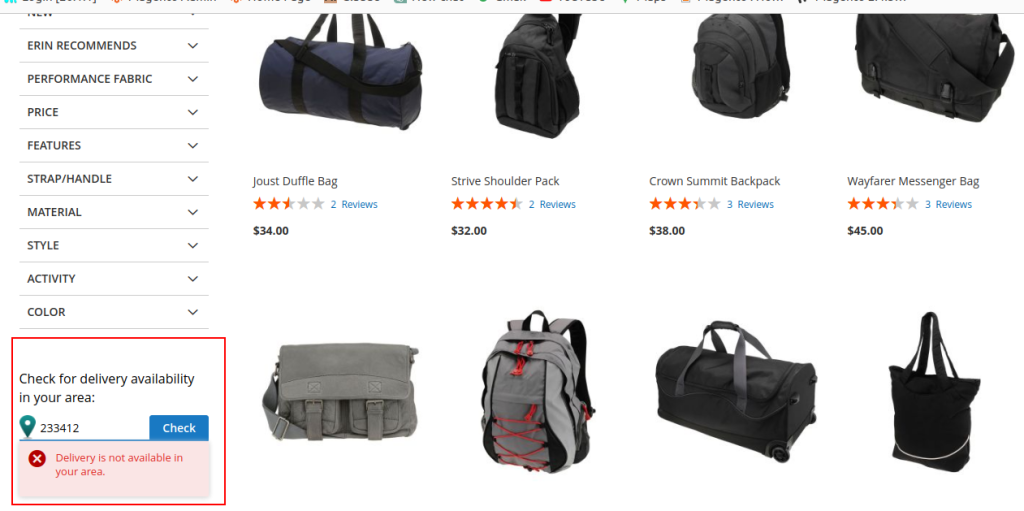
- Here it will show you the error message that you wrote on the configuration page (Delivery Unavailable Message).
- If delivery is not available in your preferred location then it will show you Delivery is not available in your area on the left side bottom.
- STEP 7
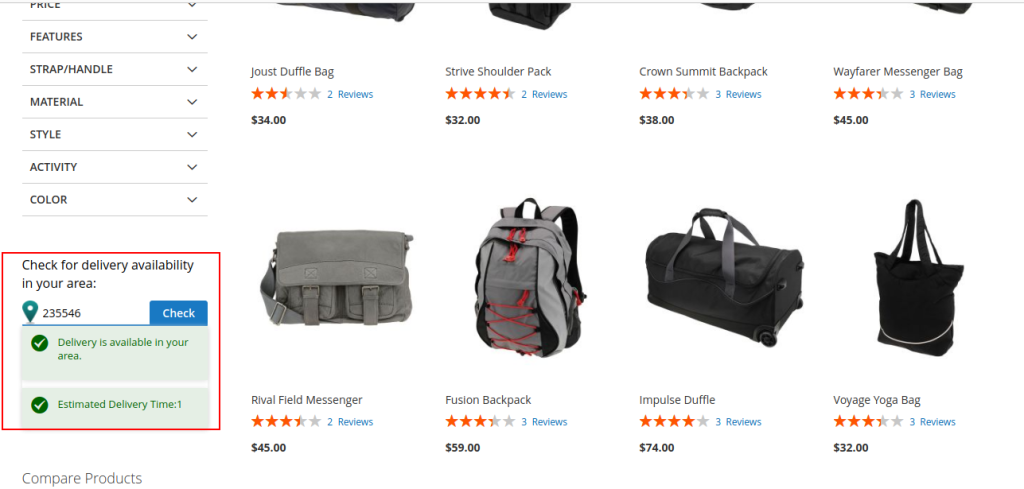
- Here it will show you the Delivery Availability Message that you wrote on theconfiguration.
- If delivery is available in your zip code then it will show you Delivery is available in your area so, it will show you the Estimated Delivery Time which was mentioned at the time of Add Data
- STEP 8
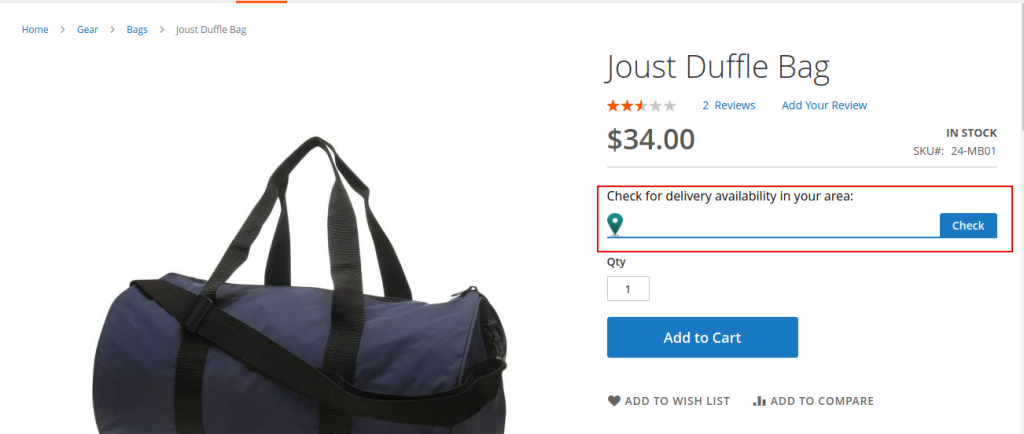
- Zip Code checker with availability.
- On the product page, add the zip code and click to check the delivery availability. If delivery is available, you ll see a popup that the admin mentioned on the configuration and vice versa.
- STEP 9
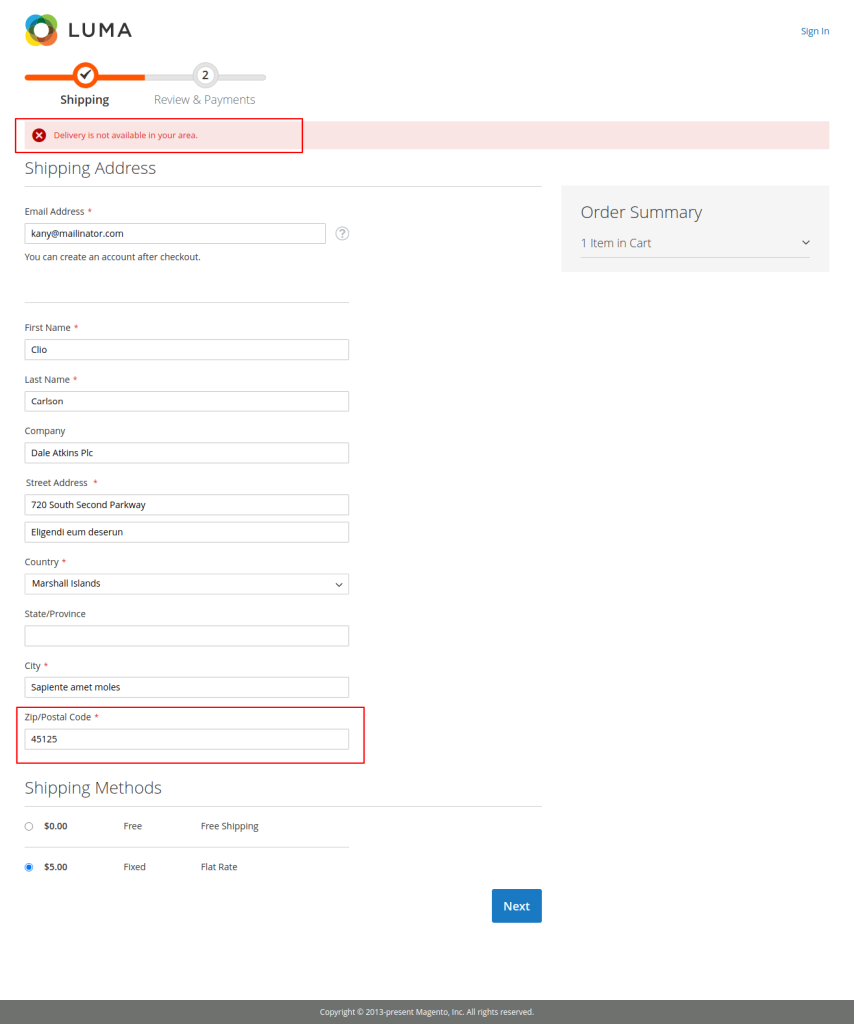
- Zip Code restriction on the checkout page.
- When users try to checkout without checking for product availability they enter a restricted zip code which has to be the same as they entered in your data and proceed to the next.
