Recent Order Notification Extension for Magento 2 permits you to display a list of the most recent orders and pending orders with their order status. The recent Order Notification extension for Magento 2 is a great way to build the trust of customers by showcasing customer’s recent activities or orders.
Table of Content
Features
- Admin can show details in a customized pop-up.
- Admin can set the number of orders to be displayed in the pop-up.
- Admin can customize their pop-ups with exclusive colors.
- Pop-up time and position can be set at admin convenience.
- For customers, they can display recent orders with automatic pop-up.
Steps:
- Extension Installation Guide
- Configuration
- Frontend
Extension Installation
- Download the zip file
- Extract and put it into /app/code/
- Open Cli in the Magento directory and follow the below commands:
- php bin/magento setup:upgrade
- php bin/magento setup:di:compile
- php bin/magento setup:static-content:deploy
- php bin/magento cache:clean
- php bin/magento cache:flush
Configuration
STEP 1:
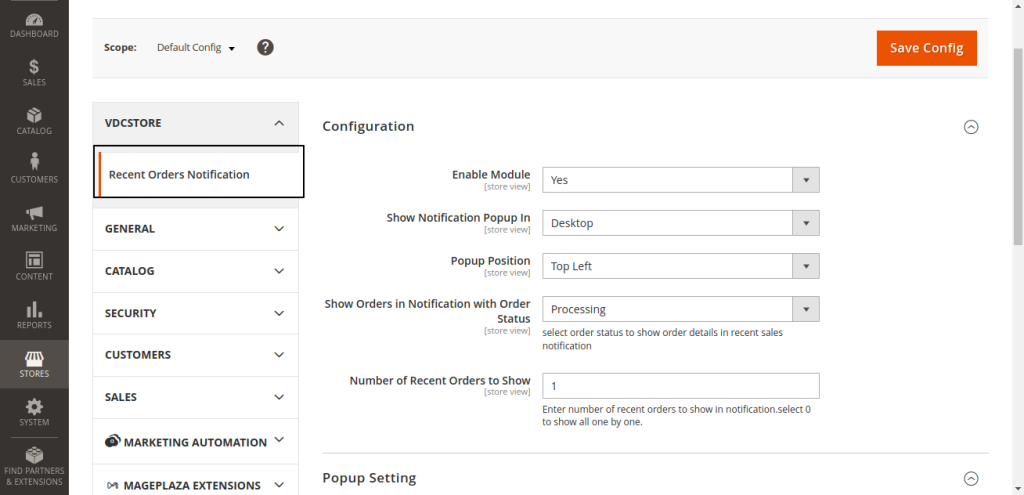
- Go to Admin > Stores > Configuration > VDC STORE > Recent Orders Notification > Enable Module
- Enable Module: Select Yes to proceed further.
- Show Notification Popup in: Admin can select where they want to show notifications such as Desktop, Mobile, or Both.
- Popup Positions: Admins can select the best positions for pop-ups.
- Bottom Right
- Top Left
- Top Right
- Bottom Left
- Show Orders In Notification with Order Status: Showcase status-wise order in front.
- Processing
- Suspected Fraud
- Complete
- Closed
- Cancelled
- On Hold
- Number of Recent orders to show: It showcases your customer s recent orders or
- the number of recent orders.
STEP 2:
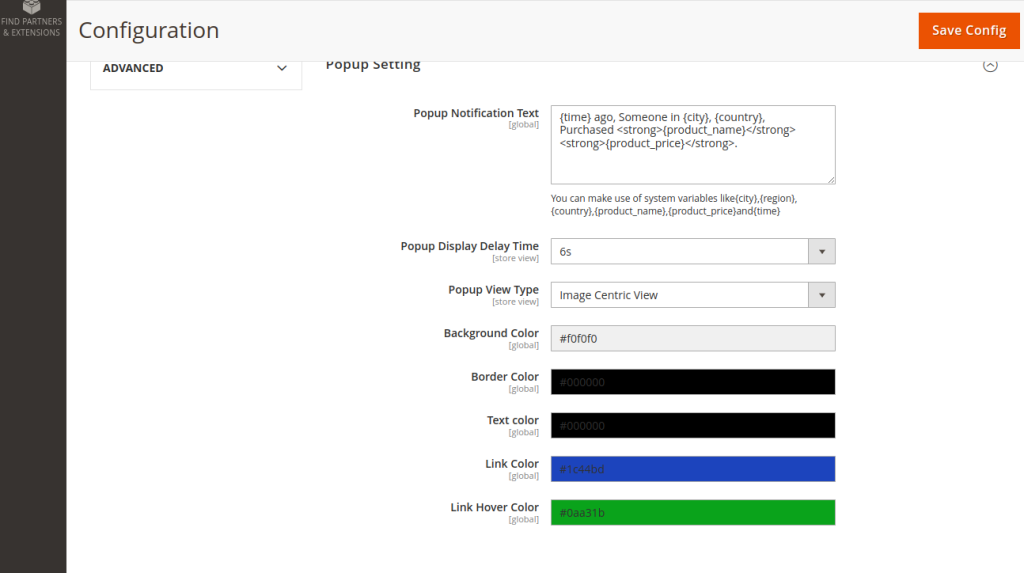
- Set Popup Settings.
- Popup Notification Text: write your customized popup text to showcase your customer s order details which need to be portrayed.
- Popup Display Delay Time: set the timer of your popup.
- Popup View Type: Image Centric View or Default Layout View
- Background Color: you can select the background color of your popup, you can also use color code from the color palette.
- Border color: you can select the color of the outer border you can also use a color code from the color palette.
- Text color: you can choose text color at your preference you can also use color codefrom the color palette.
- Link color: you can select your link color at your convenience you can also use color code from the color palette.
- Link Hover Color: you can select your link hover color you can also use color code from the color palette. After filling in all the necessary details click on Save Config’ to proceed.
Frontend
STEP 3:
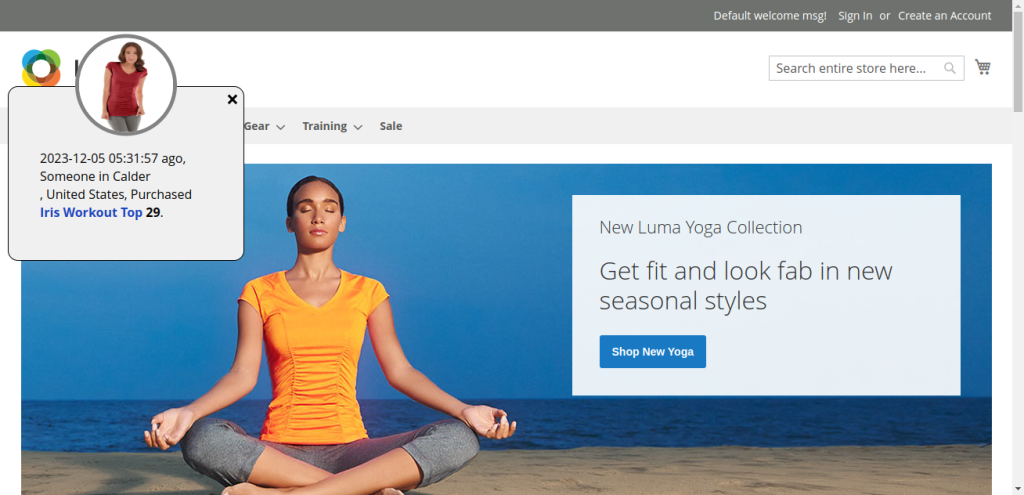
- Default Layout View: Once you’re done with the popup settings you can see the popup message like this on the Frontend side.
STEP 4:
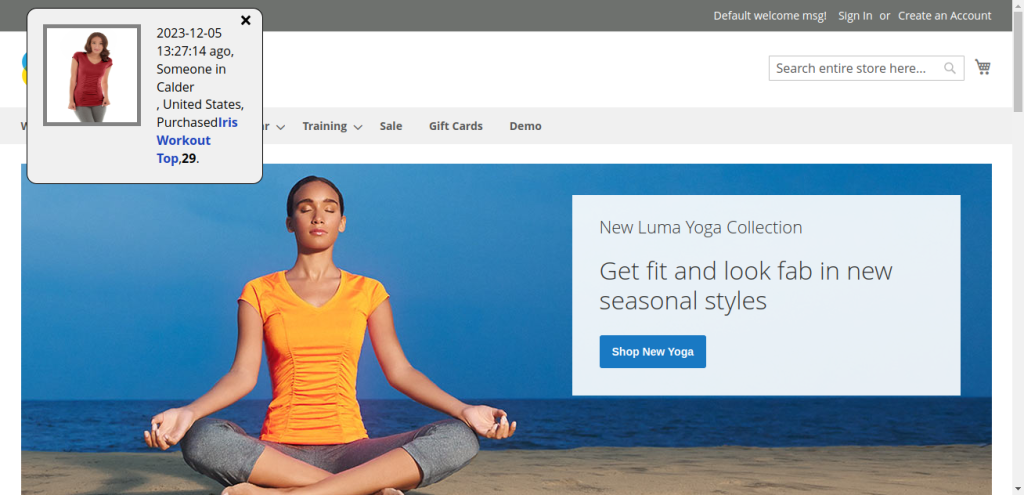
- Image Centric View: Here is another format of customized pop-ups for customers.