Easily accept recurring payments on your Magento site with the Razorpay Subscriptions for Magento 2. Built on Razorpay’s Subscriptions product, this plugin integrates seamlessly,enabling you to create and manage subscription services directly from your website.
Table of Content
Features
- Quick and easy integration with the Razorpay Subscription Plugin.
- Manage plans and subscriptions directly from your Magento dashboard.
- Customers complete payments without leaving your website.
- Supports recurring payments via credit card, debit card, netbanking,and UPI.
Steps:
- Extension Installation Guide
- Configuration
- Razorpay Subscriptions
- Frontend
- Extension Installation
- Download the zip file
- Extract it and put it into /app/code/
- Open Cli in the Magento directory and follow the below commands:
- php bin/magento setup:upgrade
- php bin/magento setup:di:compile
- php bin/magento setup:static-content:deploy
- php bin/magento cache:clean
- php bin/magento cache:flush
- Configuration:
- STEP 1
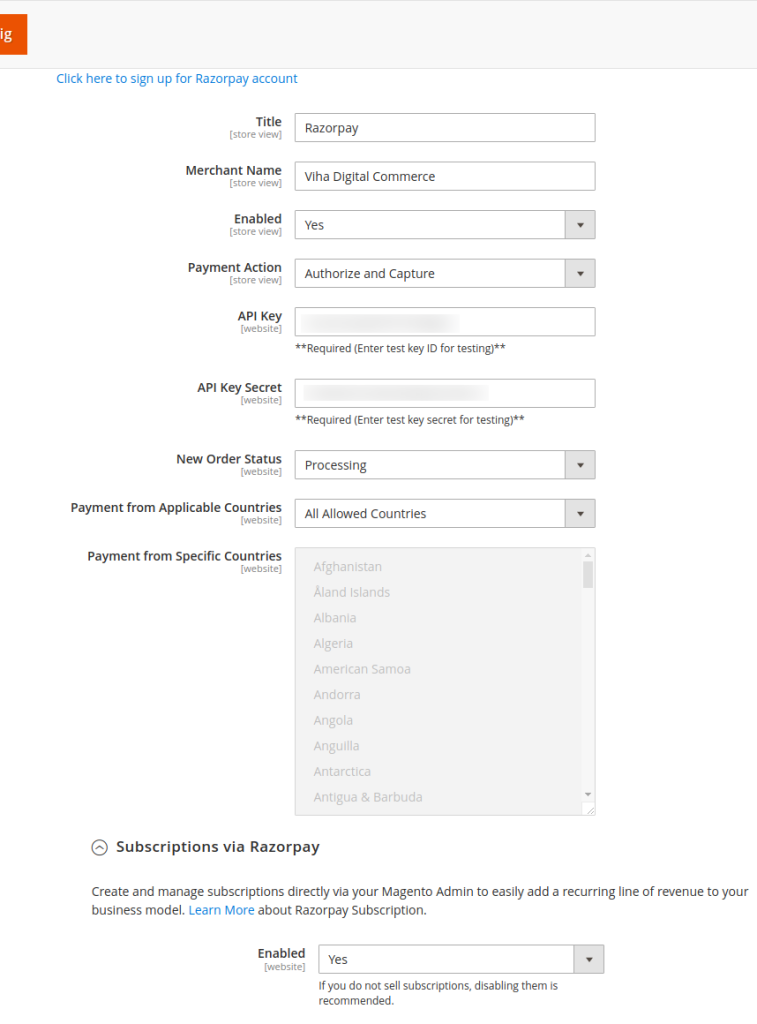
- Go to Stores > Configuration > Sales > Payment Methods Title: Enter your ‘Title’ such as ‘Razorpay’.
- Merchant Name: Enter the merchant name.
- Enable: Select ‘Yes’ to enable this extension.
- Payment Action: Select any one option i.e.
- Authorized only
- Authorized and Capture
- API Key: Enter your API key which you have generated from here: https://accounts.razorpay.com/auth/?redirecturl=https%3A%2F%2Fdashboard.razorpay.com&auth_intent=login
- API Key Secret: You can obtain the API Key Secret from the link provided above.
- New Order Status: Here you can select your order status i.e.
- Processing
- Suspected Fraud
- Payment From Applicable Country: You can select All Allowed Countries’ or your can select ‘Specific Allowed Countries’
- Payment from Specific Countries: You can choose to accept payments from selected countries.
- Subscription Via Razorpay Enable: Select ‘Yes’ to enable subscription via Razorpay.
- Razorpay Subscriptions
- STEP 2
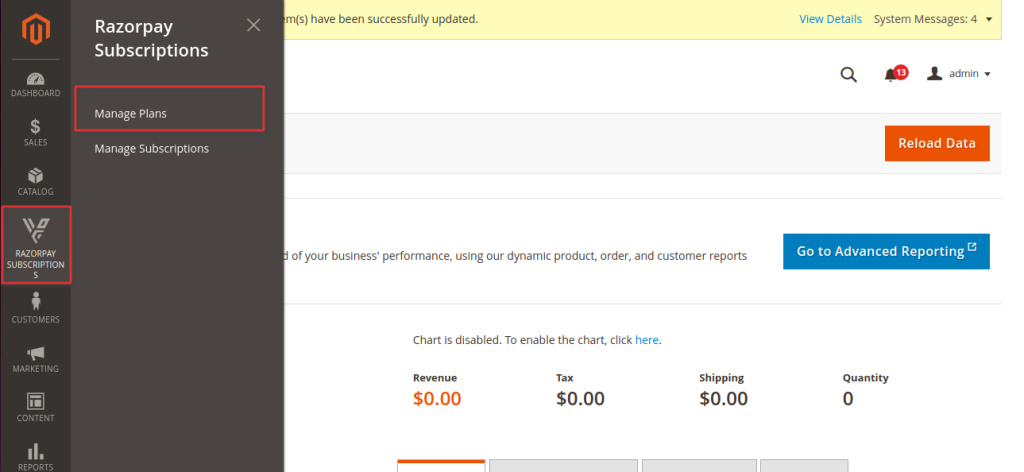
- Go to Razorpay Subscriptions > Manage Plan
- STEP 3
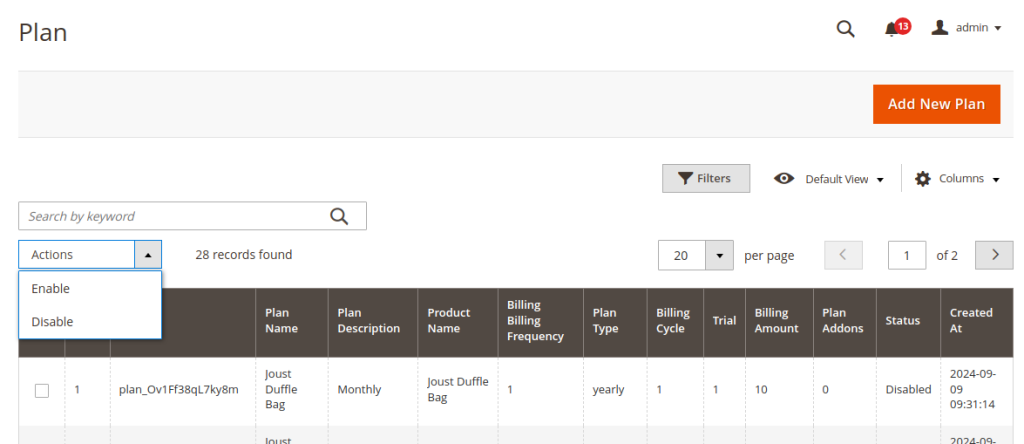
- Select actions such as ‘Enable’ and Disable’ to showcase your Razorpay plans. Also, you can add a new plan by clicking on ‘Add New Plan’.
- STEP 4
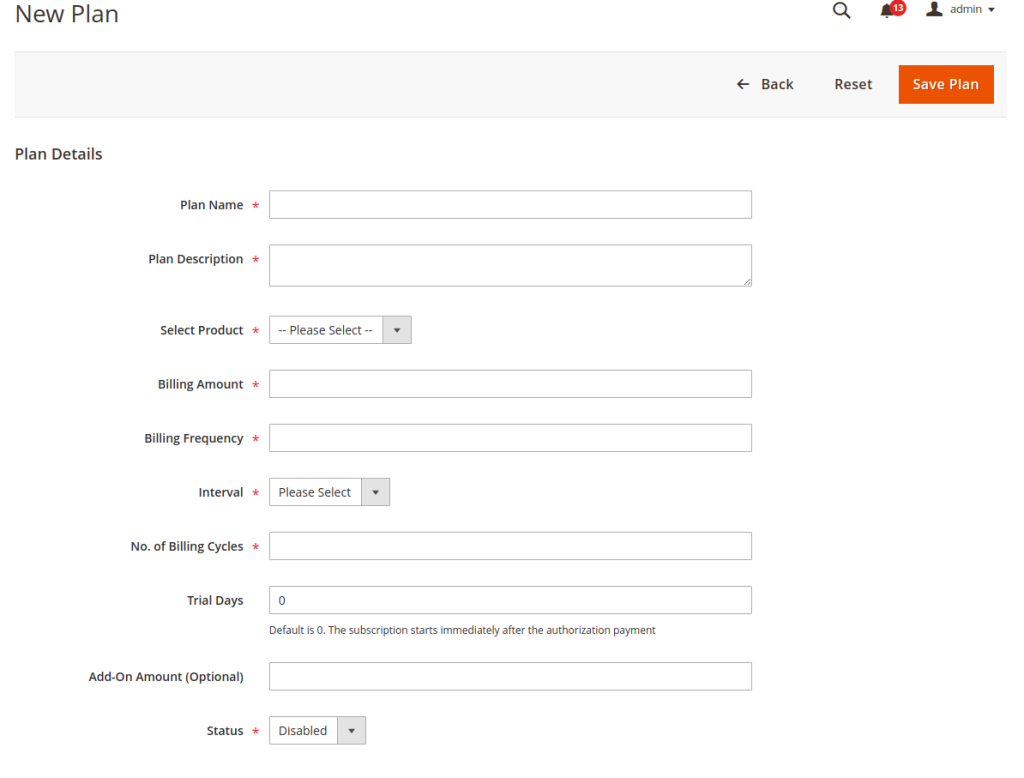
- If you click on Add New Plan’ then fill out all the necessary details such as:
- Plan Name: Enter ‘Plan Name’.
- Plan Description: Enter description about your plan.
- Select Product: Select your product which you have shortlisted.
- Billing Amount: Enter the billing amount of your purchases.
- Billing Frequency: You can decide and select the billing frequencies.
- Interval: Select your payment interval.
- No. of billing cycle: Enter your billing cycle period.
- Trial Days: Enter the no. of trial days.
- Status: Select status as ‘Enable’ or Disable’.
- STEP 5
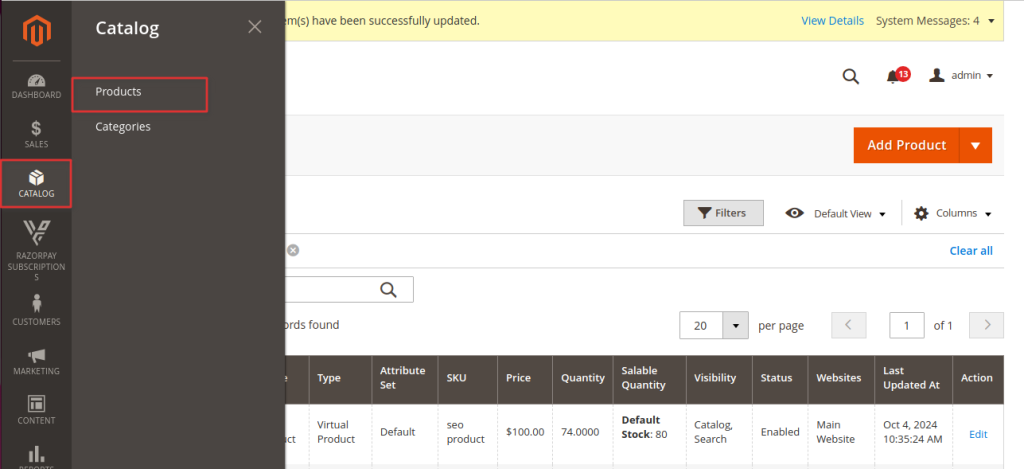
- Go to Catalog > Products Here, you will see your virtual order products, and select subscription mode .
- STEP 6

- Subscription By Razorpay
- Subscription Enable: Enable the subscription by razorpay.
- Subscription Mode: Select the mode of subscription such as ‘Subscription Only’ or With Subscription’.
- Frontend
- STEP 7
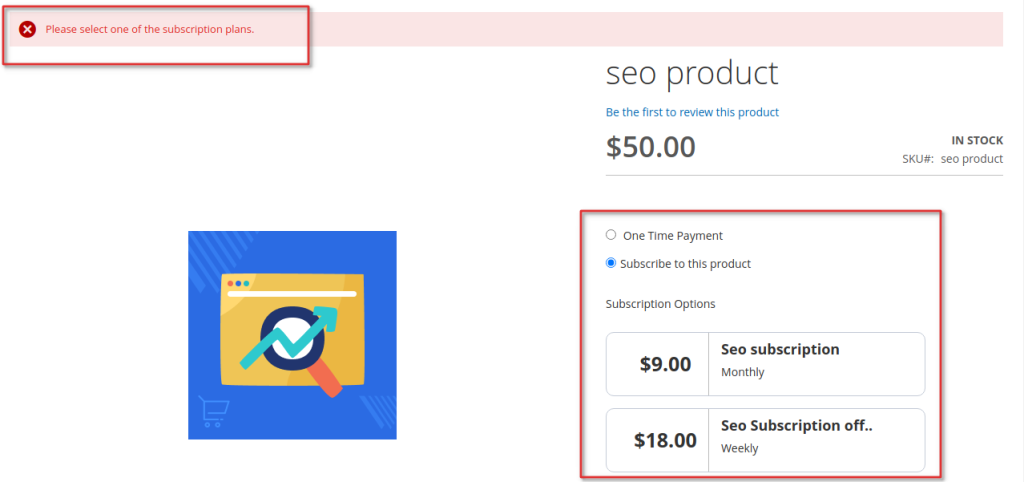
- A pop-up will appear in the top left corner. Once you ve created a subscription plan,multiple plans will be visible on the frontend for customers to choose from.
- STEP 8
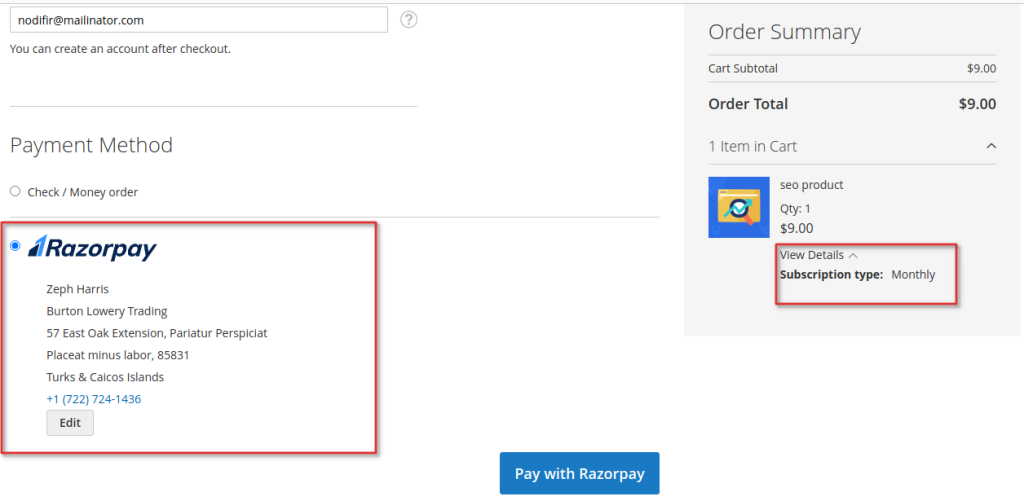
- In the bottom left, you ll find your details, including name, address, and contact information.On the right side, you ll see your subscription duration.
- STEP 9
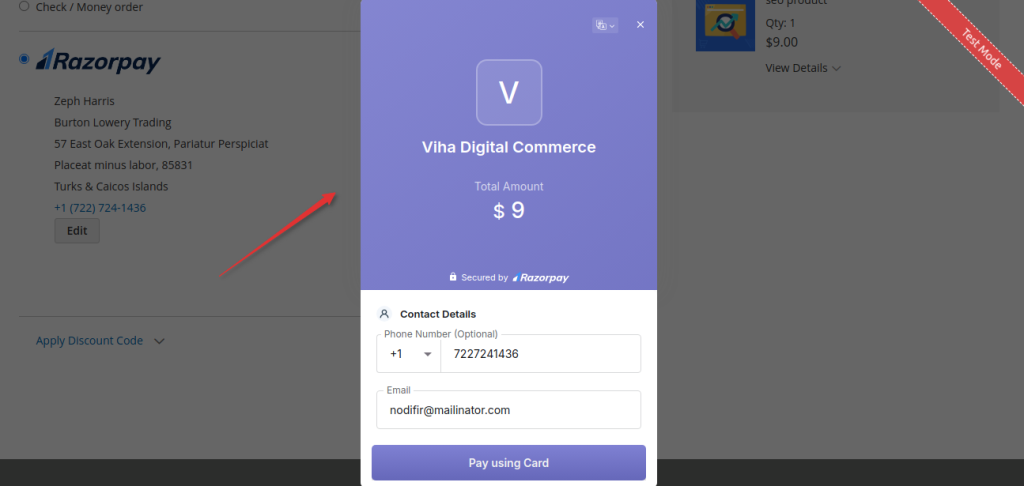
- A pop-up will appear displaying your subscription plan. You will also see fields for your contact details, where you ll need to enter your email and phone number. After that,click on ‘Pay using card’ to proceed.
- STEP 10

- You can choose to display success or failure options as needed. Note: This option is only available in test mode.
- STEP 11
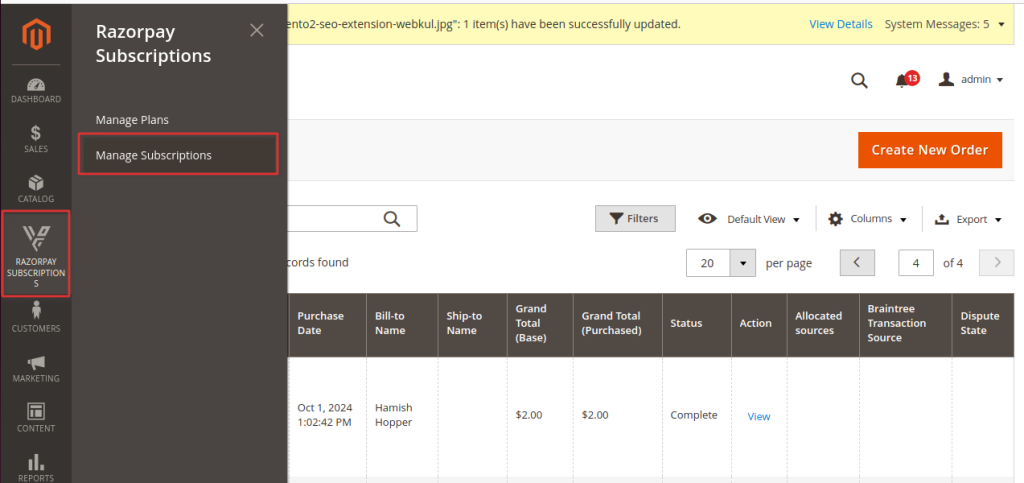
- Go to Razorpay Subscriptions > Manage Subscription Here, you will see your virtual orders list with product status.
- STEP 12
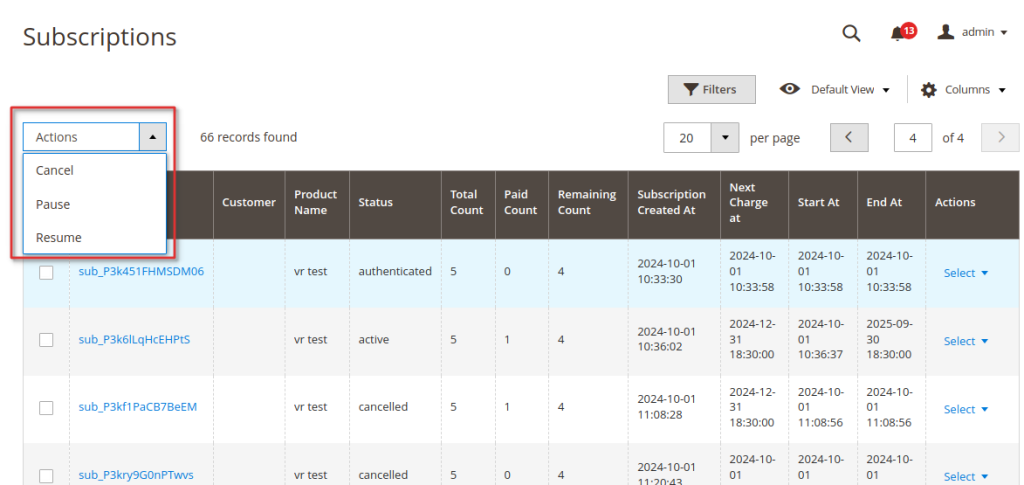
- Select your actions for all the customers, such as Cancel, Pause, or Resume.
- STEP 13
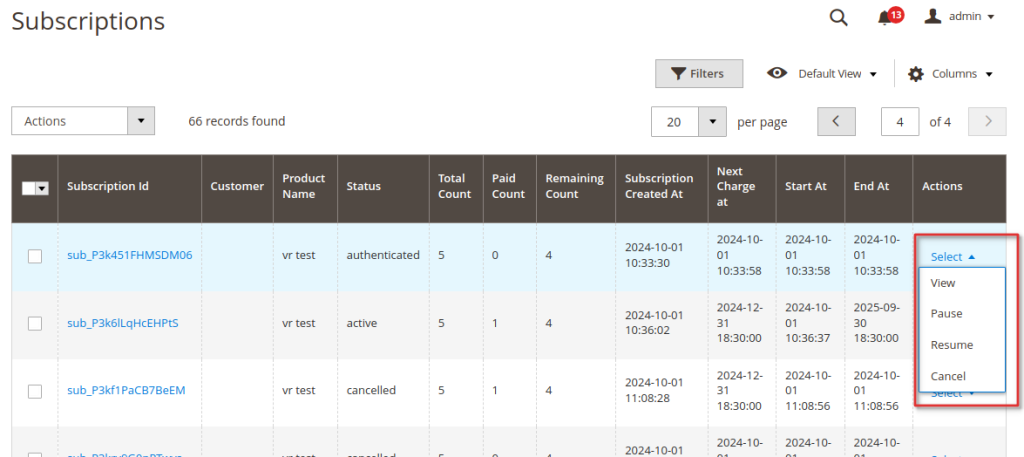
- To select a specific action, click on the particular customer. On the right side, choose an option such as Cancel, Pause, or Resume.
- STEP 14
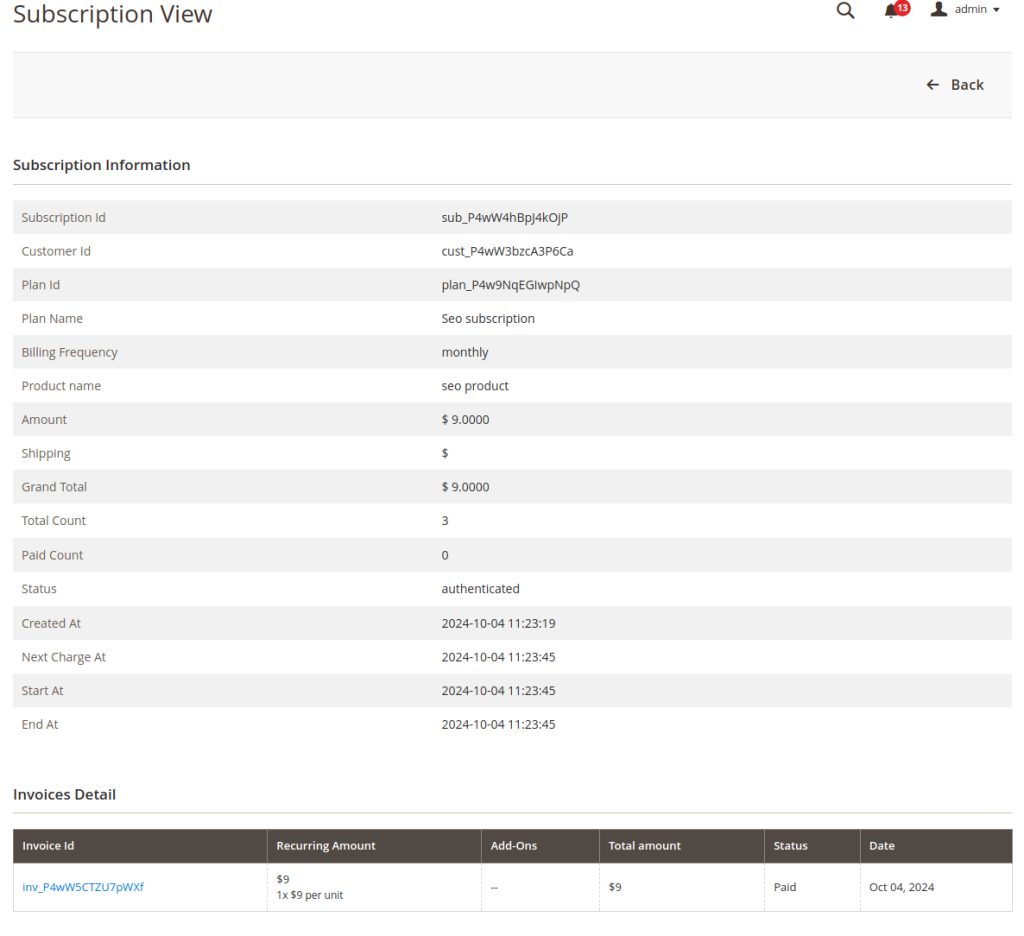
- You will see your subscription information along with your invoice details here.
- STEP 15

- Here you can view the invoice details for the subscription you wish to purchase. Note: This is a Text view.
