The Product Feed Extension for Magento 2 is a powerful tool designed to simplify and automate the process of generating and managing product feeds for various platforms. With the ability to create custom feed templates tailored to specific platform requirements, this extension ensures seamless compatibility and optimal performance. Users can efficiently filter products by categories, ensuring only relevant items are included in their feeds. The extension leverages cron jobs to automate feed generation at predefined intervals, eliminating manual intervention and saving time. Additionally, it provides success or failure notifications to keep you informed about feed generation statuses and supports auto-uploading feeds to SFTP servers, streamlining distribution processes for improved efficiency. Whether you’re targeting marketplaces, price comparison sites, or advertising platforms, this extension offers the flexibility and automation needed to enhance your feed management strategy.
Table of Content
Features
- Allows creating custom feed templates based on platform requirements.
- Filter products by categories.
- Automate feed generation at specified intervals using cron jobs.
- Sends success or failure notifications after feed generation.
- Auto-upload to SFTP servers.
Steps:
- Extension Installation Guide
- Configuration
Extension Installation
- Download the zip file
- Extract and put it into /app/code/
- Open Cli in the Magento directory and follow the below commands:
- php bin/magento s:up
- php bin/magento s:d:c
- php bin/magento s:s:d -f
- php bin/magento i:rei
- php bin/magento c:f
- php bin/magento cron:install
- php bin/magento cron:run
Configuration:
- Go to Admin => Stores => Configuration => Vdc Store => Product Feed
Step 1:
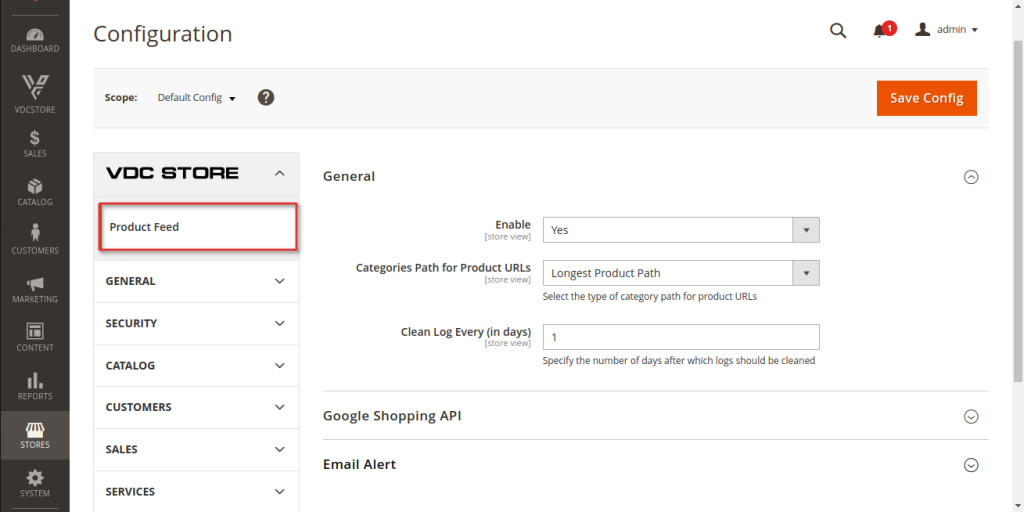
Enable : You can enable/disable the module as shown in the userguide.
Categories Path For Product URLs : Select a category path out of “Default”, “Longest Product Path” & “Shortest Product Path”
If “Default” is selected, the URL will be generated as the default Magento (Category with the smallest ID).
Clean Log Every (in days) : You can enter the number of days after which you want the log to be cleared.
Step 2:
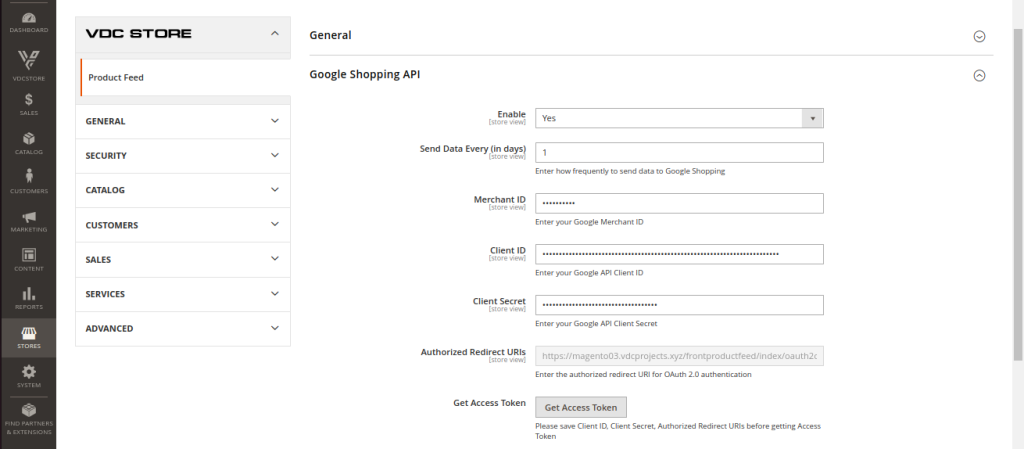
Enable : You can enable/disable Google Shopping API
Send Data every (in days) : Select the number of days in the Send data ever field. After the selected number of days, the feed data will be synced to Google Shopping API. Note that this feature is only applied to sync via cron.
Merchant ID, Client ID, Client Secret: Enter the value of the fields you have already saved and set up here.
Authorized Redirect URLs : Copy and paste the value of this section in URLs of the Authorized Redirect URLs of Google Shopping API.
Click Get Access Token button to check the connection with Google Shopping API.
Step 3 :
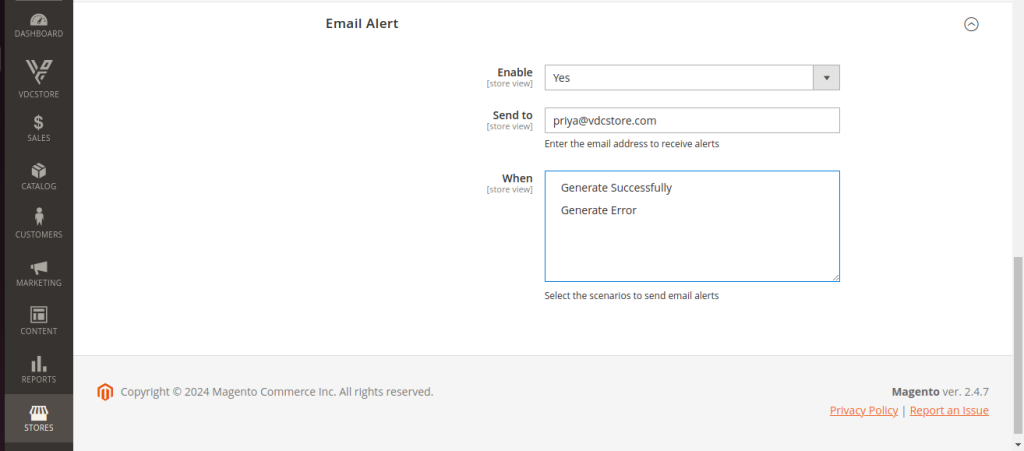
Enable : Enable/Disable Email Alert
Send To : Enter the email id you want the alert to be sent at.
When : Choose the events that when it happens, the email notification will be sent
Step 4 :
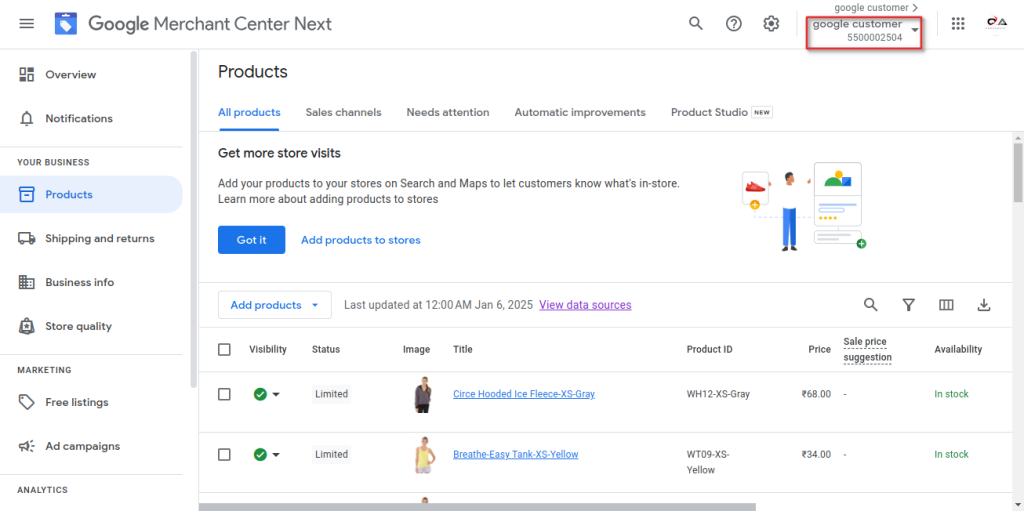
Register an account of Google Shopping API and go to this link.
After your account has been registered, you will see the value in the field Merchant ID. Save that Merchant ID value to connect with your website later.
Step 5 :
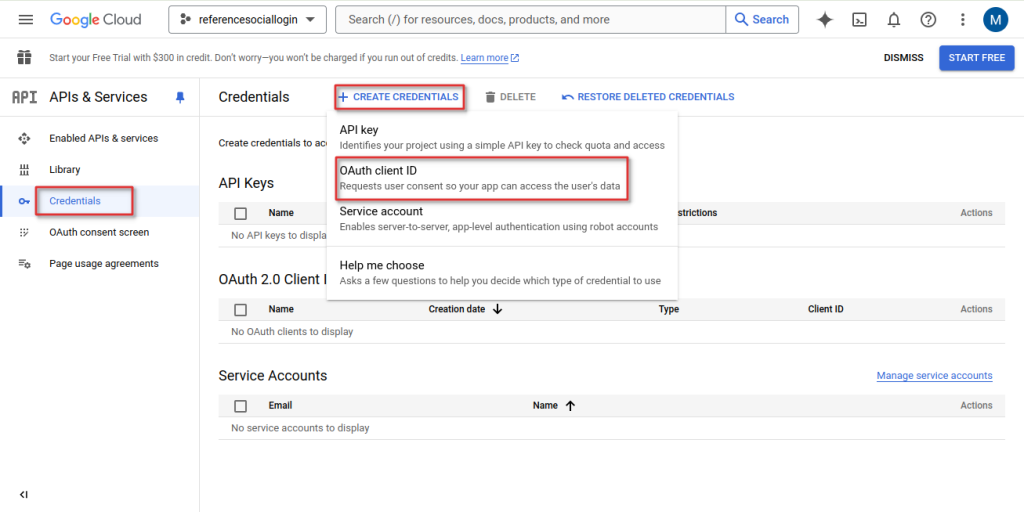
Go to this link to get the information of Google Shopping API: Client ID and Client Secret connect with your website. Click on Create Credentials > OAuth client ID.

Step 6 :

With the field Application type, you can choose a Web application, enter the information like Name. Copy and paste the value of the field Authorized Redirect URLs of your website in the field Authorized Redirect URLs of Google Shopping API. Then click Create button to complete
Step 7 :
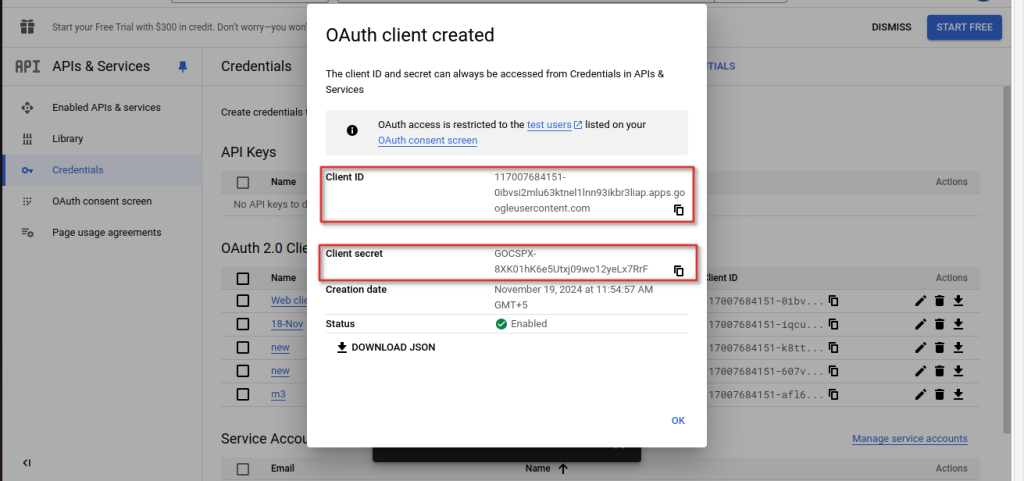
Select Ok to complete creating OAuth client ID. Save the Client ID and Client Secret to connect with your website.
Step 8 :
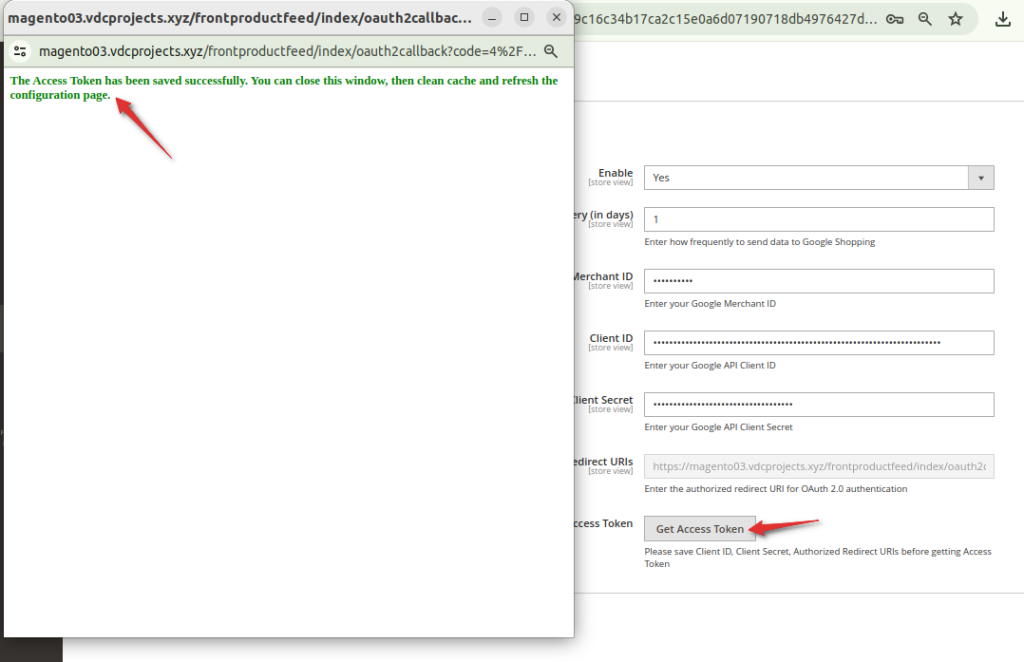
Click the Get Access Token button to check the connection with Google Shopping API.
Step 9 :
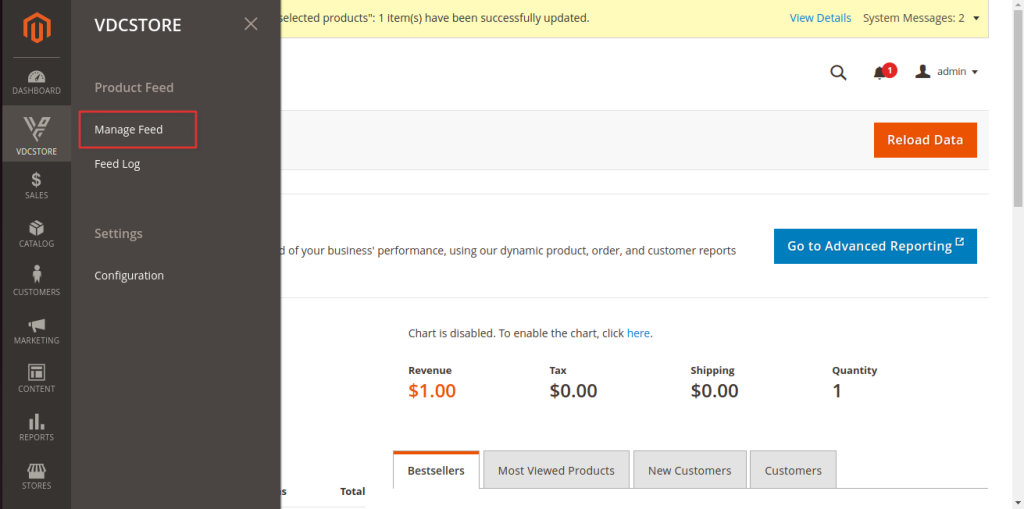
Go to the “Manage Feed” tab under the VDC STORE Option in the Menu.
Step 10 :
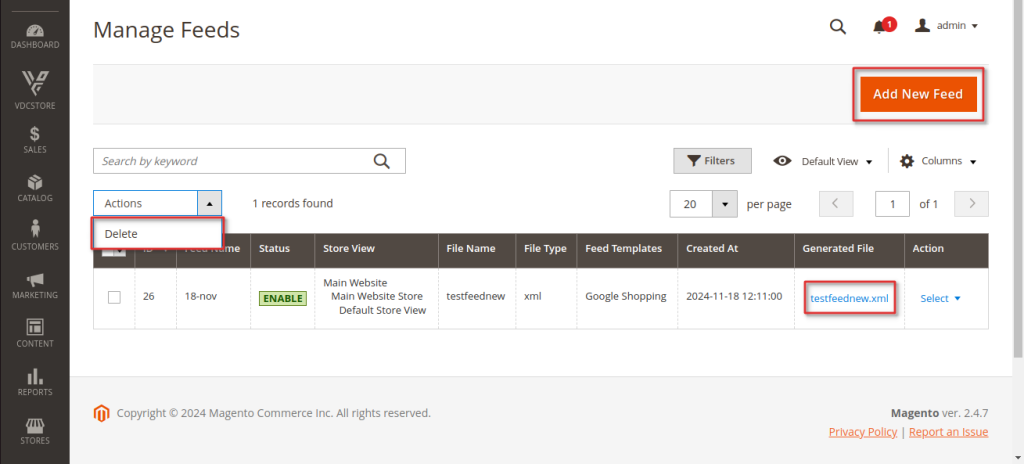
You can add New Feed as shown in the screenshot.
You can choose “Delete” from the Actions dropdown menu
As shown in the image, you can download the generated file.
Step 11 :
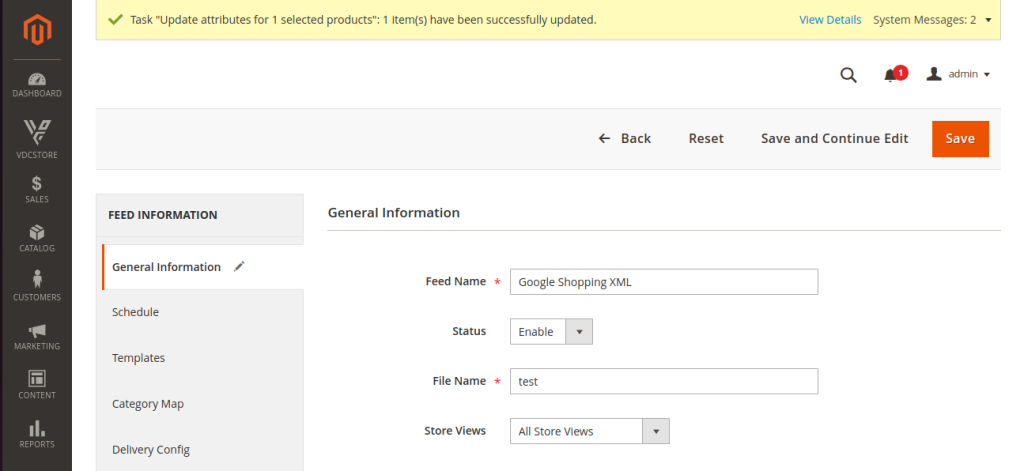
Feed Name : You can add the preferred Feed Name
Status : Enable/Disable the status of the Feed
File Name : You can name the file based on your preference
Store Views : You can select the store views as shown in the image
Step 12 :
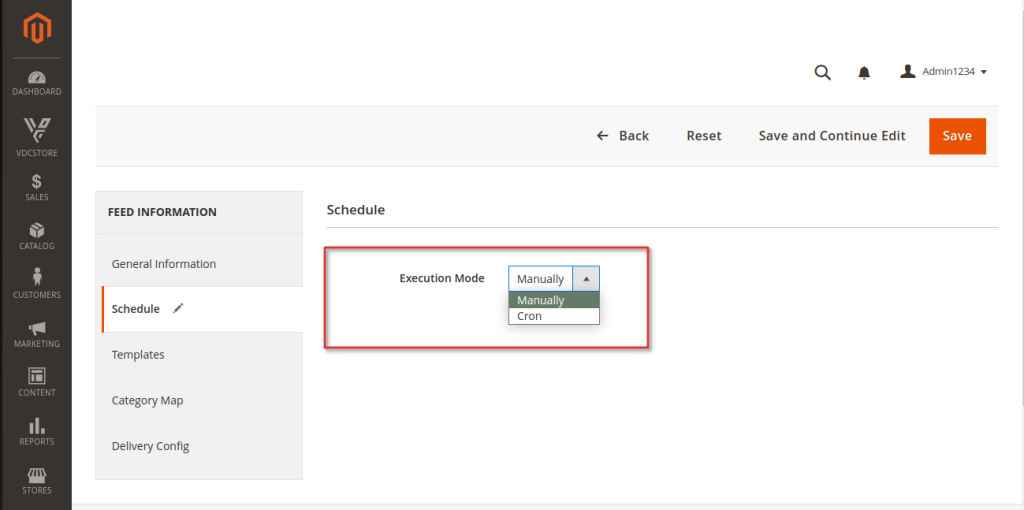
Execution Mode : You can choose to execute the mode either manually or by CRON
If Execution Mode is set to Manual: Allow generating the file manually
If Execution Mode is set to Cron: Auto-generate the file, depend Frequency & Cron Run Time field
Frequency = Daily: Auto-generate the file daily
Frequency = Weekly: Auto-generate the file weekly
Frequency = Monthly: Auto-generate the file monthly
Step 13 :
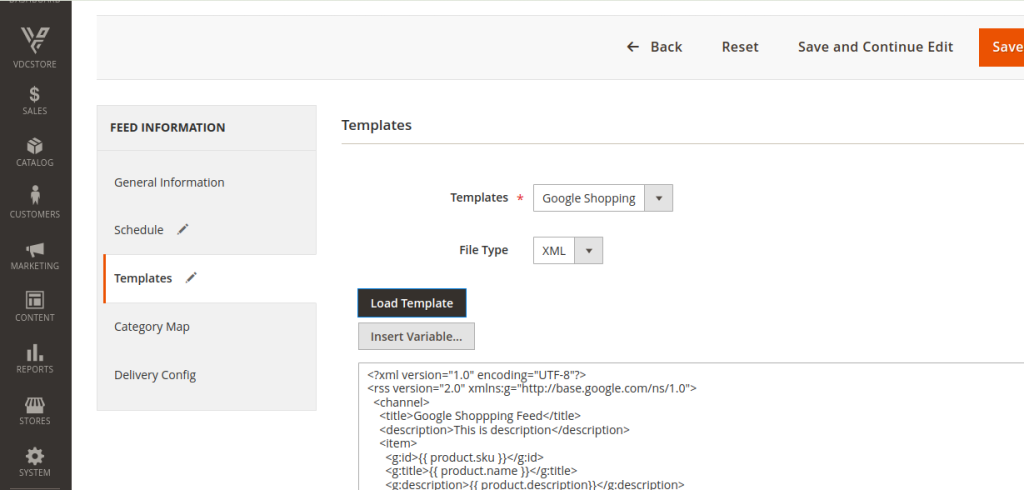
Templates : Choose Google Shopping template from here as shown in the screenshot
File type : Choose XML file type as it is the default file type
Click on Load Template and the Google Shopping template will be displayed in the output area.
Click on Insert Variable to add default variables for Magento like colour, brand etc
Step 14 :
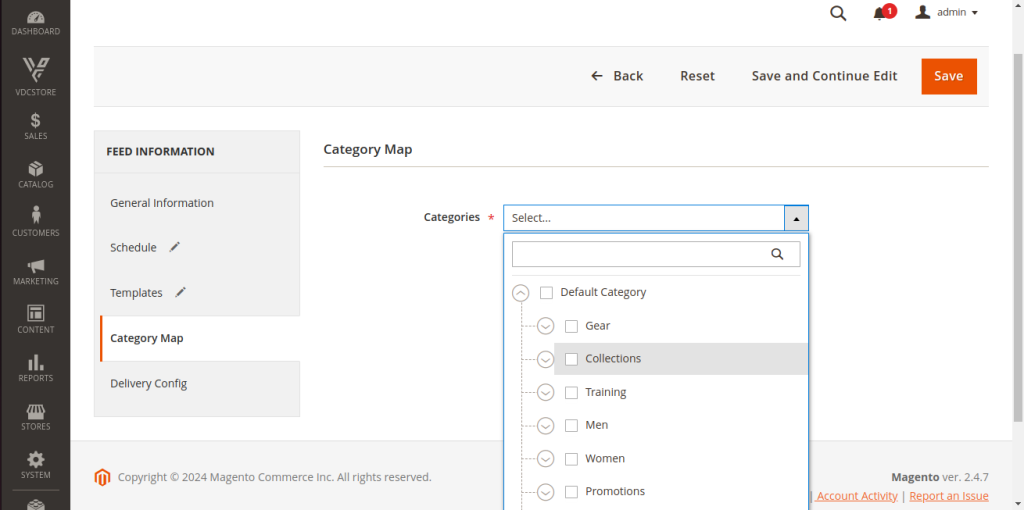
Categories : You can decide which categories you want to choose to be displayed in the product feed.
Step 15 :
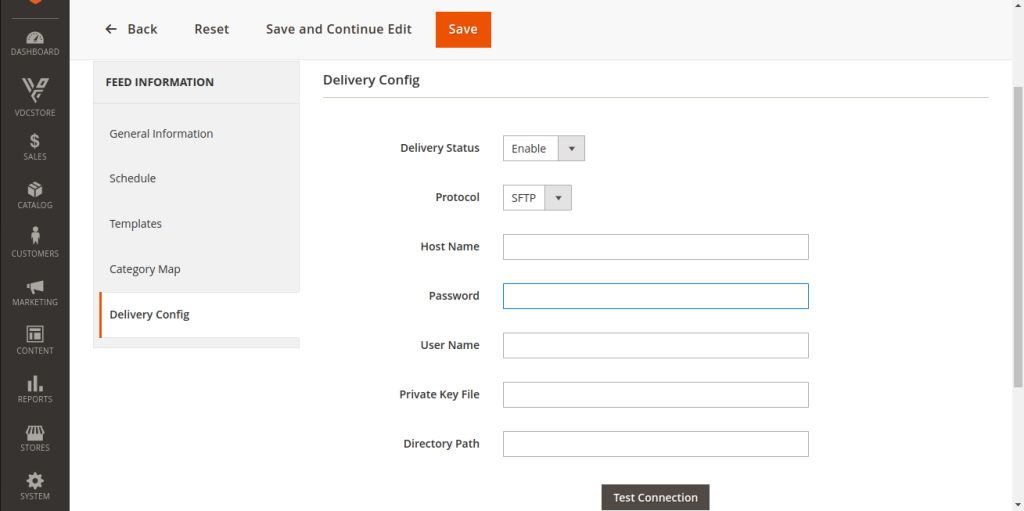
Delivery Status : Enable/Disable the delivery status
Protocol : Select SFTP
Host name : Enter the host name in the Host Name field
User Name : Enter the user name in the User Name field
Password : Enter the password to access the host in the Password field
Private Key: Click […] and choose the key file to connect with the server. You can skip choosing the key file when your server can connect without the key file.
Directory Path : If you want to save the file, only enter the path in the Directory Path field. Note: You need to set the name the export file at the end of the path
Click on “Test Connection” Button
Step 16 :
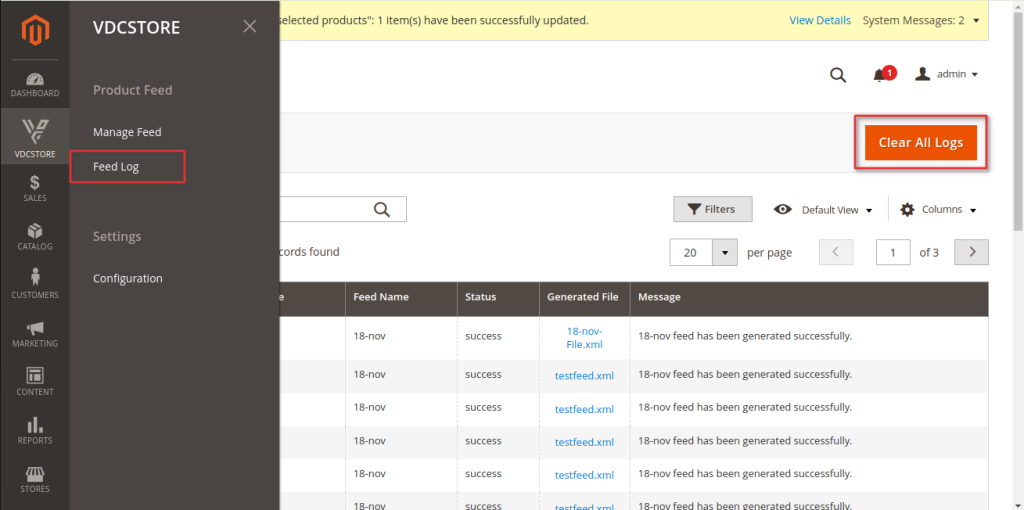
Go to VDCStore →Feed Log → Click on Clear All Logs to delete all feed logs.
