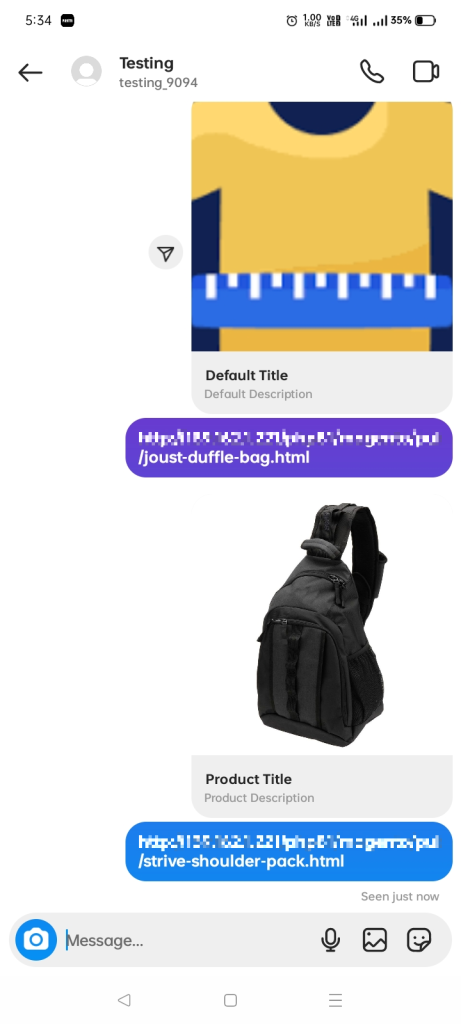
At present, almost every website promotes social media share on their web pages. It is one of the effective ways for businesses to gain awareness. When users choose to share the webpage links on social media as a post or with their friends, the store owner must stress upon how the link looks when shared on social media platforms. To enhance the view of links on social media, you can use Open Graph Tags for your web pages. But Magento 2 store merchants can be worry-free about adding Open Graph Meta Tags for enhancing social media share of web links.
Open Graph Tags Extension for Magento 2 enables store admins to add Open Graph Image, Title, and Description Tags for web pages. The admin can add OG tags separately for Product, Category, and CMS Pages. The store admin can also add default OG tags so that no webpage is held off without Open Graph Tags. Fine-tune your webpage appearance on social sites using the Open Graph Meta Tags Extension for Magento 2.
Table of Content
Features
- Effortlessly add OG tags to your Magento 2 store pages.
- Configure Open Graph title, description, and image tags for website pages.
- Add separate OG tags for product, category, and CMS pages.
- Option to set default OG tags for your Magento 2 store
- Strengthen the view of your web pages on social media.
- Drive traffic and increase sales by adding Open Graph Tags for your website.
Steps:
- Extension Installation Guide
- Configuration
- Extension Installation
- Download the zip file
- Extract and put it into /app/code/
- Open Cli in the Magento directory and follow the below commands:
- php bin/magento setup:upgrade
- php bin/magento setup:di:compile
- php bin/magento setup:static-content:deploy
- php bin/magento cache:clean
- php bin/magento cache:flush
- Configuration
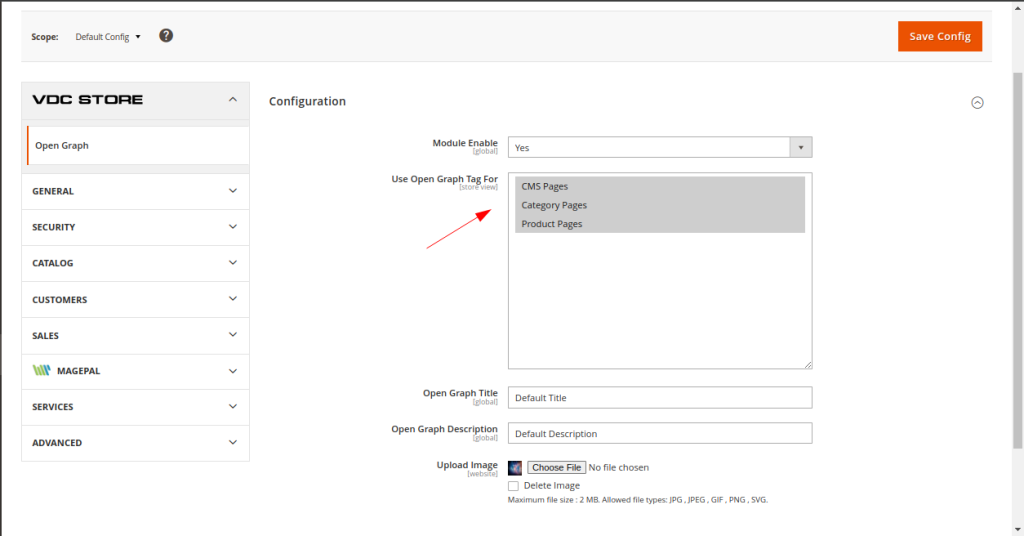
- Module Enable > Turn on the Module.
- Use Open Graph Tag For > Choose the open graph tags option from the three that are displayed in the image.
- Default OG Image : Set default open graph image.
- Default OG Title : Enter default open graph title.
- Default OG Description: Enter default open graph description & save Config.
- If any value has not been placed in the page prior, you will see “Default Title”, “Default description”,and “Default Upload Image”.
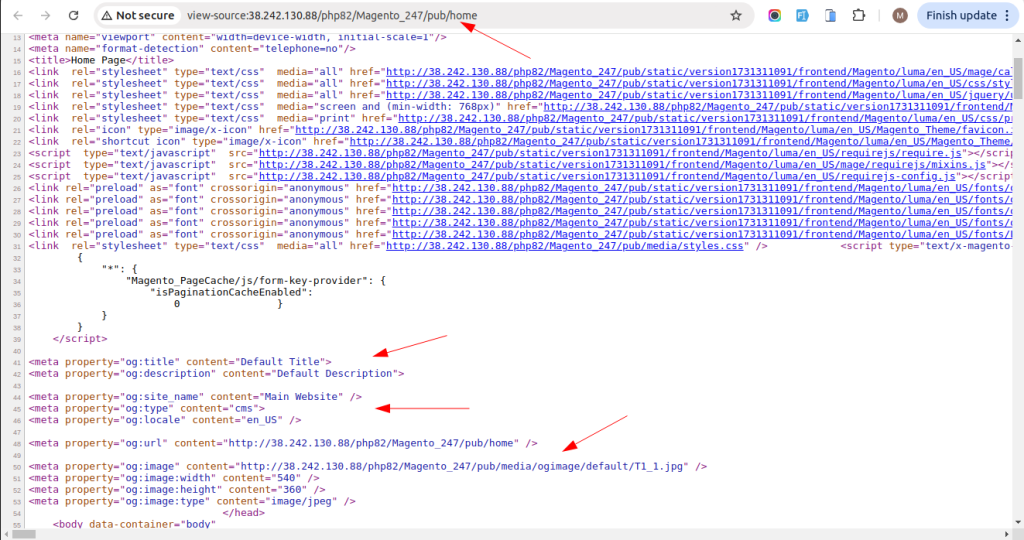
- Open any page in the storefront that isn t marked with OG tags now. Use Ctrl+U or right-click to choose View Page Source. According to your configuration settings, you can see that the default Open Graph Tags have been inserted for that page successfully in the area.
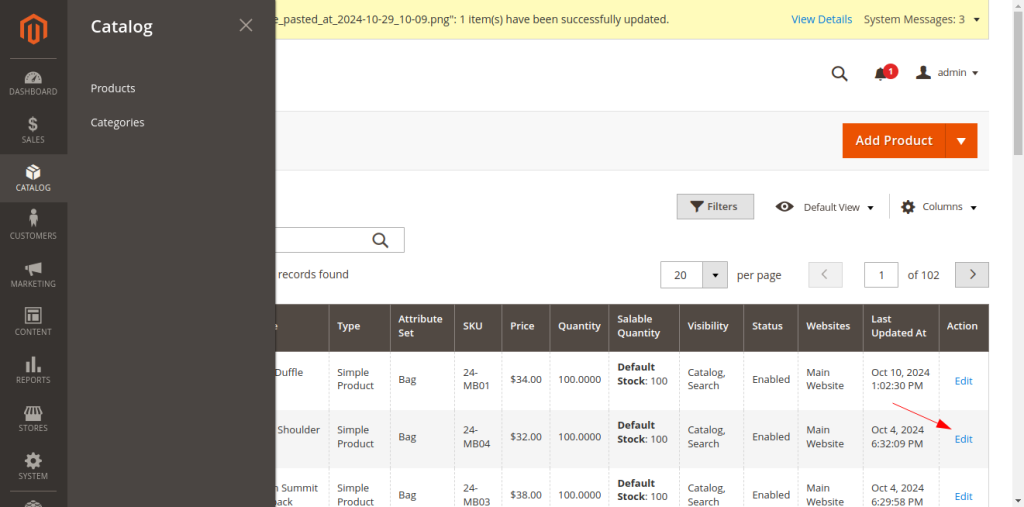
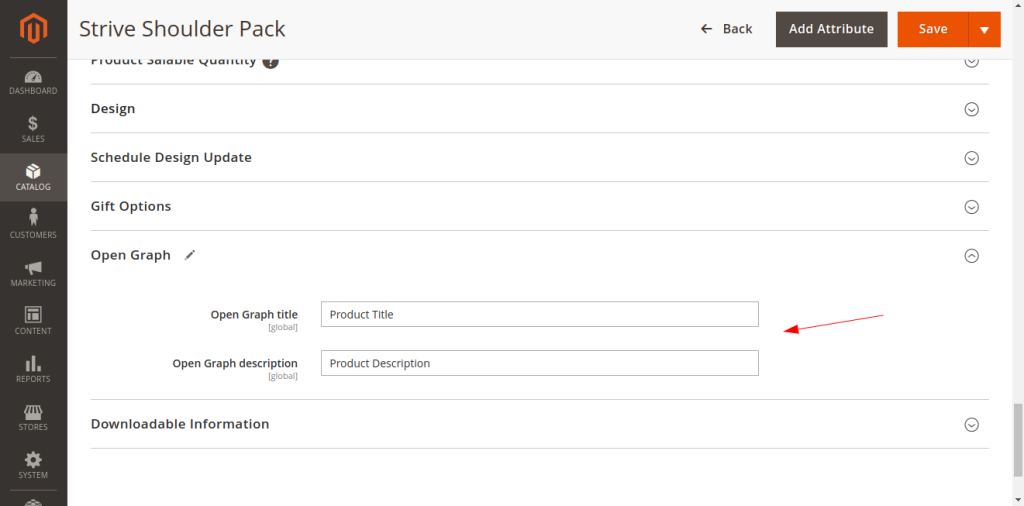
- Regarding the Product page Locate the Open Graph Metadata area after selecting a product in the Admin Panel > Catalog > Products section.
- Declare the Open Graph Title. If it is configured, the Meta Title will be used if you haven t set it up. If not, the product s name will be used.
- Enter the product Open Graph Description. Meta Description of the product will be used in case an OG description hasn t been set up. If there are none of the descriptions configured, the Deflut Description will be used.
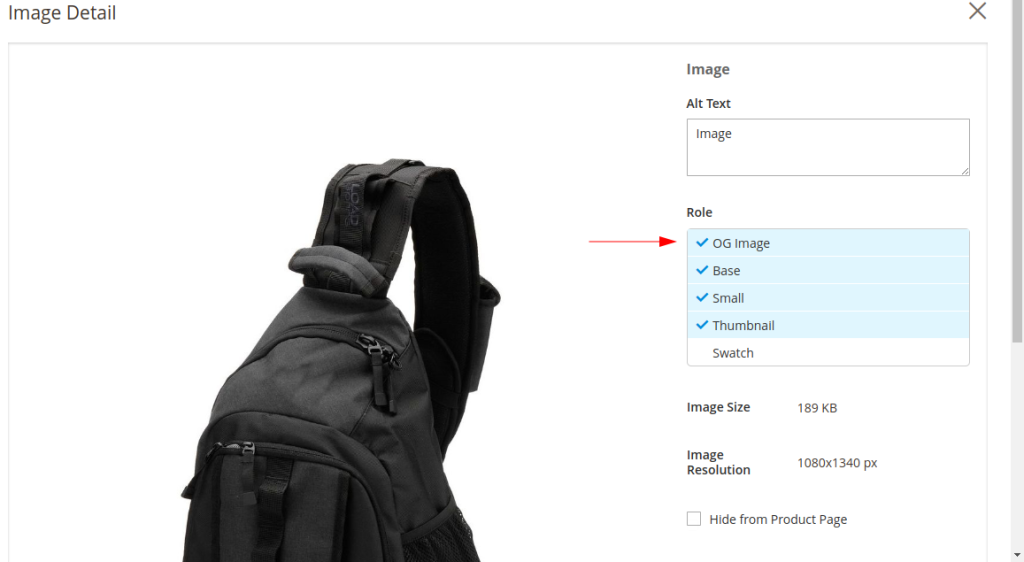
- To add a new image or change an existing one, set the product Open Graph Image (Facebook image) moving to the Images and Videos area.
- selected the image and assigned it the original image role. For a product, Defult OG Image will be utilized if the Open Graph Image is not set.
- Remember to hit the Save button once you re done.
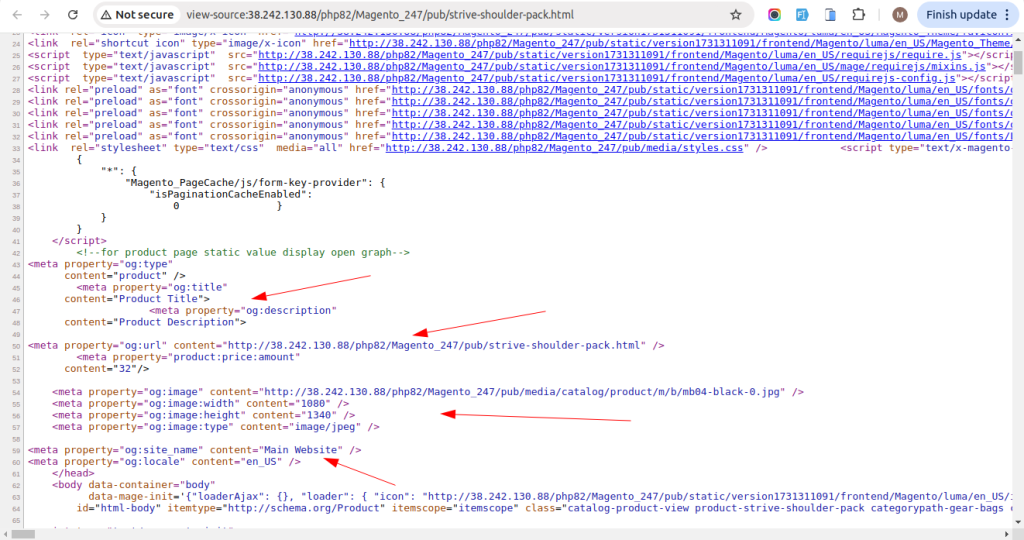
- Open any page in the storefront that isn t marked with OG tags now. Use Ctrl+U or right-click to choose View Page Source. According to your configuration settings, you can see that the default Open Graph Tags have been inserted for that page successfully in the <head> area.
- For Category page
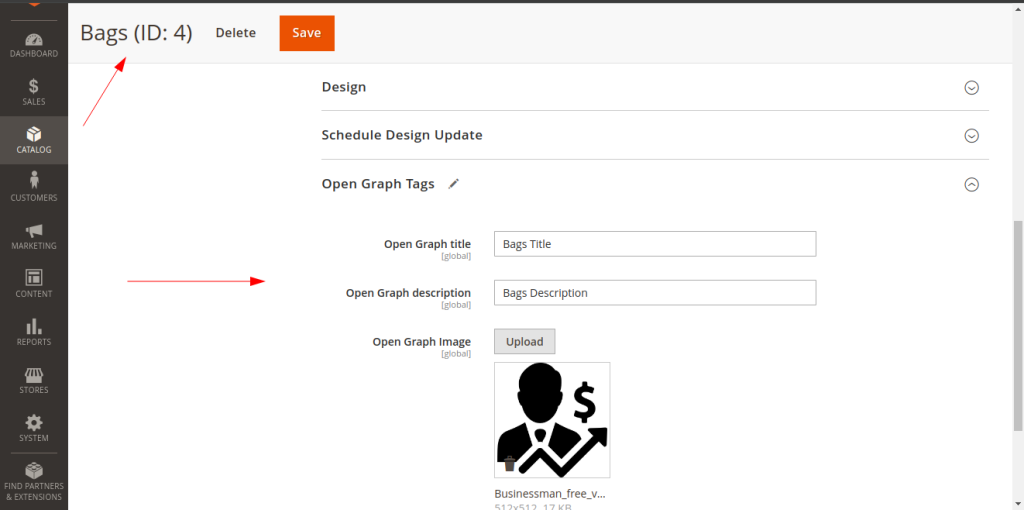
- Go to Admin Panel > Catalog > Categories.
- Locate the Open Graph Metadata area for the category you want to configure the OG tags for.
- In the OG Title area, provide the title of the Open Graph. If you haven t configured it, the Meta Title will be utilized. The category name will be used if it isn t set.
- Set the category s Open Graph description in the OG Description. In the event that an OG description is not specified, the category s meta description will be used. The Default Description will be used if none of the preset descriptions are present
- In the OG Image, set an Open Graph Image; if not, the Default OG Image will be used. When you re done, don t forget to click Save.
- Open any page in the storefront that isn t marked with OG tags now. Use Ctrl+U or right-click to choose View Page Source. According to your configuration settings, you can see that the default Open Graph Tags have been inserted for that page successfully in the area.
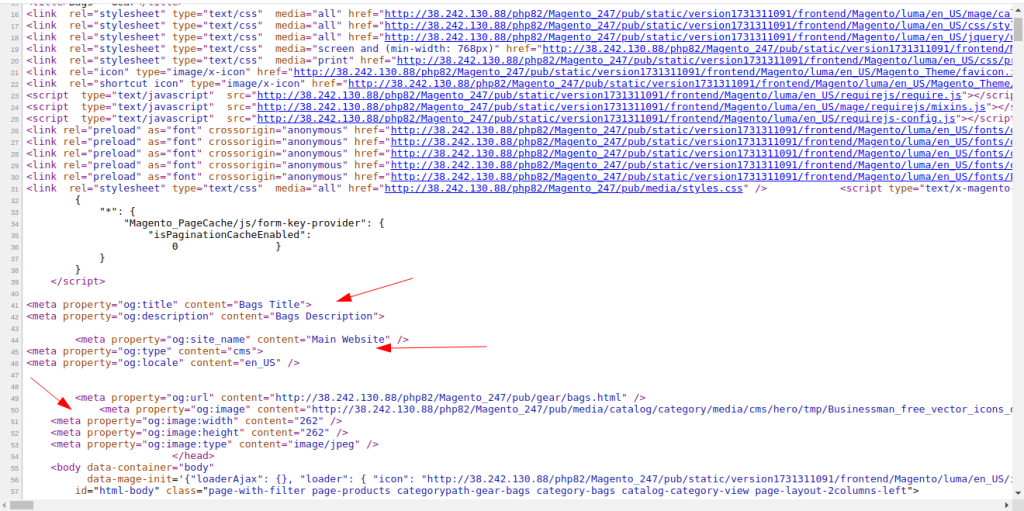
- For CMS Pages :
- To do that, select Content > Pages and launch the CMS page of your choice in Edit mode. Select the Open Graph Metadata tab now, and click to make it larger.
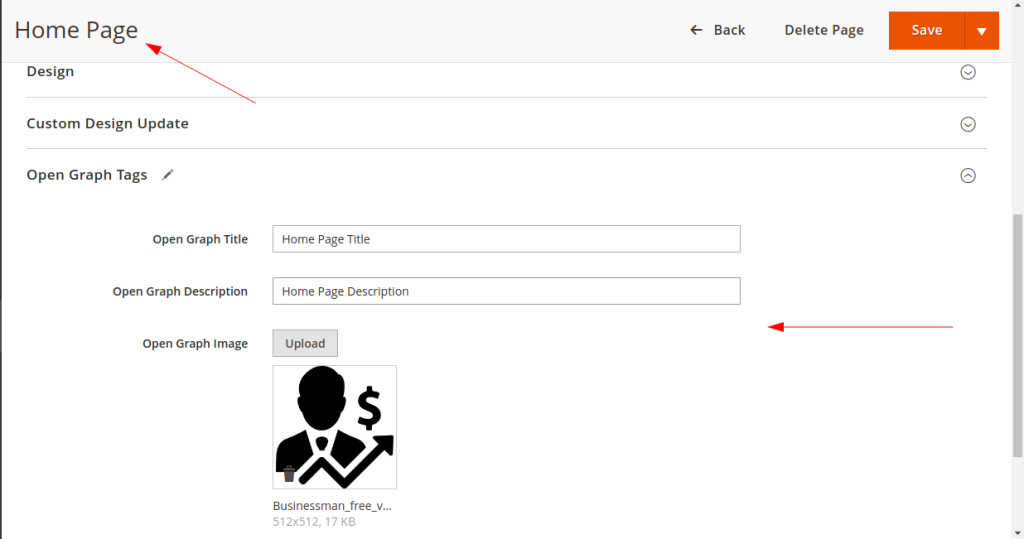
- OG Title : This CMS page needs an open graph title. Add one.
- OG Description : For this CMS page, include a description of an open graph.
- OG Image :For this CMS page, upload an image of an open graph.
Open this CMS page now in the storefront. Use Ctrl+U or right-click to choose View Page Source. As per your configuration settings, you can see that the Open Graph Tags have been successfully placed to the area of the page.
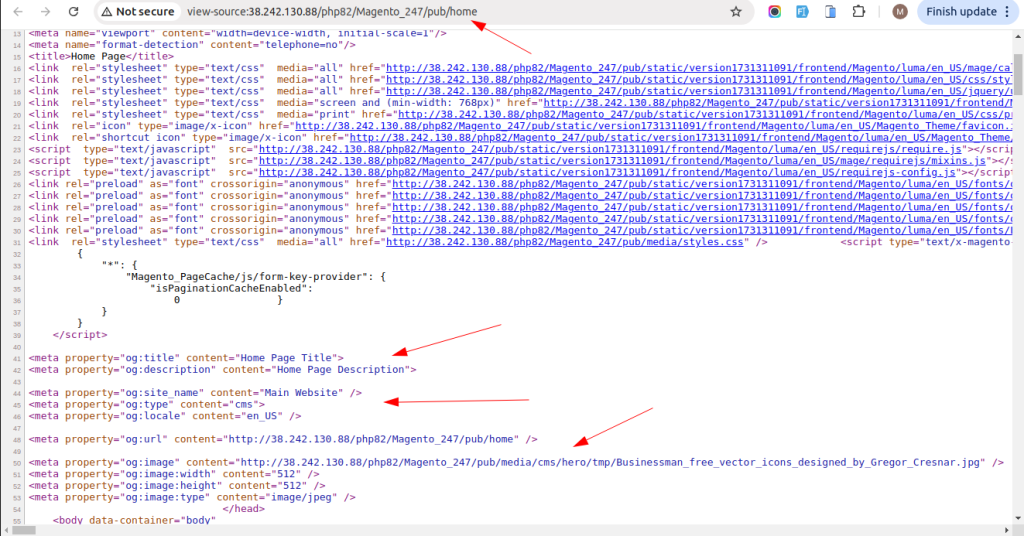
- OG: url specifies the URL of the Main Website page being shared, ensuring that social media platforms link back to this exact page.
- OG: site_name defines the site name as “Main Website”, which appears alongside the shared link to provide brand context.
- OG: type is set to “cms,” identifying the content as a general webpage.
- OG: image:type, OG:image:width, OG:image:height define the type and dimensions of the preview image in JPEG format, ensuring that platforms display a correctly sized image.
- OG: locale is set to “en_US,” specifying the language and locale as British English for more localized content display.
- These tags help control how the page appears in social media previews, enhancing both visual consistency and content relevance
- Open Graph Tags Display on Social Media
- A link with Open Graph tags will look like this when you share it with your friends and networks on social media.
