Our Magento 2 notification bar tempts your customers by our showing the highlighted offers. Store/ business owners can highlight the sale and best offers for the specific customer group. This grabs the customer’s attention to the special deals thereby increasing conversion rate and upshots sales. Notification bars are the best options for attractive and healthy promotions of special deals, news, new launches, best sellers, and a lot more.
Table of Content
Features
- Admin can enable/ disable the extension module.
- Multiple notification bars.
- Highlights the deals.
- Upshot sale.
- Attractive conversion rate.
- Easy configuration and customization.
- Responsive design.
- Custom names for each notification bar.
- Display notification bar based on customer group.
- Display on all pages or selected pages.
- Display notification bar for the specific period.
- Customize the position of the notification bar.
- Customize the height of the notification bar based on pixels.
- Display notification bar based on priority.
- Select multiple store views to display the notification bar.
- Customized each notification bar’s background color, font style, size, etc.
Steps:
- Extension Installation Guide
- Configuration And Customization
- Frontend Examples
- Extension Installation
- Download the zip file
- Extract and put it into <Magento-Directory>/app/code/
- Open CLI in Magento directory and Run Magento installation commands
- php bin/magento setup:upgrade
- php bin/magento setup:di:compile
- php bin/magento setup:static-content:deploy
- php bin/magento indexer:reindex
- php bin/magento cache:flush
- Configuration And Customization:
- Configuration Login to the Admin Magento,Stores > configuration > VDCSTORE> Notification Bar
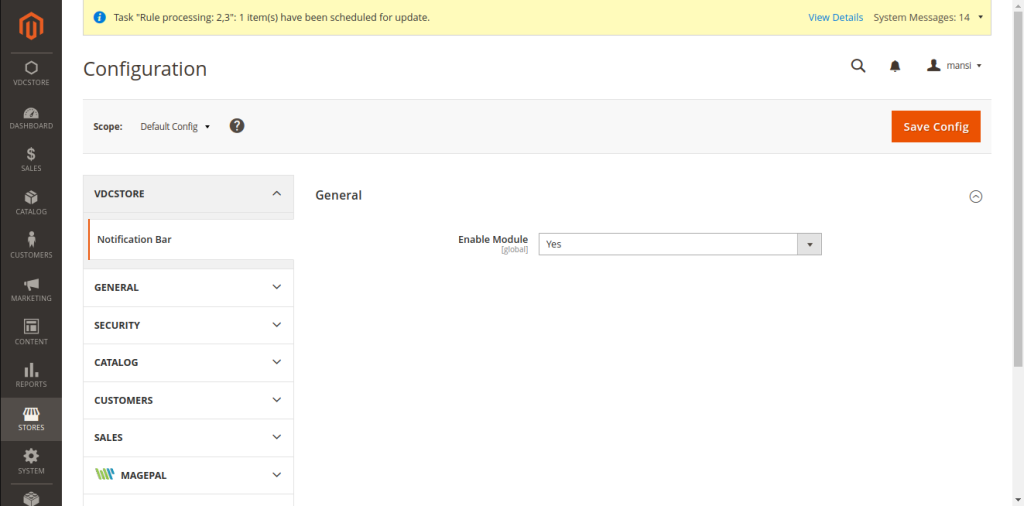
- Enable/disable the notification bar module.
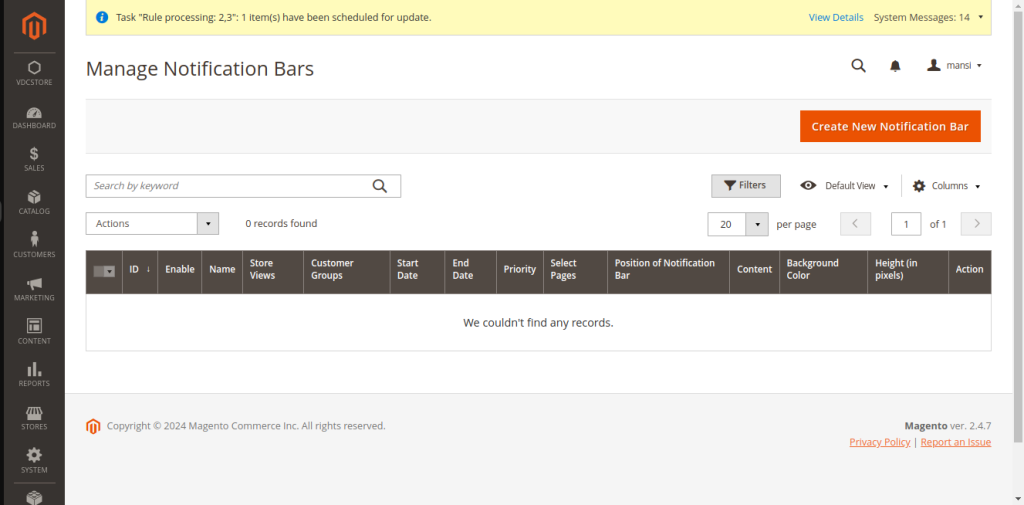
- Add a new notification bar from the Create New Notification Bar option at the top right corner.
- Enable the particular notification bar.
- Choose a name for that notification bar.
- Select store views where you want to display the current notification bar.
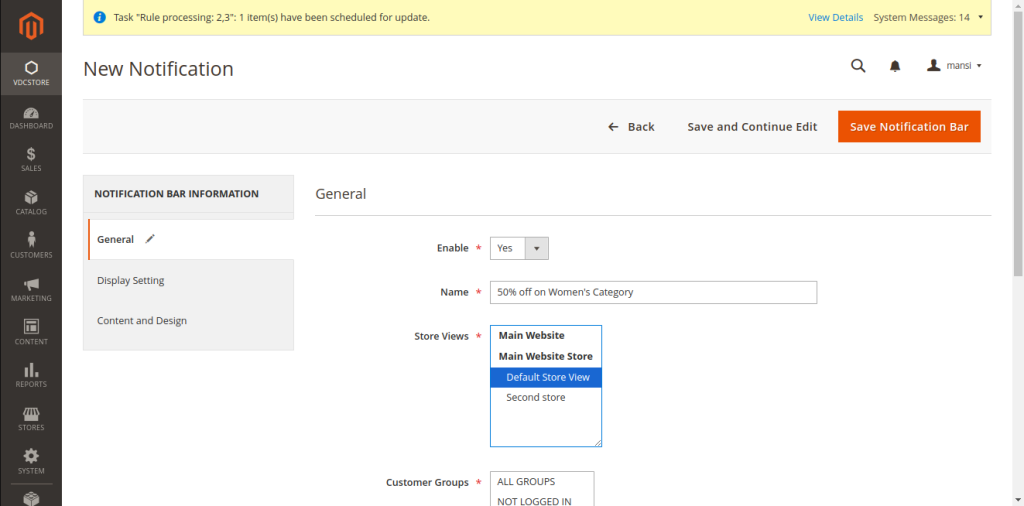
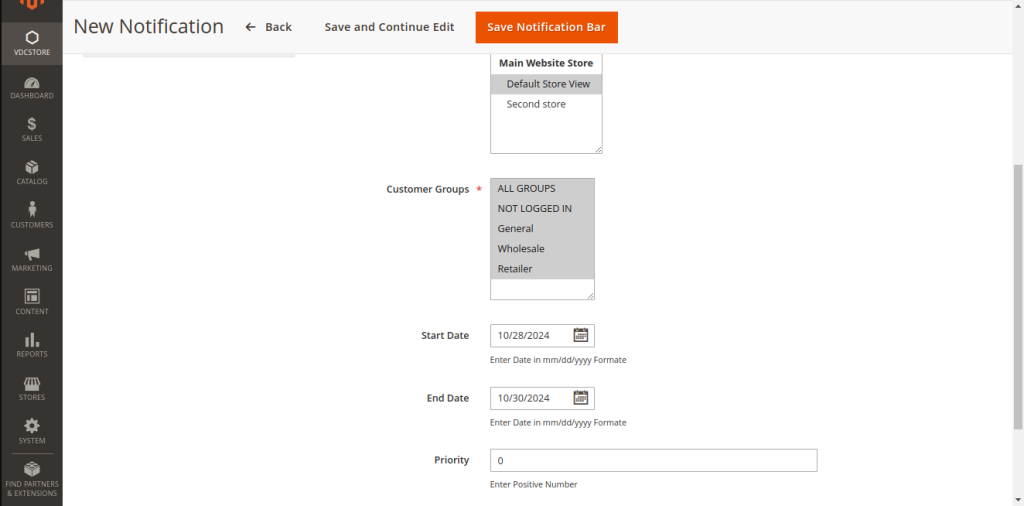
- Select store views where you want to display the current notification bar.
- If you want to show the notification bar for a specific period then you can set the start date and end date for the same.
- Choose the priority of the current notification bar. Priority starts from zero.
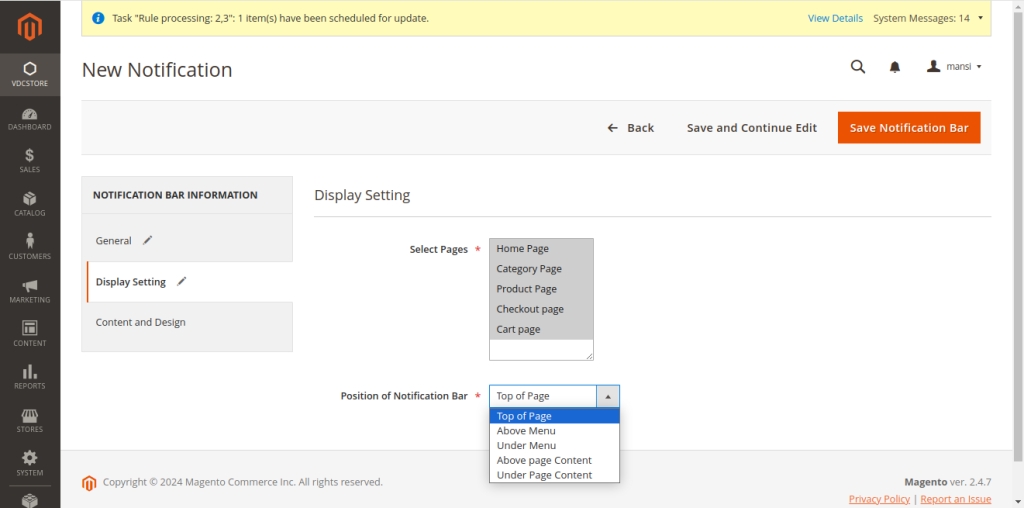
- Select the pages where you want to show the notification bar. You can select an individual as well as multiple pages.
- Choose the position to display the notification bar. We have these 5 position options for the notification bar.
- Top of page
- Above menu
- Under menu
- Above page content
- Under page content
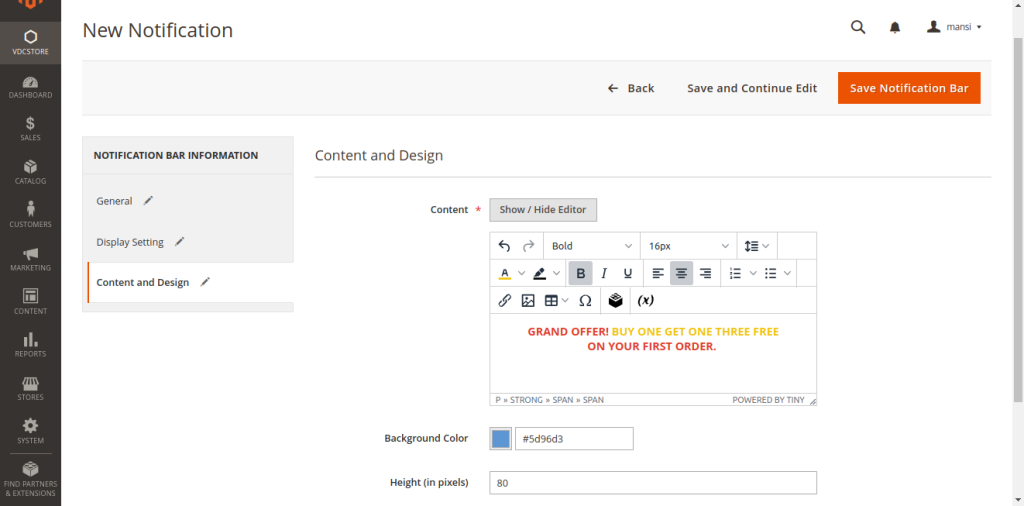
- Customize the design of your notification bar by editing font style, font color, and other font options.
- Set background color.
- Set the height of the notification bar in pixels.
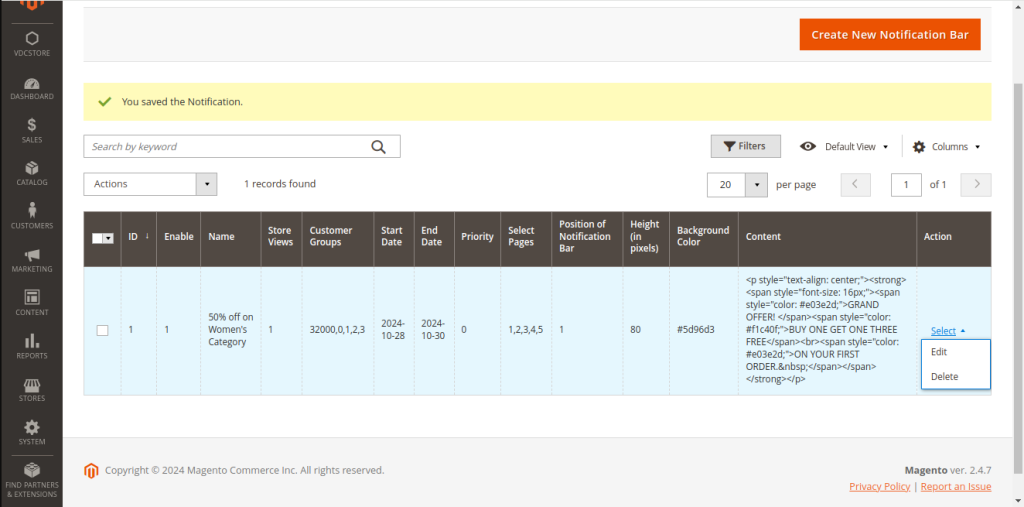
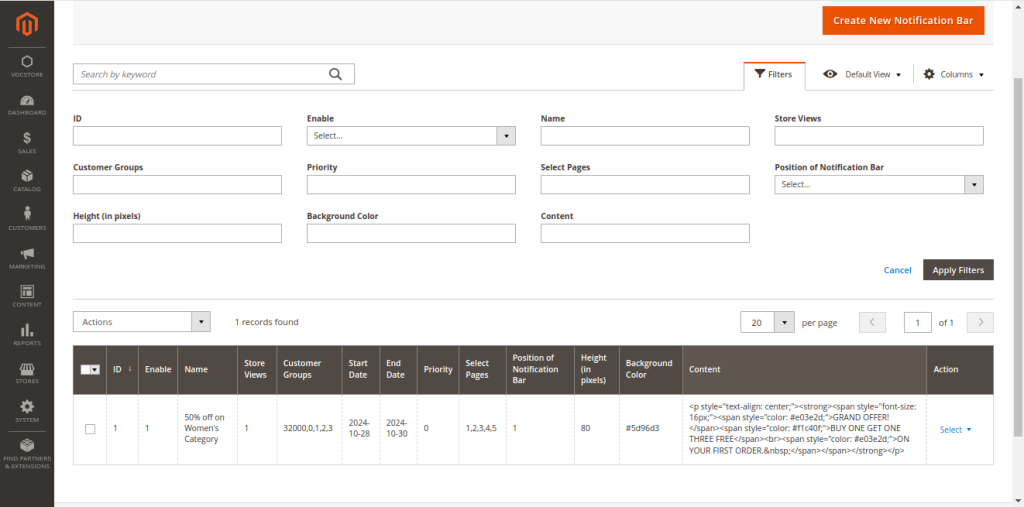
- The newly created notification bar is now added to the notification bar grid.
- Admin can Edit or Delete the notification bar individually or in batch from the select option in the grid itself.
- Admin can also delete notification bars individually or in batch from the actions menu.
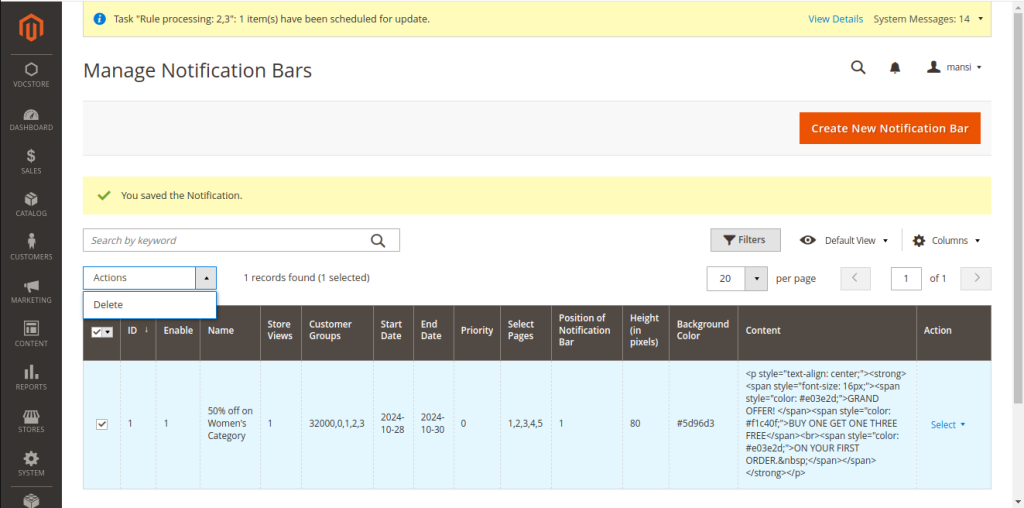
- Admin can search for a particular notification bar using the filters.
- Frontend Examples
- Customer view of the website/ online store.
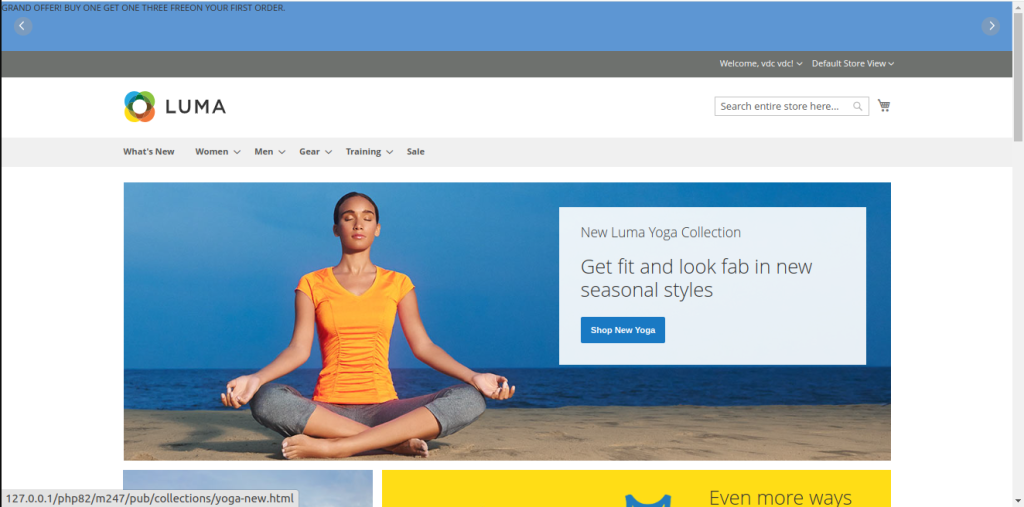
- Blue shows the top of page location.
- Purple shows above the menu location.
- Black shows the above page content location.
- Purple shows under page content location.
