Live Chat for Extension for Magento 2 add-on rovides for websites built on the Magento 2 Platform. It gives assured real-time communication between the visitors and chat suort sokeserson through a chatbot medium. This extension gives immediate assistance,allowing visitors to raise their concerns, seek hel, or ask anything while going through their website. Let your customers feel safe and communicate with you.
Table of Content
Features
- Direct Customer Interaction.
- Real-Time Communication.
- Peaceful Chat Satisfaction.
- Active 24/7 Chat Suort.
- Easy to Login or Signu.
- Less exense on the custom chat box.
- Growth of sales with Chatbot orders.
Steps:
- Extension Installation Guide
- Configuration
- Frontend
- Extension Installation
- Download the zip file
- Extract it and ut it into /a/code/
- Oen Cli in the Magento directory and follow the below commands
- php bin/magento setup:upgrade
- php bin/magento setup:di:compile
- php bin/magento setup:static-content:deploy
- php bin/magento cache:clean
- php bin/magento cache:flush
- Configuration:
STEP 1 :
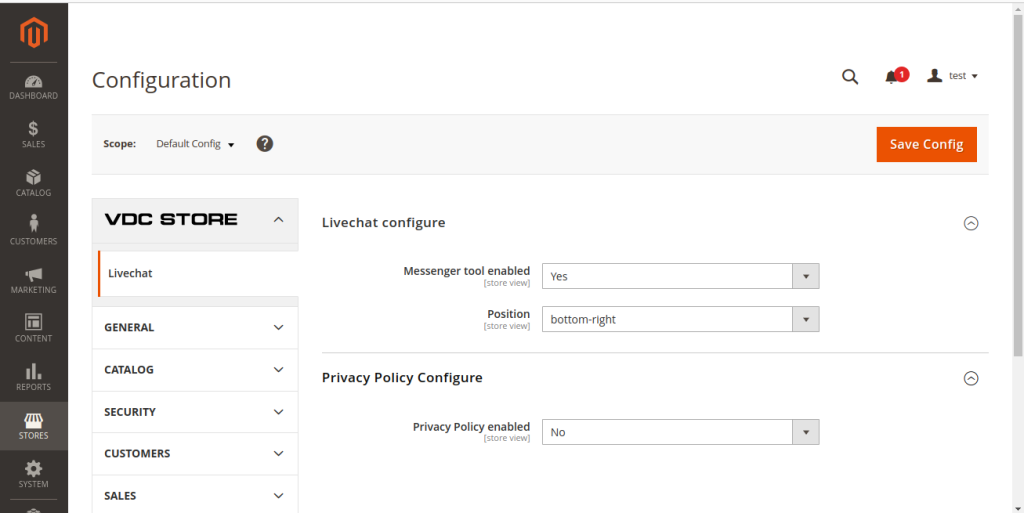
- Go to Admin > Stores > Configuration > VDC STORE > Livechat
- Messenger Tool Enabled: After selecting Livechat you will see Messenger tool enable (Yes/No).
- Position: Then select the ossible osition of your Livechat.
- Bottom Righ
- Bottom Left
- Middle Right
- Middle Left
- Top Right
- Top Left
- Privacy Policy Condition: Then set Privacy Policy Configure by enabling with Yesor No.
STEP 2 :
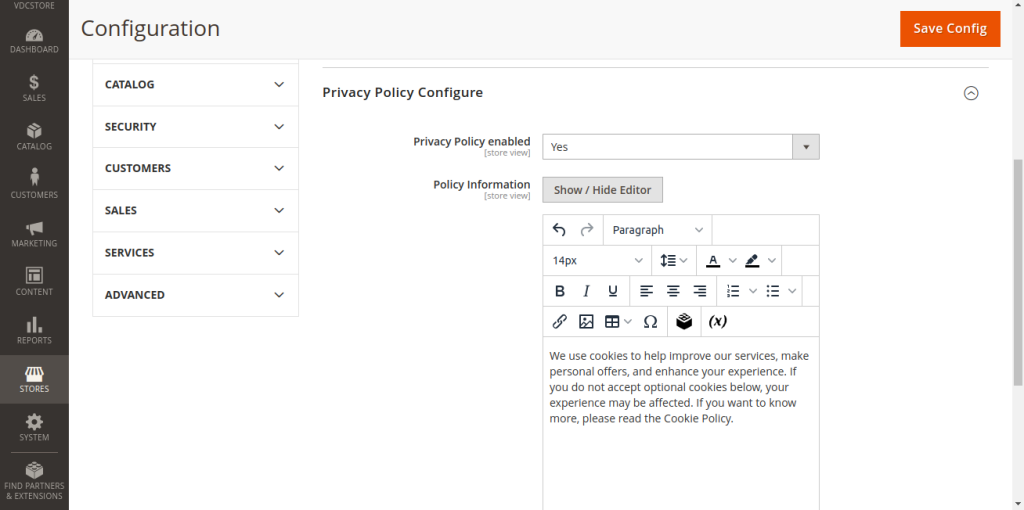
- Policy Information: When you enable it you will show you ‘Policy Information’ where you can edit or write your aragrah and click on ‘Save Config’.
STEP 3 :
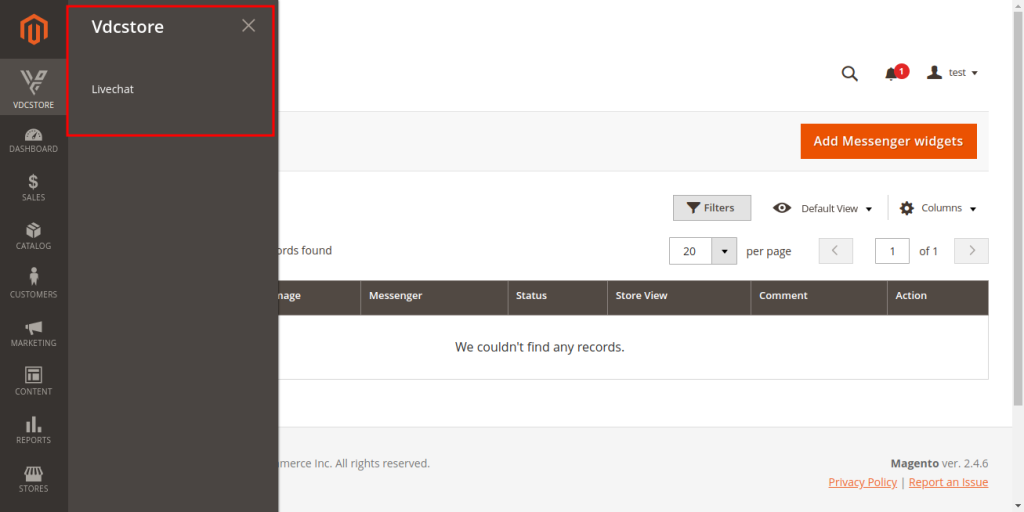
- Go to VDC STORE > Livechat
- Click on the to of the right button ‘Add Messenger Widgets’.
- Here you can add your messenger widget such as social media latforms.
STEP 4 :
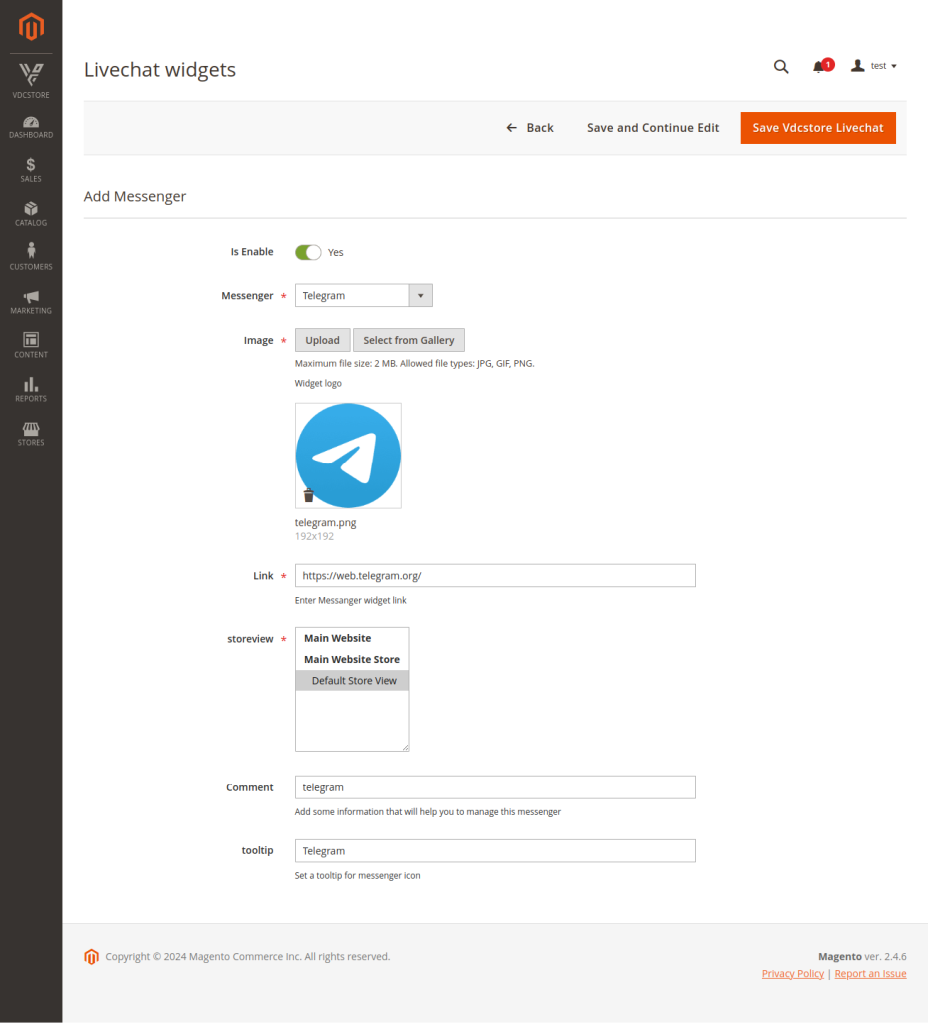
- When you select ‘Action’ enable your messenger.
- Messenger: Select the Messenger tye (eg: Telegram) it could be your customised messenger.
- Image: Uload or Select from Gallery the resemblance image of the messenger.
- Link: Add a Link to your messenger.
- Storeview: You can select your ‘Storeview’.
- Main Website
- Main Website Store
- Default Store View
- Comment: Add a comment about your messenger which hels you to manage.
- Toolti: Add a toolti for your messenger icon.
- After comleting your rocedure click on the to of the right button ‘Save VDCstore Livechat’.
STEP 5 :
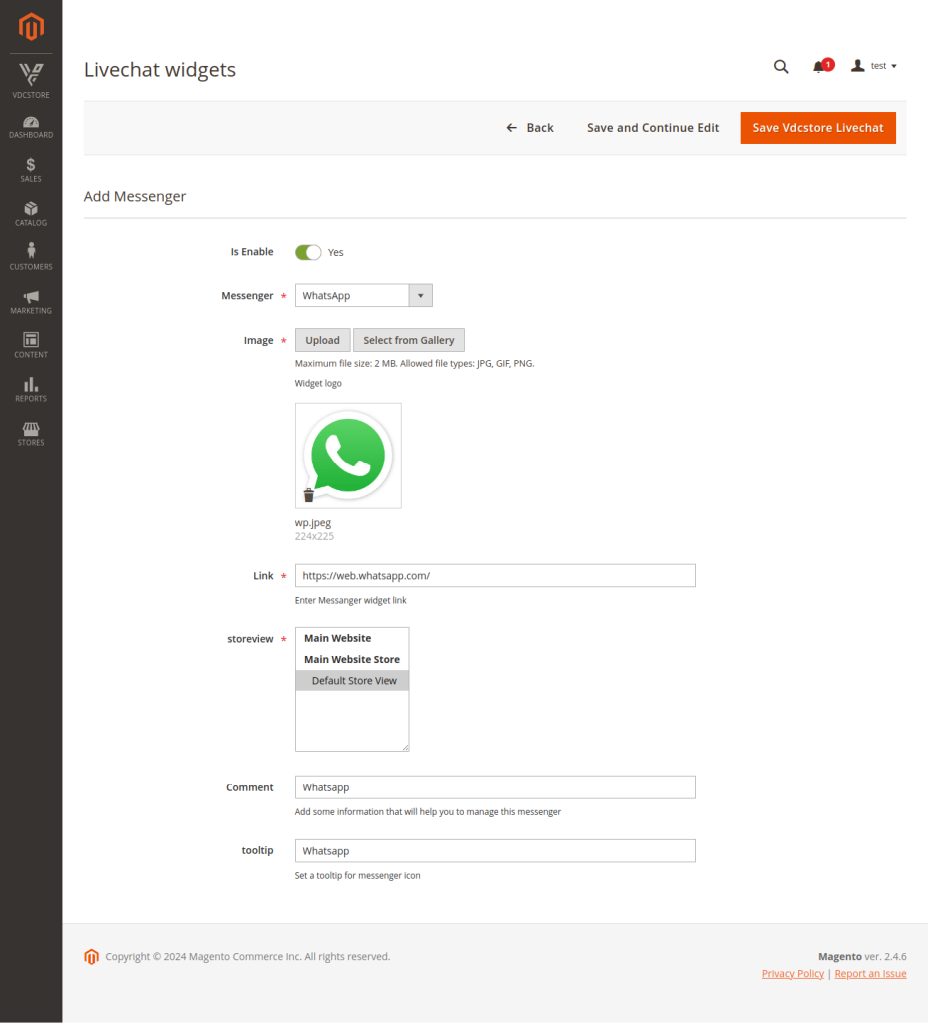
- You can Add multile messengers with the same rocess.
STEP 6 :
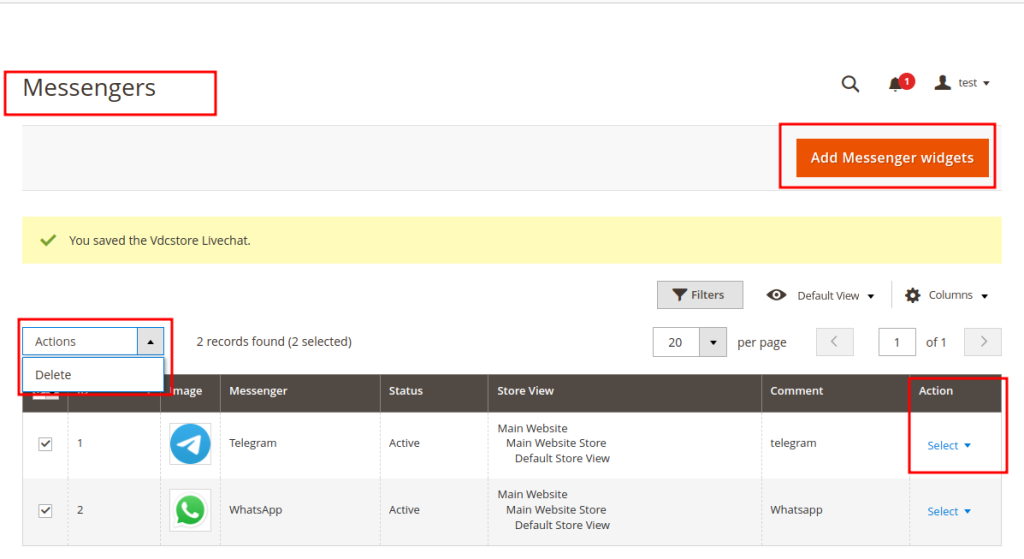
- When you add messengers it will show the lists of messengers (Social Media As).
- You can select your actions as Select or if you want to delete any of the one messengers select DELETE and it will be removed from your frontend.
Frontend
STEP 7 :
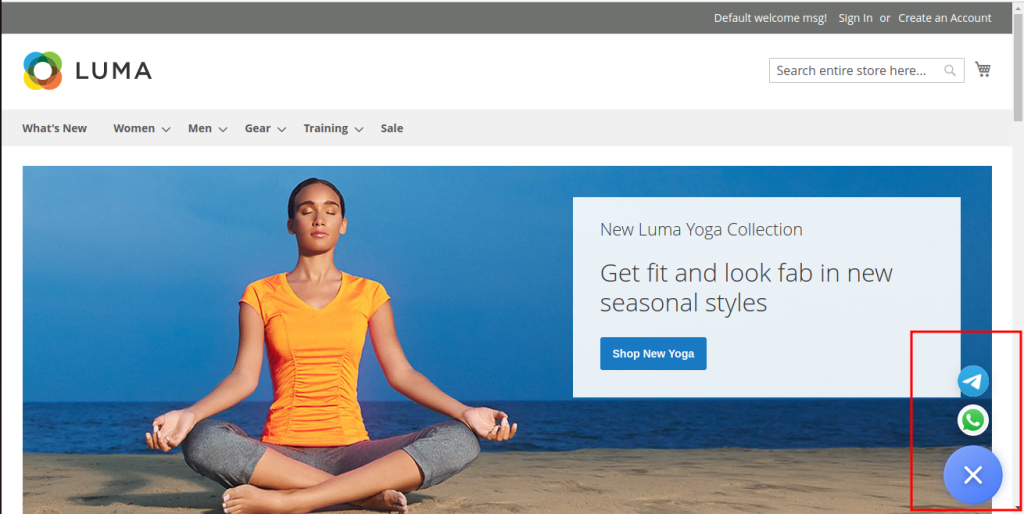
- On the Front, you can see the icons of your messenger.
STEP 8 :
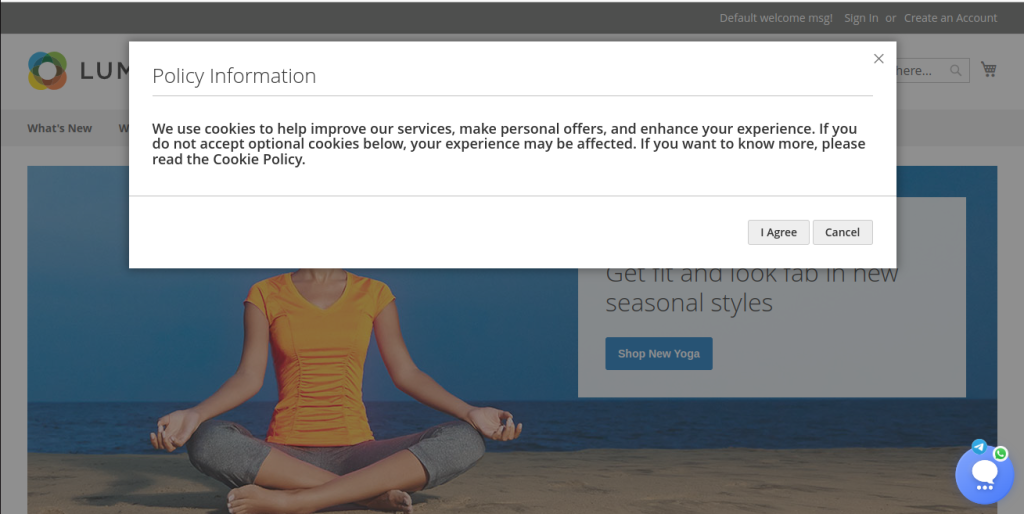
- When you click on the messenger Icon you will see a o-u of olicy information.
- You have two otions ‘I Agree or Cancel’ which will be of your selected cookies.
- When you click on I Agree it will redirect to the messenger.
STEP 9 :
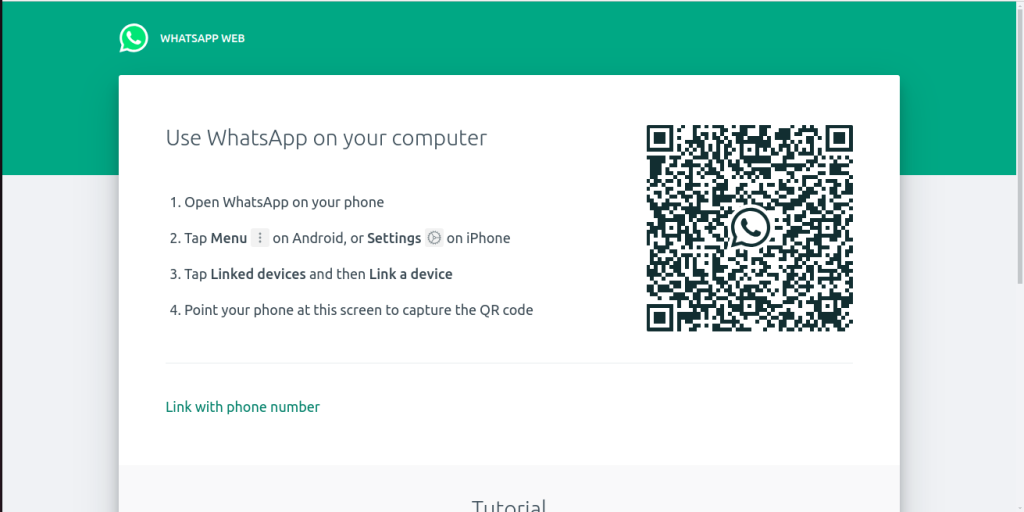
- Scan the QR and have haypy Chat support.
