Using the HelpDesk extension for Magento 2 visitors and customers can create new advance support tickets for the website. This extension for Magento is about raising complaints, issues, queries, suggestions, problems, and so on. This extension helps to improve the customer service of any website. HelpDesk extension is an ideal model for ticket management. This extension works for small to large-scale online businesses. In this, the web admin can manage tickets in the Magento admin panel. HelpDesk Magento extension is the perfect solution for you and your customer’s queries or issues.
Table of Content
Features
- It allows visitors to manage and post tickets from their My Account page.
- Web admin can manage tickets from the Magento admin panel.
- It can specify the ticket’s status and priorities.
- Visitors can select the priority of the ticket.
- It allows the allocation of ACL resources to a particular role or user of admin and it allows or rejects accessing HelpDesk.
- It allows the Magento admin panel to set ticket email templates.
- Visitors and Admin will be notified by Email whenever a ticket is created or updated.
- Admin of the panel can see and reply to the list of tickets visitors post.
Steps:
- Extension Installation Guide
- Configuration
- Frontend
- Extension Installation
- Download the zip file
- Extract it and put it into /app/code/
- Open Cli in the Magento directory and follow the below commands:
- php bin/magento setup:upgrade
- php bin/magento setup:di:compile
- php bin/magento setup:static-content:deploy
- php bin/magento cache:clean
- php bin/magento cache:flush
- Configuration:
- STEP 1
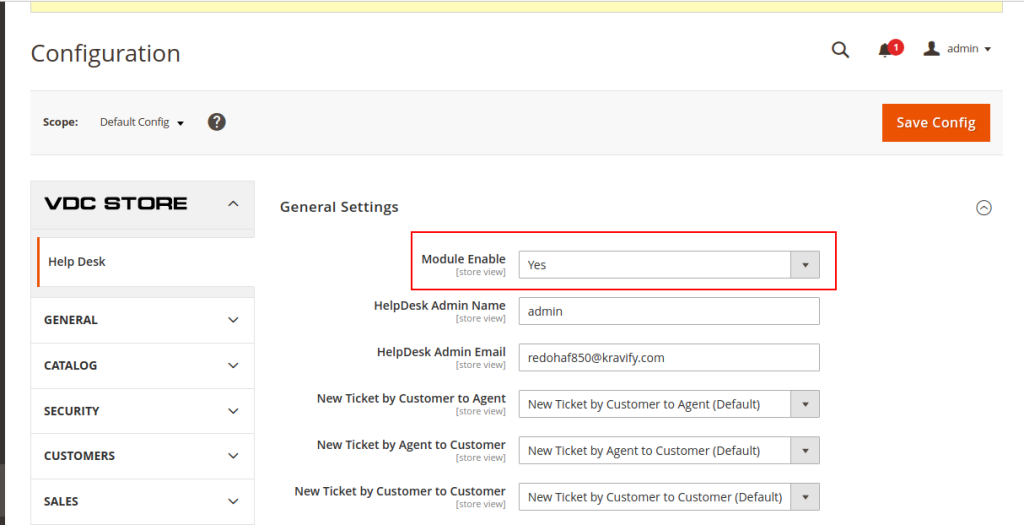
- Go to Admin > Stores > Configuration > VDC STORE > Help Desk
- When you open General Settings you will see Module Enable.
- Module Enable: Module Enable will give you 2 Options YES or NO.
- HelpDesk Admin Name: Write admin’s name in this column.
- HelpDesk Admin Email: Write the admin’s email here.
- After filling in all the details click on Save Config’ to proceed.
- STEP 2
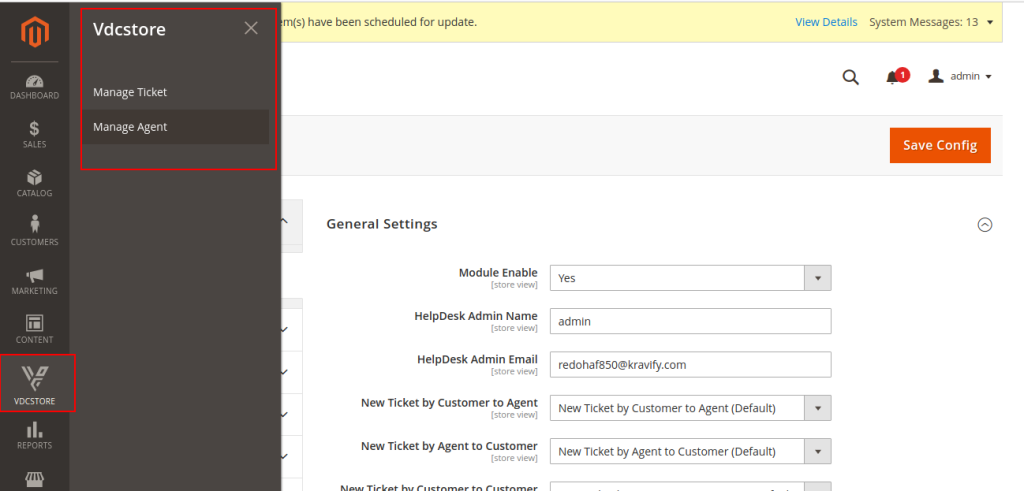
- When the extension is enabled, the above custom menu will be displayed.
- Admin will see two sub-options i.e. Manage Tickets and Manage Agent.
- From this admin can assign an agent to a particular customer as per their need.
- STEP 3
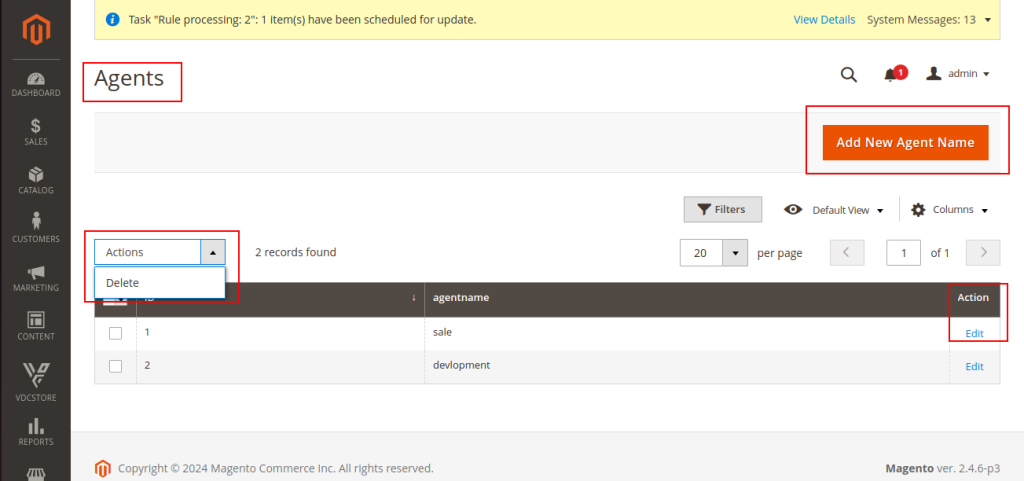
- Go to VDC STORE > Manage Agent
- In this, you can select your actions like if you want to add a new agent then click on the Add New Agent Name.
- If you want to Edit then you can select Edit’.
- If you want to delete an agent, select Delete and remove it from the agent list.
- STEP 4
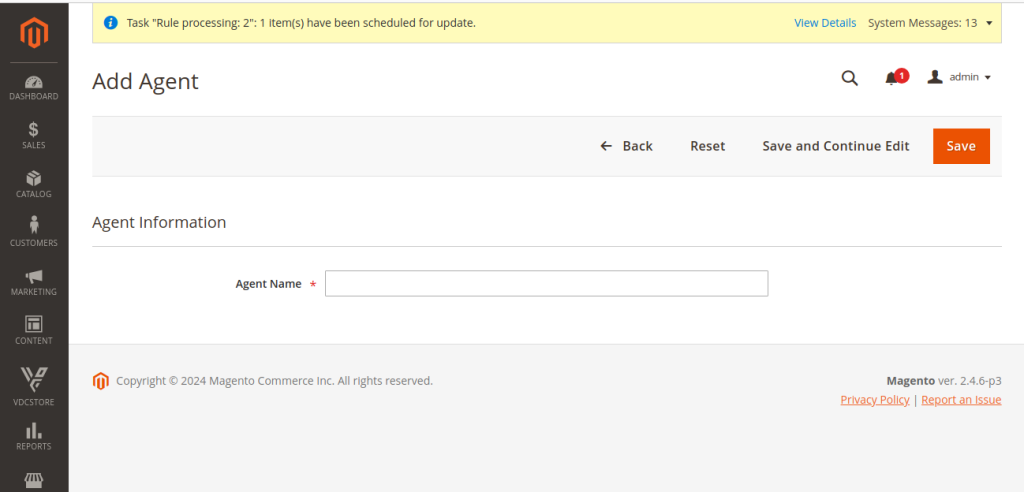
- Agent Name: After selecting Add Agent you have to fill in the agent information in the Agent Name column.
- Click on Save to proceed further.
- STEP 5

- Go to VDC STORE > Magento Ticket (only if you want to purchase a ticket for customers).
- STEP 6
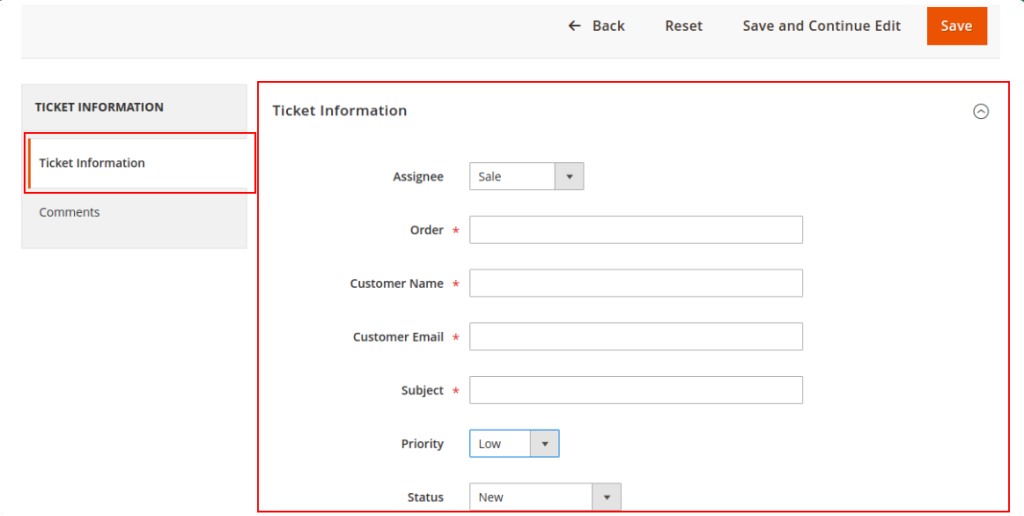
- After saving your agent name you will see all the details over here.
- When you open the menu, click on Ticket information . After that fill in the necessarydetails such as:
- Assignee: Select the criteria such as Developers and Sales.
- Order: write your order or ticket and generate a number.
- Customer Name: Write Customer Name.
- Customer Email: Write customer email.
- Subject: Write purpose.
- Priority: Select Priority (Low, Medium, etc).
- Status: Select status such as New, Pending, or Waiting for Customers and fill in all the details.
- STEP 7
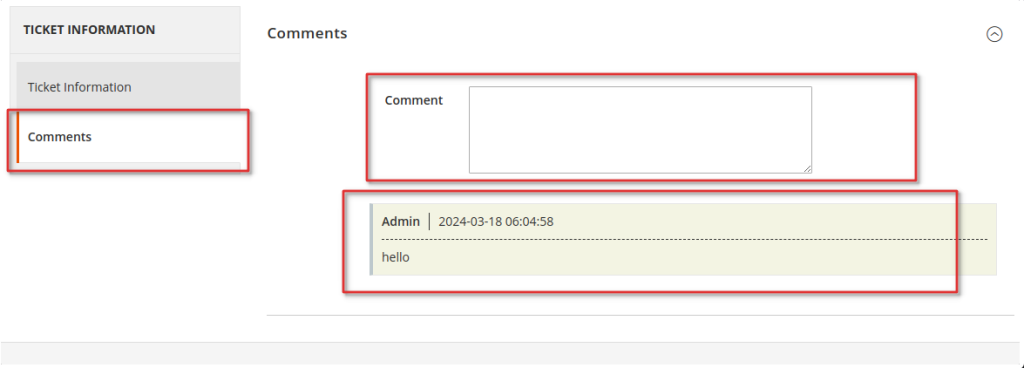
- Comment: After generating Magento Ticket Admin will be able to add comments.
- Below that admin can see their and customer’s comments. click on Save to proceed further.
- Frontend
- STEP 8

- Go to the Frontend > Login > My Account
- STEP 9
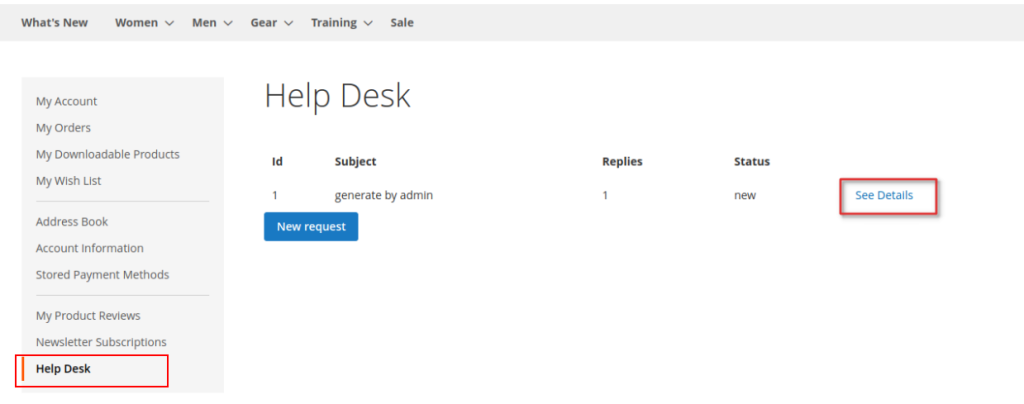
- After login click on Help Desk.
- Here you will be able to see Customer and Admin generated tickets.
- If you want to look out click on See Details.
- STEP 10
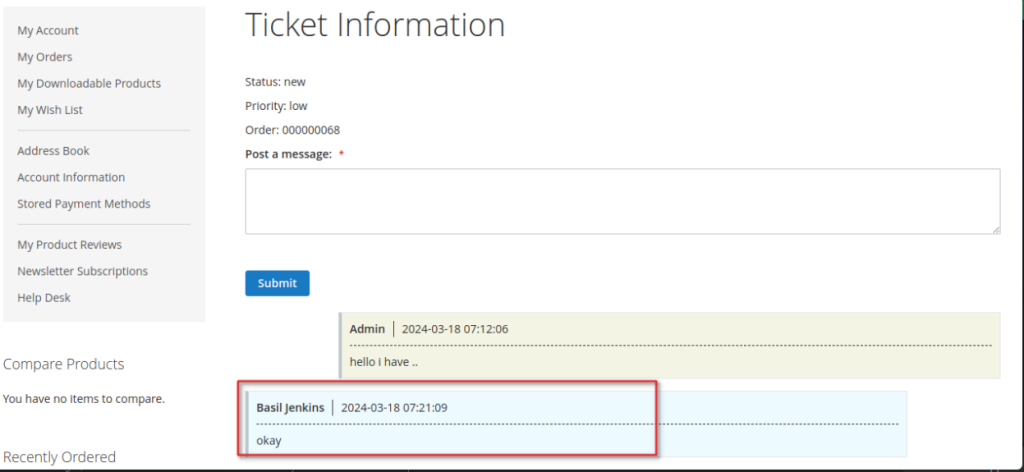
- Here Customers will be able to comment.
- Now Admin and Customers will comment and raise concerns.
- STEP 11
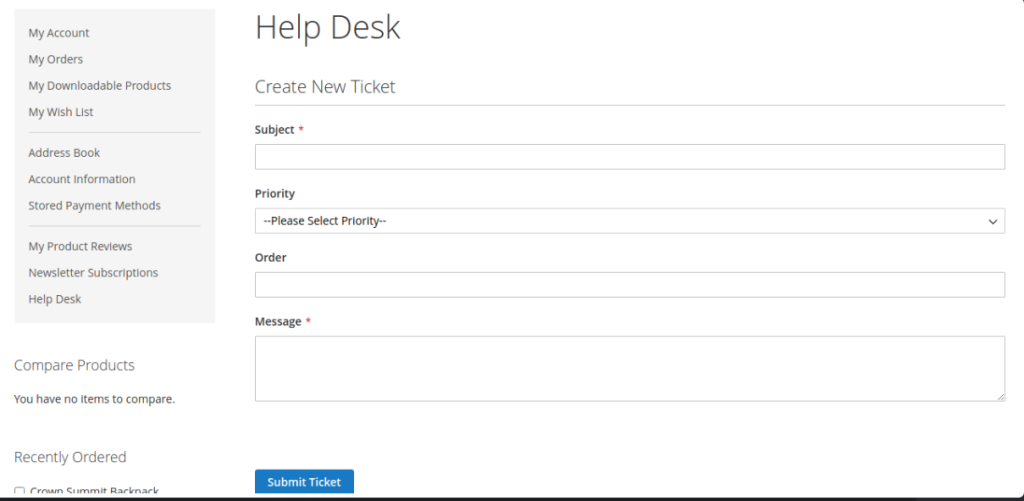
- When you click on Help Desk, Admin will be able to generate a new request by clicking on the tab “New Request.
- After that, it will showcase you like this where you need to fill in details such asSubject, Priority, Order, and Message and Click on Submit Ticket to submit.
- STEP 12
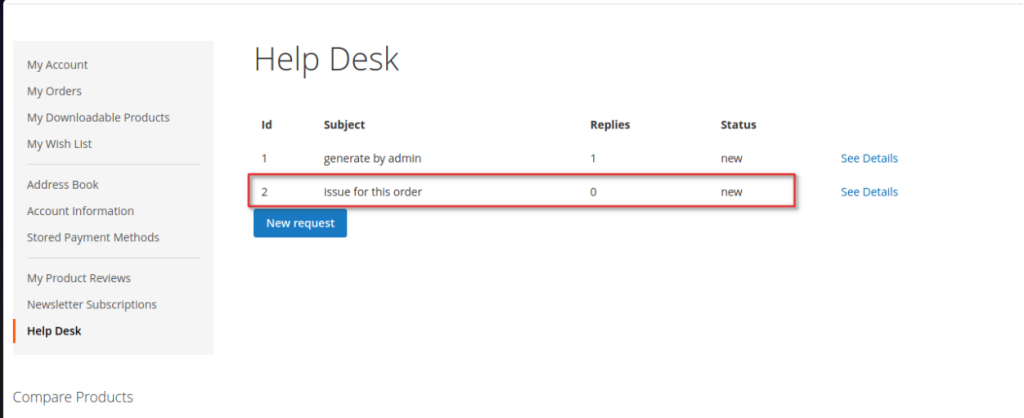
- After generating tickets Admin will be able to see lists of tickets.
- In that list, the admin counts the number of replies for each particular ticket.
- STEP 13

- When a customer generates a ticket Admin will get an email like this.
- STEP 14

- Lastly, the Admin can see replies from the customers.
- STEP 15

- When Admin generates a ticket, customers will be notified via email like this.
- STEP 16

- When Admin generates a ticket, customers will be notified via email like this.
