Uplift your store’s Google Rating with customer’s organic feedback. Showcase the Google Rating identification and it helps in boosting your CTR (click-through rate). With this extension, you can collect genuine reviews from the customers. With zero effort you can build a great reputation for your store.
Table of Content
Features
- Seamless integration with shoppers, allowing merchants to use Google Customer Reviews easily and functionally without having core technical knowledge.
- Automatic appeal of customer reviews after buying, the process starts working and increases the possibilities of steaming valuable feedback.
- Magento 2 Google Customer Reviews displays the badge on the front side by showcasing the merchant’s trust and reputation to loyal customers.
- Assemblage the ratings of sellers which are based on customer reviews,providing influential purchasing and social ethical decisions.
- And it is 100% The General Data Protection Regulation compliances.
- Notifying the seller about reviews on Google will enhance the credibility and isibility in search results.
- Modifying options for the placement and appearance of Google Customers Reviews badge which helps in aligning store designs and branding.
- As per the metrics and insights Google Merchant Center can have access,shoppers can track performance reviews and make data-driven decisions to better theircustomer experience.
Steps:
- Extension Installation Guide
- How To Configure
- Frontend
- Extension Installation
- Download the zip file
- Extract and put it into /app/code/
- Open Cli in the Magento directory and follow the below commands:
- php bin/magento setup:upgrade
- php bin/magento setup:di:compile
- php bin/magento setup:static-content:deploy
- php bin/magento cache:clean
- php bin/magento cache:flush
- STEP 1

- Create your Merchant ID from Google Merchant Center (https://www.google.com/retail/)
- Once you click on the setting icon you will see Business Information in Tools, click and move forward.
- STEP 2
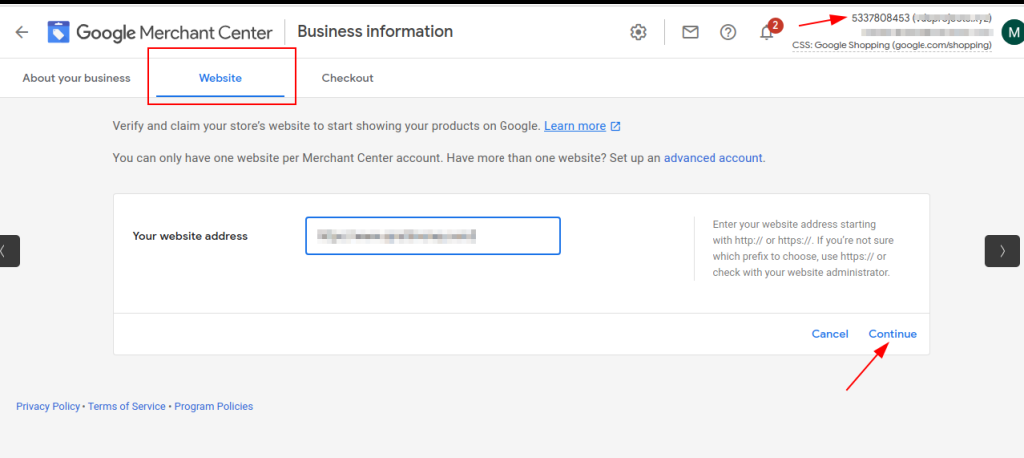
- Go to Website and claim your website address in the column.
- See your Google Merchant ID on the top of the right side ofthe screen.
- Click on Continue to proceed further.
- STEP 3
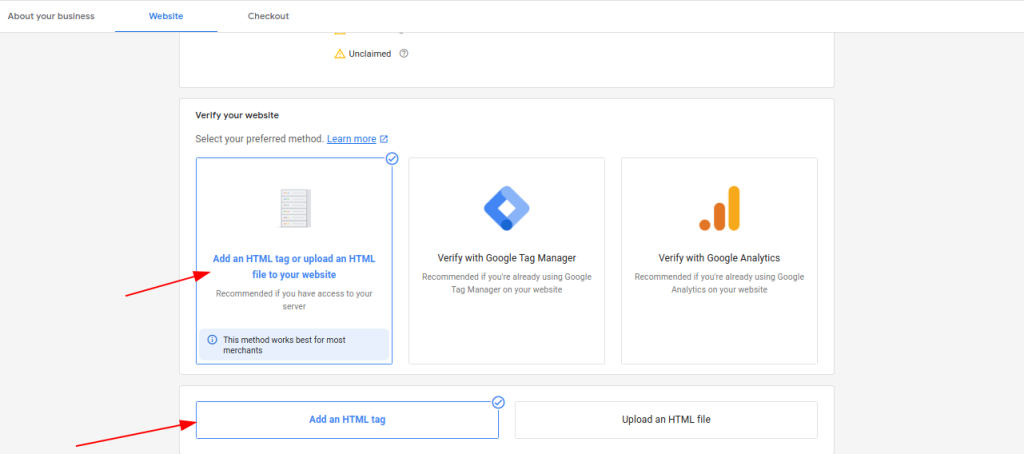
- If you want to verify your website youcan select the option.
- After that click on Add an HTML tag or upload an HTML file to your website .
- And then click on Add an HTML tag
- STEP 4
- Go to admin => Content => Configuration => Edit =>HTML Head => Scripts and StyleSheets

- Copy the HTML tag generated foryour website.
- Paste the HTML tag in the HTML code of yoursite’s homepage.
- Submit your website to Google Search Console for verification by clicking on ‘Verify Website’.
- NOTE* After submitting your URL you ll get a confirmation email from Google Search Console.
- STEP 5

- Go to admin > Content > Configuration > Edit > HTML Head > Scripts and Style Sheets and paste it on its path.
- STEP 6

- Go to the Homepage > You need to enable the managing program by clicking on enable. Then you will be able to work on the Google Customer Review extension.
- How To Configure
- STEP 7
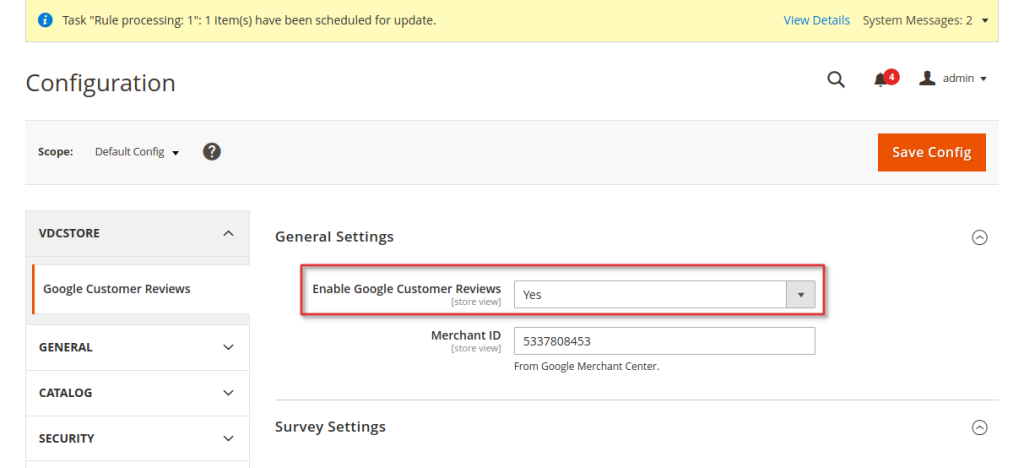
- To enable the Google customer review extension you need to go to Configuration and then click on Google customer reviews in the general setting you will get twooptions yes or no. Click on yes to enable Google customer reviews and save configuration. And then Save Config to proceed
- STEP 8
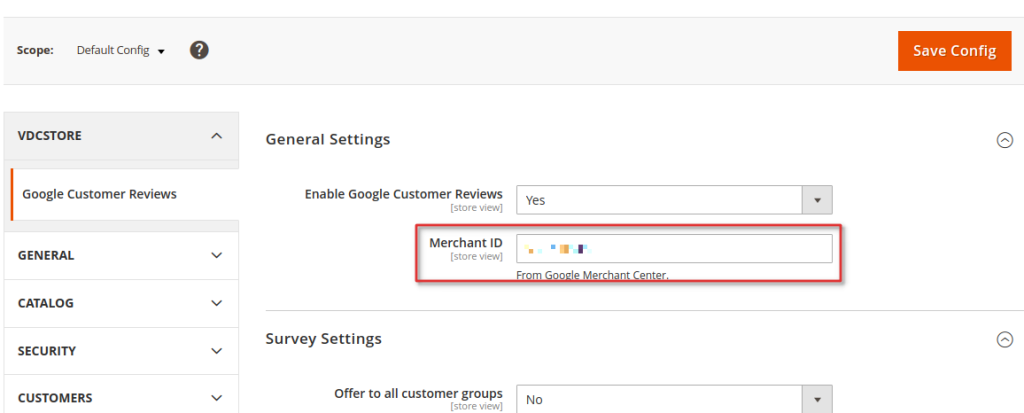
- For the next step, you need a Merchant ID
- Create your Merchant ID from Google Merchant Center (https://www.google.com/retail/)
- After activating you will get your merchant ID from Google Merchant Center.
- Copy that ID and paste it into your extension in the Merchant ID column and click on Save Config to proceed
- STEP 9

- After Merchant ID move forward to the Survey Settings
- Offer to all customer groups: You will see a column of offers to all Customer groupswhere you will have 2 options Yes or No.
- If you select YES then all your customers can see your offer.
- If you select NO then the groups of customers will be able to see the offer.
- Note* if you select NO, you can create groups such as General/Wholesaler/Retailer.
- Default Estimated Delivery Time:- Trigger email by Google based on Estimated
- Delivery Time; even if you select 0 it will take 2-3 days to get your email.
- STEP 10
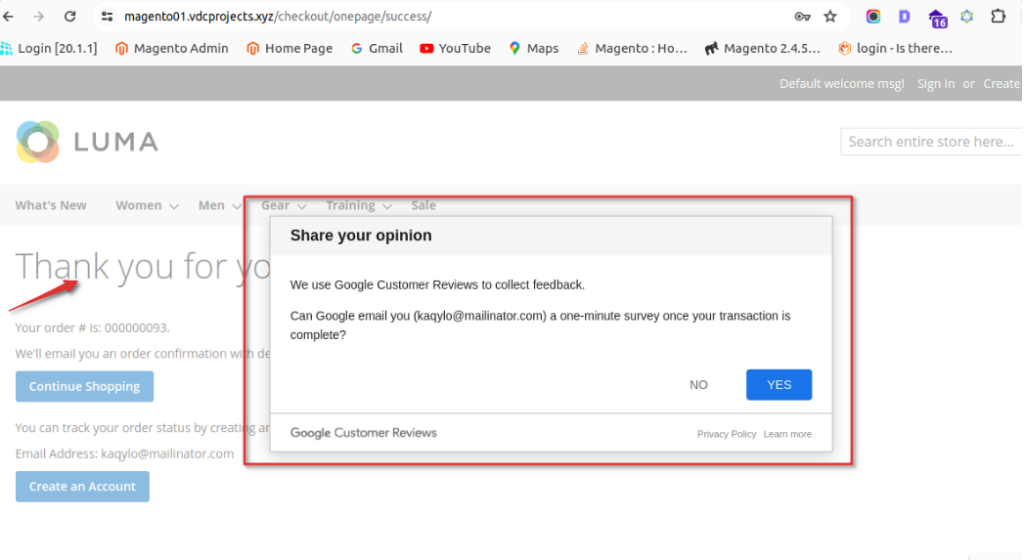
- Once you’re done getting back on the front end after placing your order you will see a popup.
- Allow customers to select yes for participation and they will receive a popup on the Thank you page.
- STEP 11
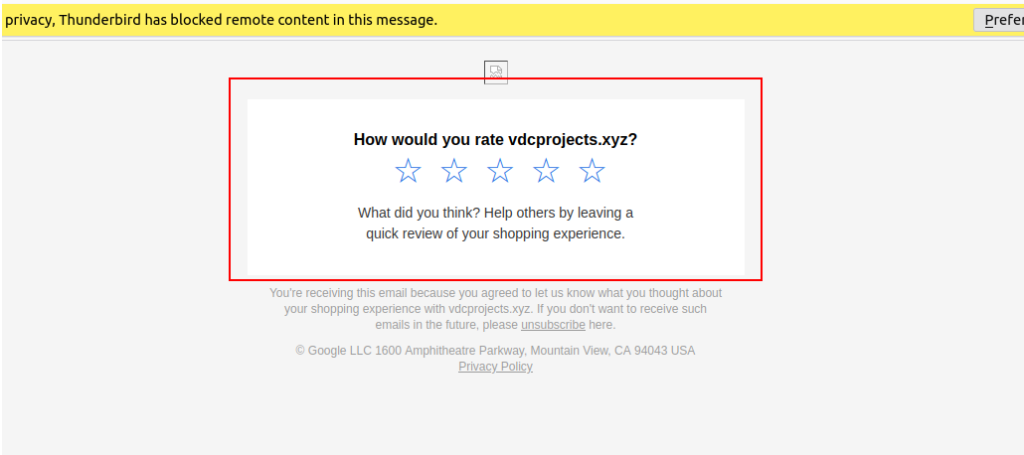
- If a customer agrees, the extension will automatically send an email depending onthe Default Estimated Delivery Time.
- STEP 12

- Go to Admin side > Store > configuration > VDC STORE > Google Customer Review
- In Badge settings when you click on enable badge YES then you will be able to seepop-up feedback in front.
- Frontend
- STEP 13
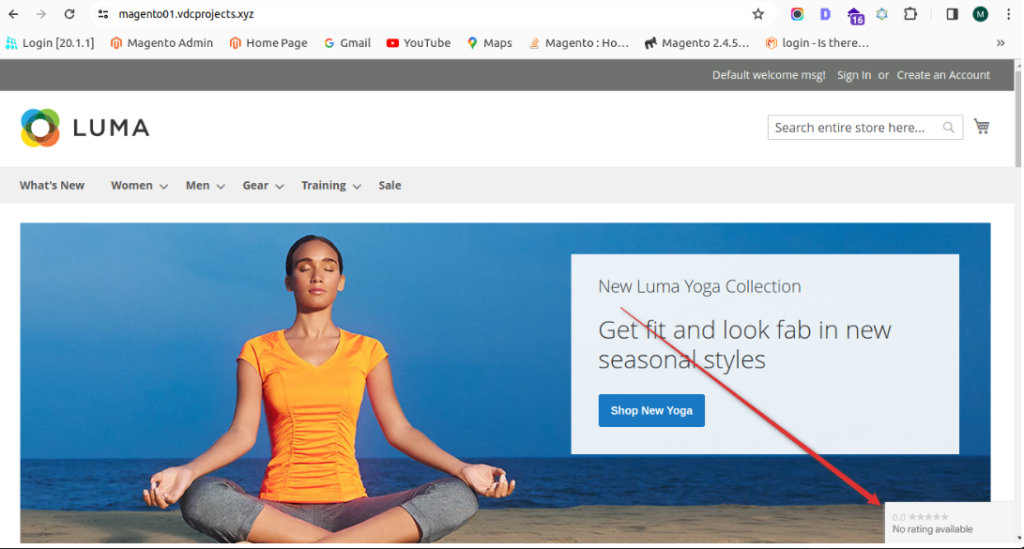
- After completion of the process, a review badge will be showcased on your website.
- Note: For testing purposes use the HTTPS website only.
