The Custom Tabs extension for Magento 2 lets you create and customize tabs to replace default ones on product pages. By organizing content into personalized tabs, you can enhance the user experience and present information more effectively. This extension provides flexibility in arranging product details, helping you deliver a cleaner, more engaging layout tailored to your store’s needs.
Table of Content
Features
- Customize default Magento tabs to suit your specific needs.
- Create targeted tabs for specific audiences using flexible rules.
- Effortlessly edit tab content without complex coding.
- Boost average order value by showcasing related products.
Steps:
- Extension Installation Guide
- Configuration
- Customer Front-End
- Extension Installation
- Download the zip file
- Extract and put it into /app/code/
- Open CLI in the Magento directory and follow the below commands:
- php bin/magento setup:upgrade
- php bin/magento setup:di:compile
- php bin/magento setup:static-content:deploy
- php bin/magento cache:clean
- php bin/magento cache:flush
- Configuration:
STEP 1
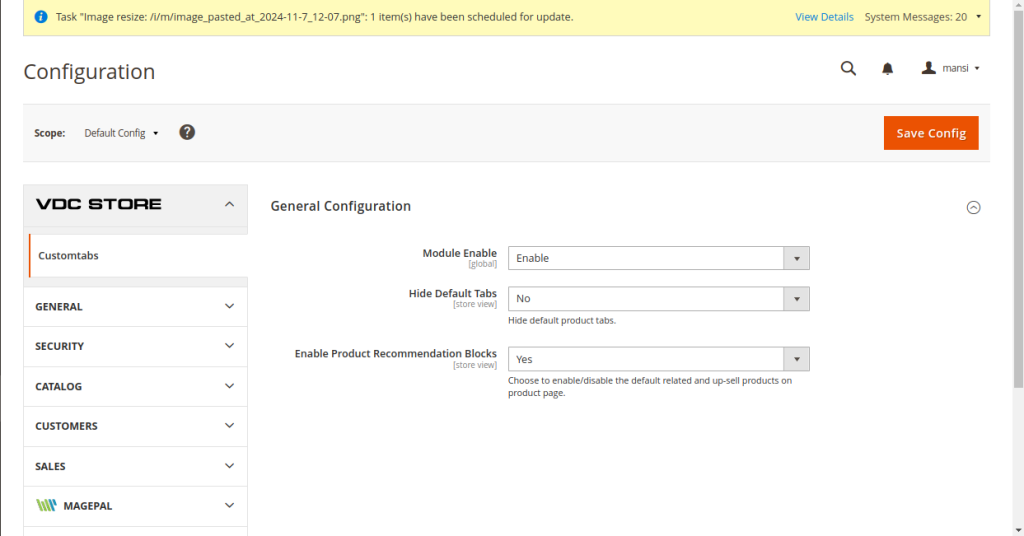
Go to Admin => Stores > Configuration > Vdcstore > Customtabs
General Configuration
Module Enable: Select ‘Yes’ to enable this extension.
Hide Default Tabs: Choose ‘No’ if you want to keep the default tab visible, or select ‘Yes’ if you want to hide the default tab.
Enable Product Recommendation Blocks: Select whether to enable or disable the default related and up-sell products on the product page.
STEP 2
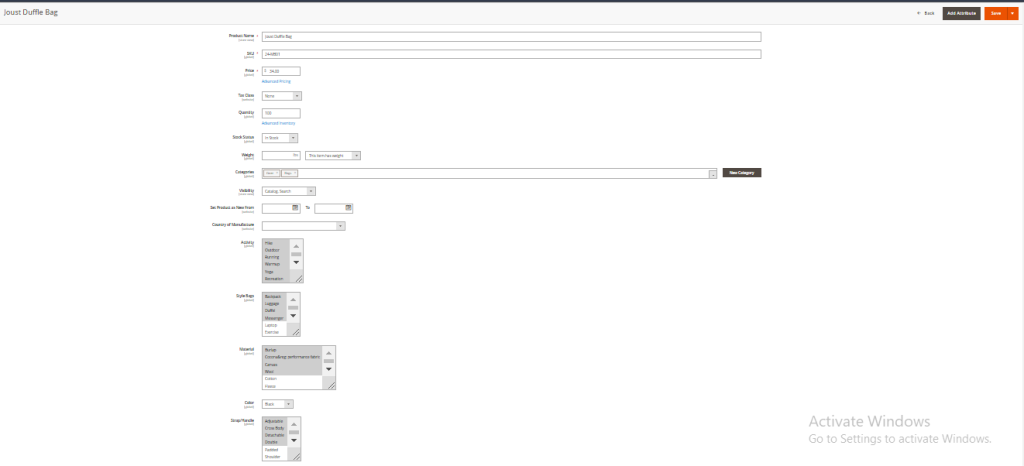
Go to catalog > products > Edit product.
Users can edit the particular product and also add various conditions such as activity , material , color, style , features in the particular product.
STEP 3
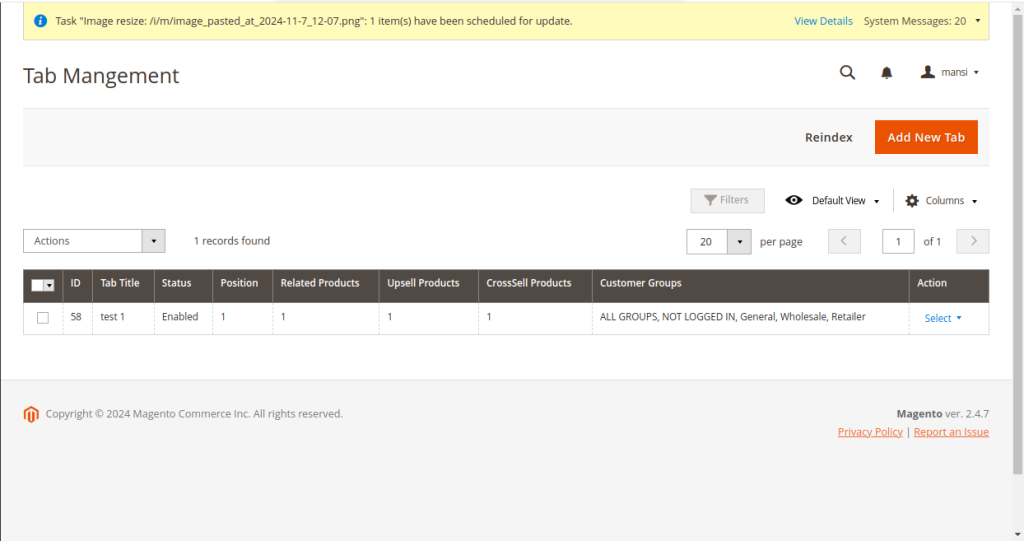
Catalog => Product Tabs => Product Tabs Management
Where you’ll find a grid displaying all product tabs, including default tabs such as Details, More Information, and Reviews. The grid provides details like Tab ID, Title, Status, Position, and an Edit link.
STEP 4
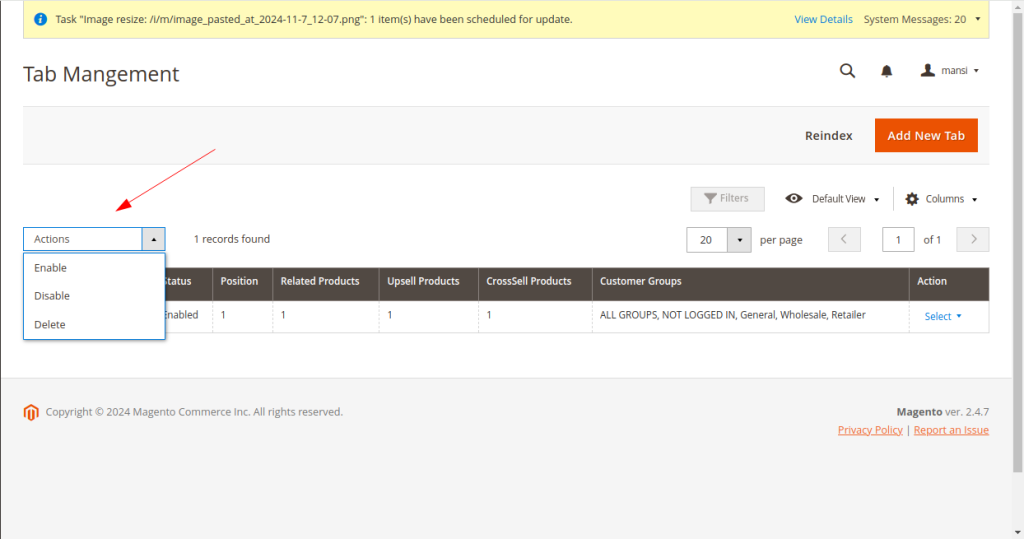
Explore the Action field to select options such as Enable, Disable, or Delete for the chosen tabs.
Add New Tab: Click this button to create a new tab. You will be redirected to the tab editing page.
Reindex Rule: Since this module enables assigning tabs to products based on rules, you must click this button to remove the tab from a product when it no longer matches the rule.
This grid is store view-enabled, allowing you to take actions and edit custom tabs within a specific store view scope. The module supports bulk actions, including deleting, enabling, and disabling multiple product tabs directly from the grid.
Steps to follow:
– Select product tabs by checking the box in the first column.
STEP 5
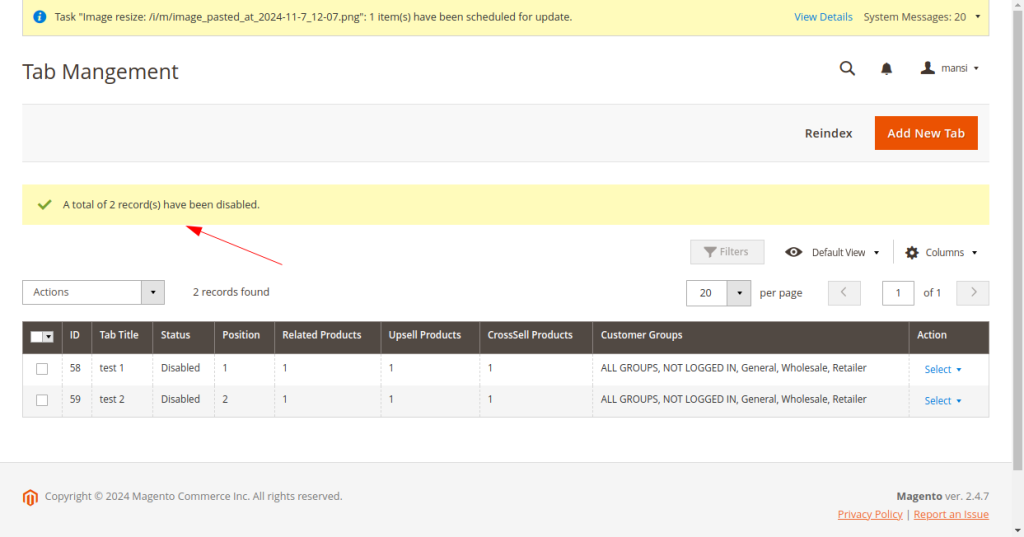
If you select the ‘Disabled’ option, a pop-up will appear.
Create and Edit Product Tabs:
- To create a new tab, click the Add New Tab button.
- To edit an existing tab, click the Edit link for that tab in the product tabs grid.
- This will open the Edit Tab page, where you can begin designing the tab.
Note: When you edit a tab in All Store Views, any duplicated tabs across all store views will also be updated. However, if you edit a duplicate tab in a specific store view, the original tab in the All Store Views grid and other store views will remain unchanged.
STEP 6
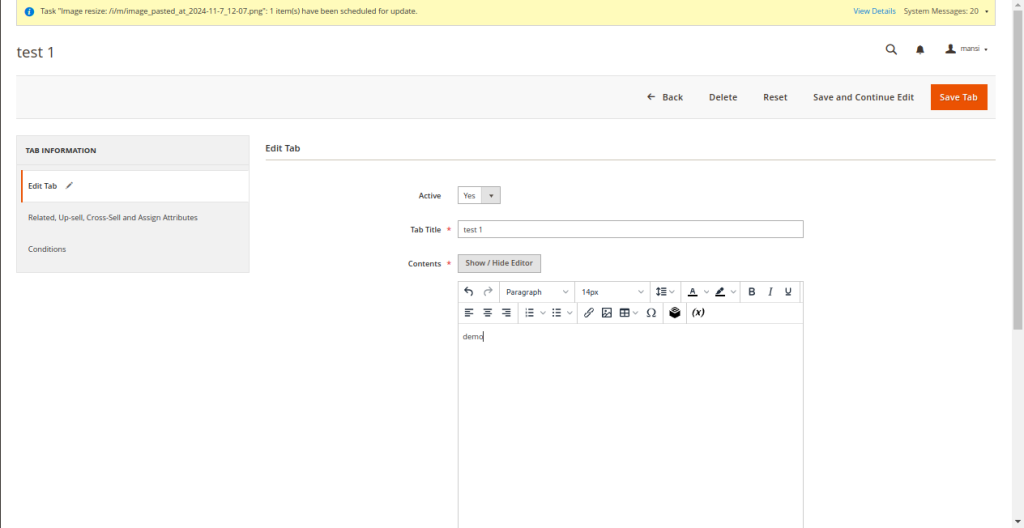
Tab Configuration Options:
Select Yes to enable the tab or No to disable it.
Title: Enter the title for the tab.
Content: Edit the content to be displayed on the tab. Use the WYSIWYG editor to add widgets, variables, and more.
Customer Groups: Select multiple customer groups that will have access to view the tab.
Position: Enter a number to set the tab’s sort order. Tabs with smaller numbers will appear first.
In addition to the content and general settings above, you can enhance the tab by adding product recommendation blocks and product attributes as needed.
STEP 7
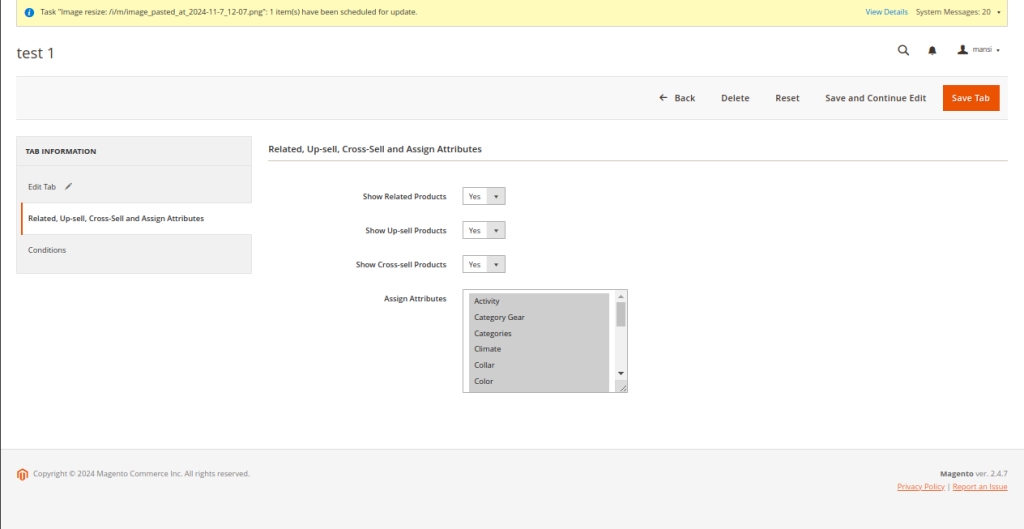
Related, Up-sell, Cross-sell, and Assign Products:
- Show Related Products: Select Yes to add the Related Products block to the tab, or No to exclude it.
- Show Up-sell Products: Select Yes to add the Up-sell Products block to the tab, or No to exclude it.
- Show Cross-sell Products: Select Yes to add the Cross-sell Products block to the tab, or No to exclude it.
Assign Attributes:
Choose the product attributes from the grid to display the attribute values on the tab.
After making your selections, click the Conditions button to complete the setup.
STEP 8
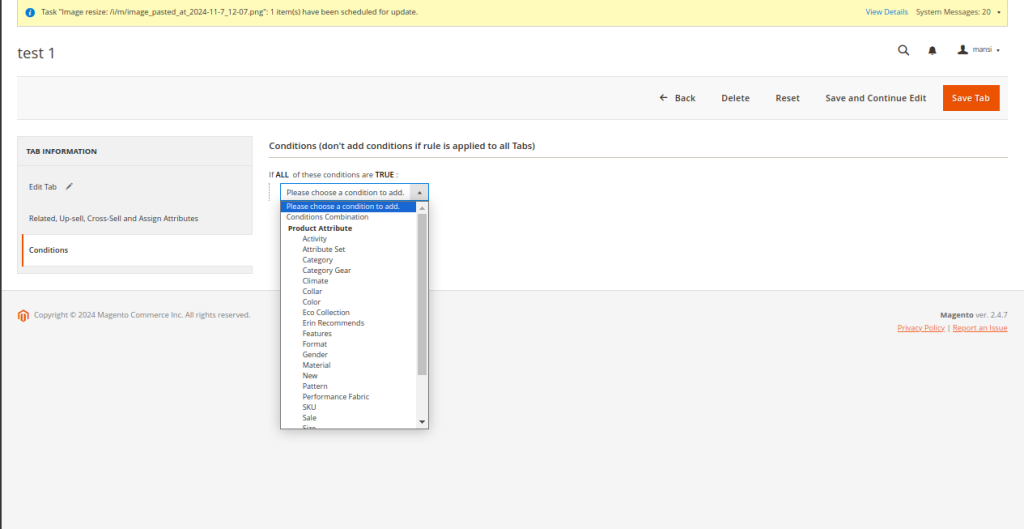
Click on the (+) icon to open the condition selection field.
In this field, you can choose an option and easily assign the tab to multiple products by selecting the desired conditions such as:
- Conditions Combination
- Product Attribute
- Activity
- Attribute Set
- Category
- Category Gear
- Climate
- Collar
- Color
- Size, etc.
STEP 9
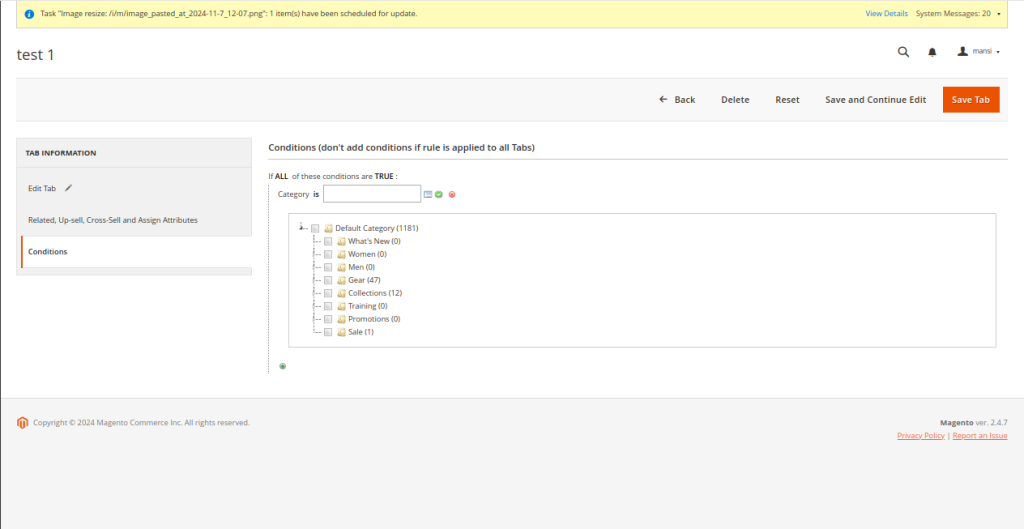
After selecting the products, click the Save Tab button to save your settings.
STEP 10
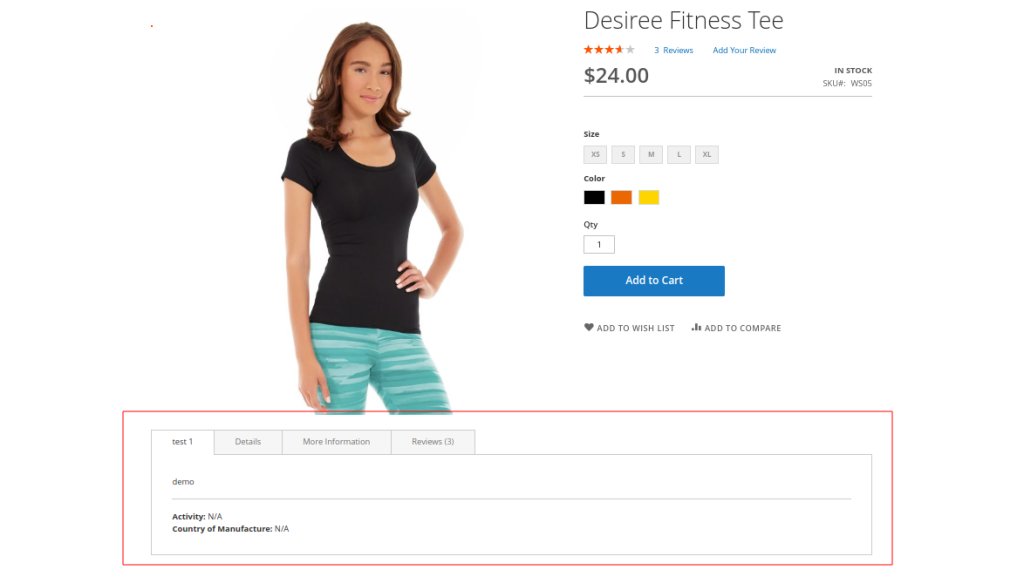
- Customer Front-End:
These tabs will be applied to the products replacing the standard tabs on the frontend product pages. This means the default tabs will be disabled.
STEP 11
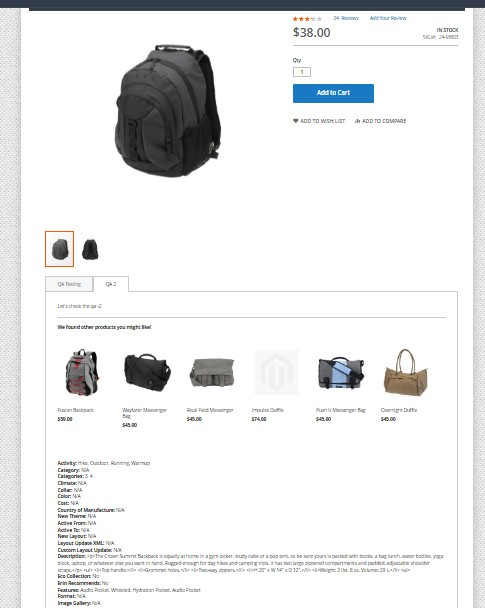
When selecting cross-sell, up-sell, or related products, the product images are displayed in the product tabs on the frontend.
