The Custom Checkout Fields extension for Magento 2 allows store owners to personalize the checkout page by adding extra fields to gather additional customer information, such as order details, preferences, or comments.
Table of Content
Features
- Add up to 8 custom fields (text & text-area) to the checkout page.
- Collect additional order-related information from customers.
- Customize labels for each field.
- Control visibility of custom fields on the checkout page.
- Arrange the order of custom fields as needed.
- Show custom fields on the customer’s Order View page.
- Display custom field data in admin’s Order View, invoices, shipments, and credit memos.
- Ensure smooth order fulfillment.
Steps:
- Extension Installation Guide
- Configuration
- Frontend
- Backend
- Extension Installation
- Download the zip file
- Extract and put it into /app/code/
- Open CLI in the Magento directory and follow the below commands.
- php bin/magento setup:upgrade
- php bin/magento setup:di:compile
- php bin/magento setup:static-content:deploy
- php bin/magento cache:clean
- php bin/magento cache:flush
- Configuration
STEP 1
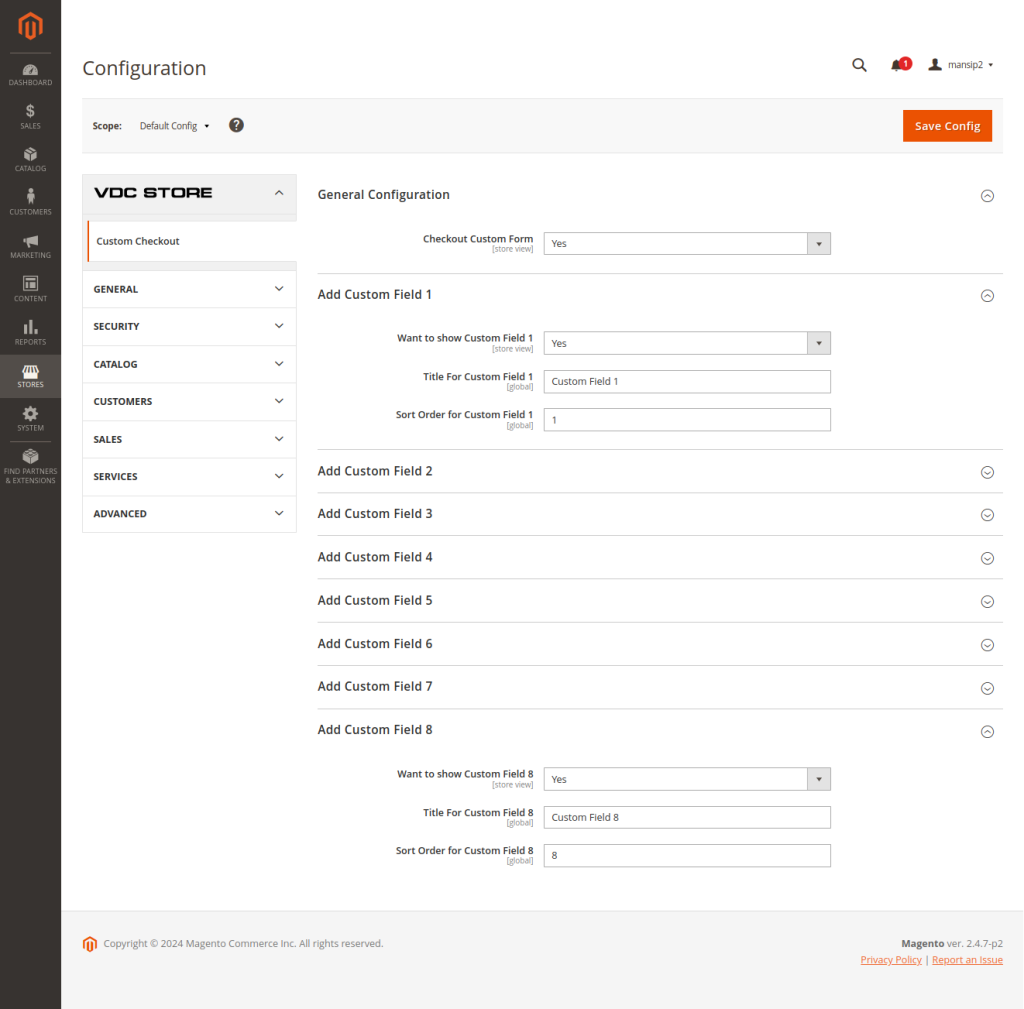
Go to Admin => Stores => Configuration => Vdcstore => Custom Checkout Fields
Checkout Custom Form: Select ‘Yes’ to Enable or select ‘No’ to Disable the extension from this section.
Add Custom Field 1:
-Title for Custom Field 1: Enter the desired title for your custom field here.
-Display Custom Field 1: Choose YES to show the custom field, or NO to hide it.
–Sort Order for Custom Field 1: Specify the sort order number to determine where the field will appear.
This process allows you to add multiple custom fields by selecting ‘Add Custom Field 2, 3, 4,’ and so on.
After clearing the cache, navigate to the frontend page, add a product to the cart, and proceed to the checkout page.
Note: Fields 1, 2, 3, and 4 are designated for text custom fields, while Fields 5, 6, 7, and 8 are for textarea custom fields.
STEP 2
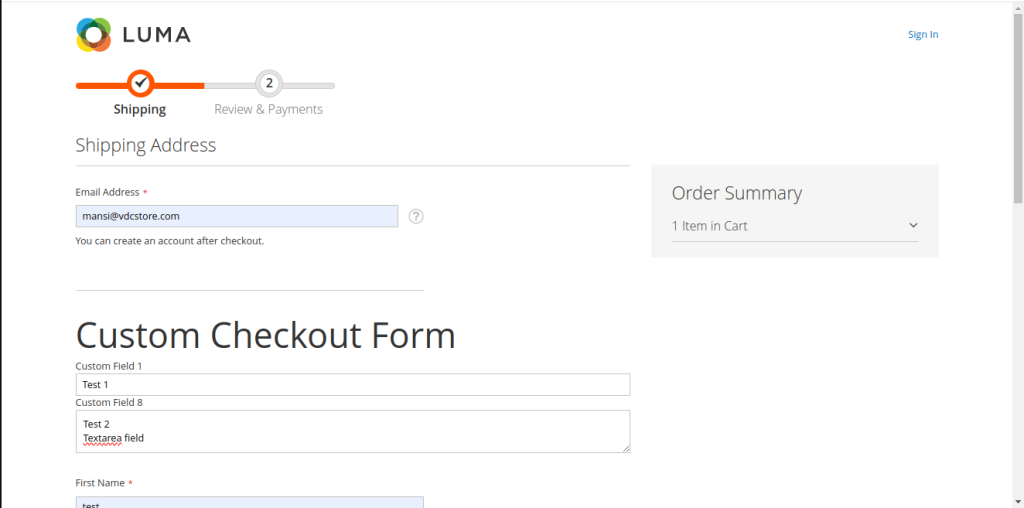
- Frontend
Note: It is not compatible with multiple shipping addresses.
This Custom Check Form is for the guest users.
Custom checkout forms will be displayed on the front side.
STEP 3
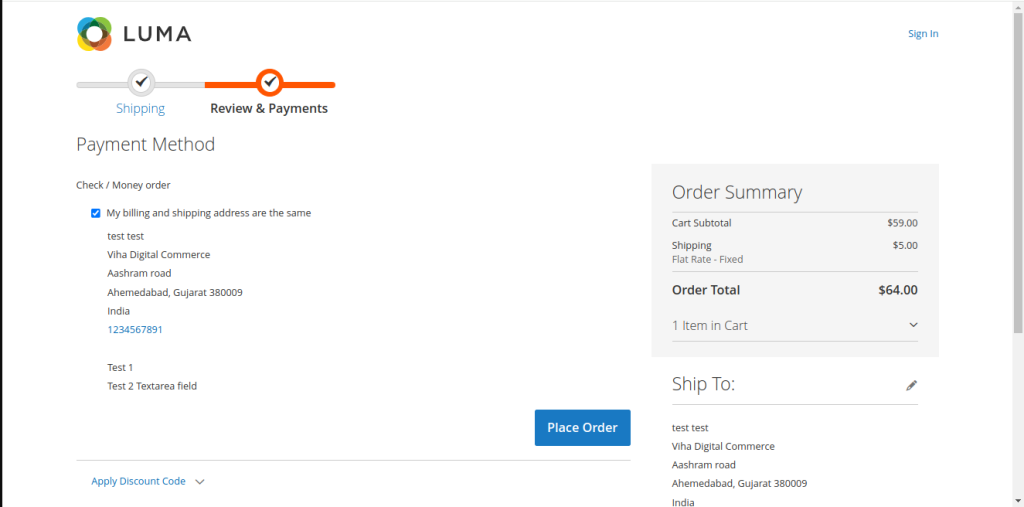
The details you have filled above on the Custom Checkout form will be displayed here.
STEP 4
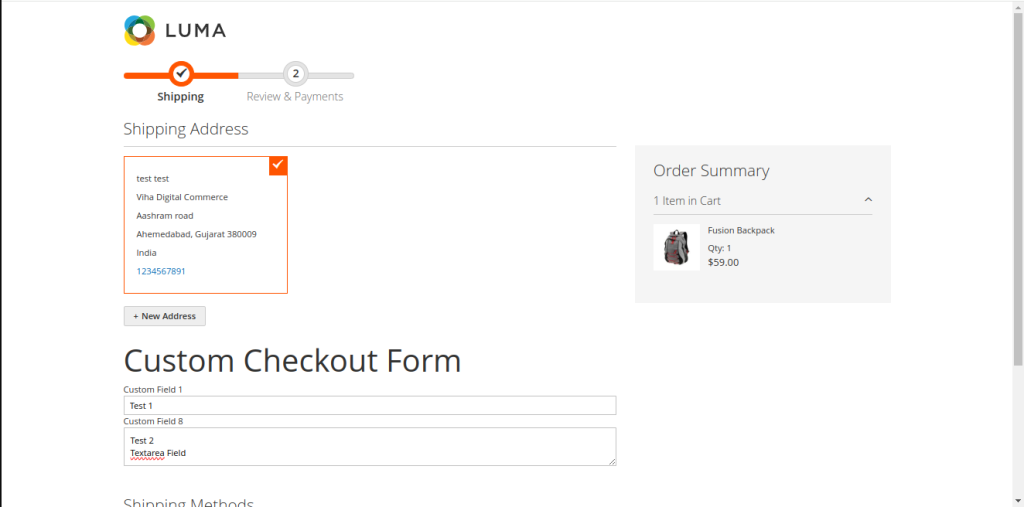
This Custom Checkout Form is for login users.
Custom checkout forms will be displayed on the front side.
STEP 5
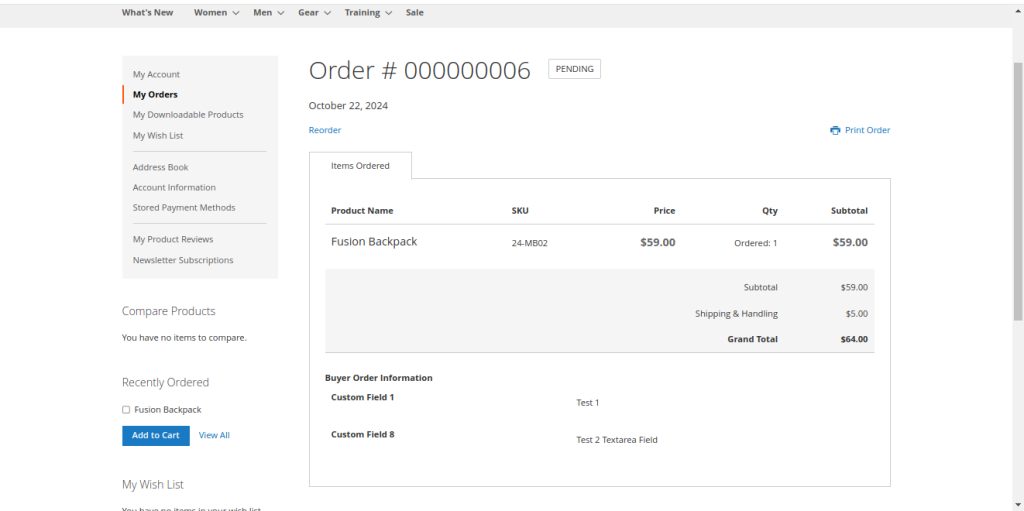
Here is the Order where customers can see their product details and also custom fields for shipping, invoice, and credit memo details will be displayed on the frontend for customers to view.
STEP 6
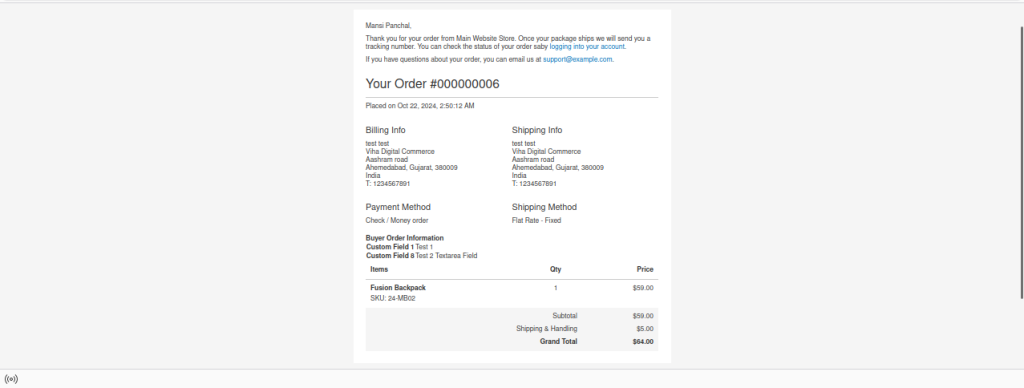
Custom fields will be displayed on order email mail and also displayed on shipping, invoice, and credit memo email
STEP 7
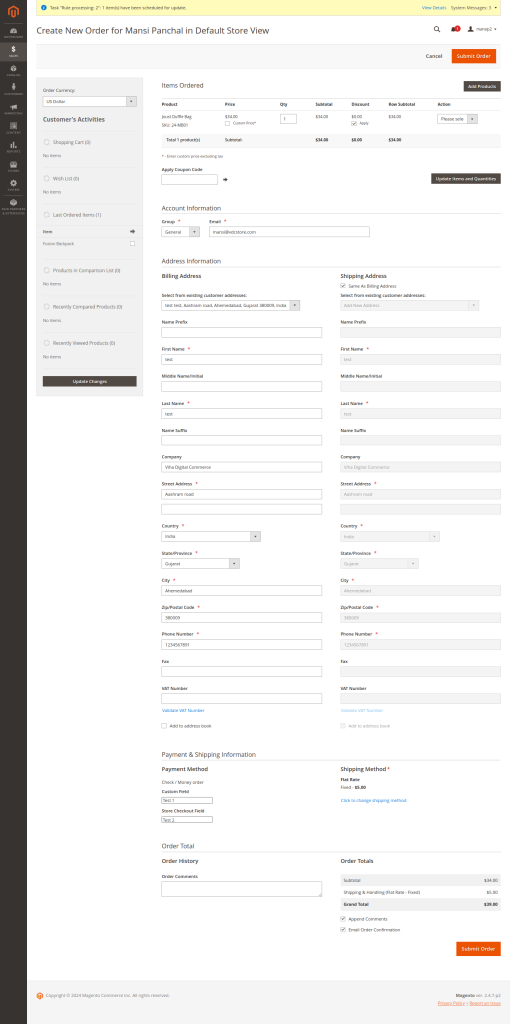
- Backend
Navigate to Sales => Create New Order. Just like in the frontend, where you can fill out custom checkout fields, we can implement the same functionality in the backend.
STEP 8
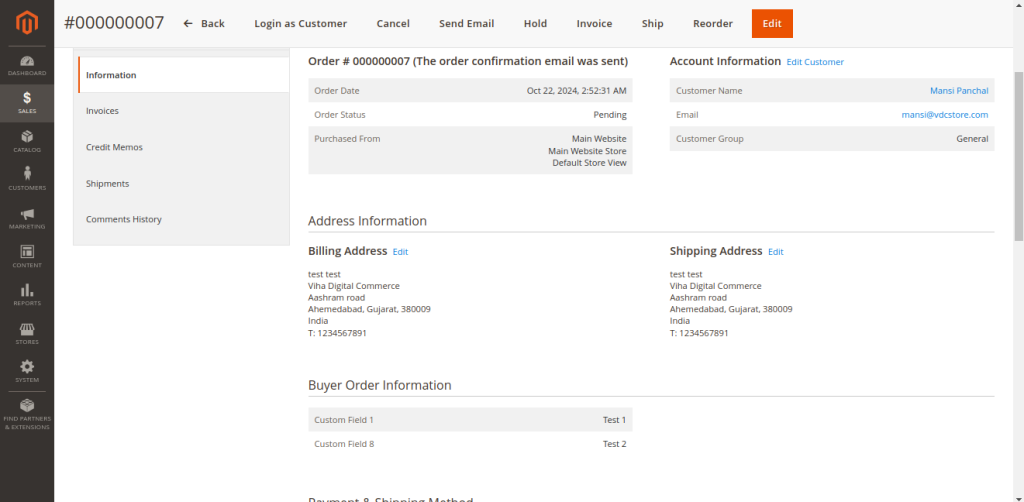
The details which we have filled above will be displayed here on Order view page and als display on shipping, invoice and credit memo page.
