Also View Product extension for M2 allows your store to product suggestion sections. This extension automatically monitors displays and tracks related products based on the actual and real behavior of the customers with each item. Also view products will be displayed in the frontend andyou can customize it from the backend.
Table of Content
Features
- It displays related products in widgets for the Also View Product extension to enhance user engagement and better shopping experience.
- It automatically collects customer’s purchase data.
- Admin can customize product suggestion rules.
Steps:
- Extension Installation Guide
- Configuration
- Extension Installation
- Download the zip file
- Extract it and put it into /app/code/
- Open Cli in the Magento directory and follow the below commands:
- php bin/magento setup:upgrade
- php bin/magento setup:di:compile
- php bin/magento setup:static-content:deploy
- php bin/magento cache:clean
- php bin/magento cache:flush
- Configuration:
- STEP 1
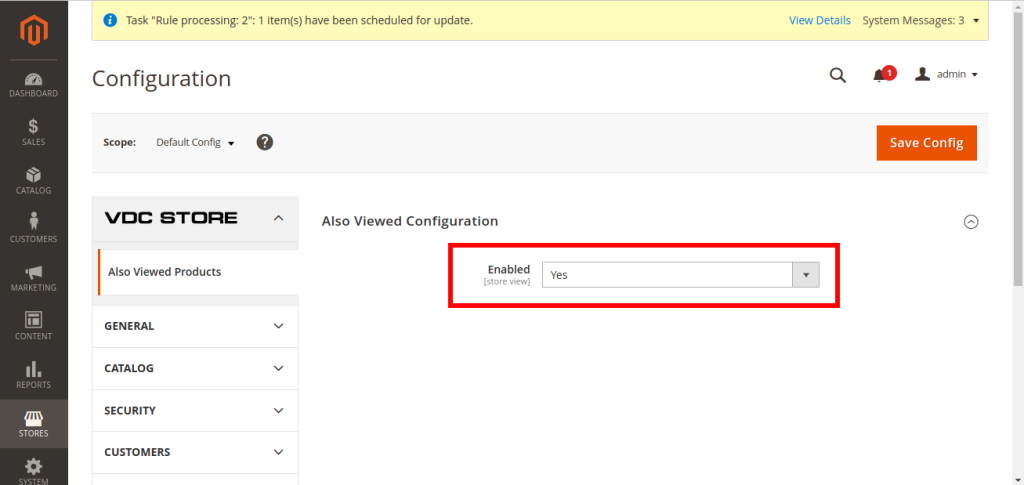
- Go to Admin > Stores > VDC STORE > Also Viewed Products
- Also Viewed Configuration: Enable the Also Viewed configuration and then click on SaveConfig
- STEP 2
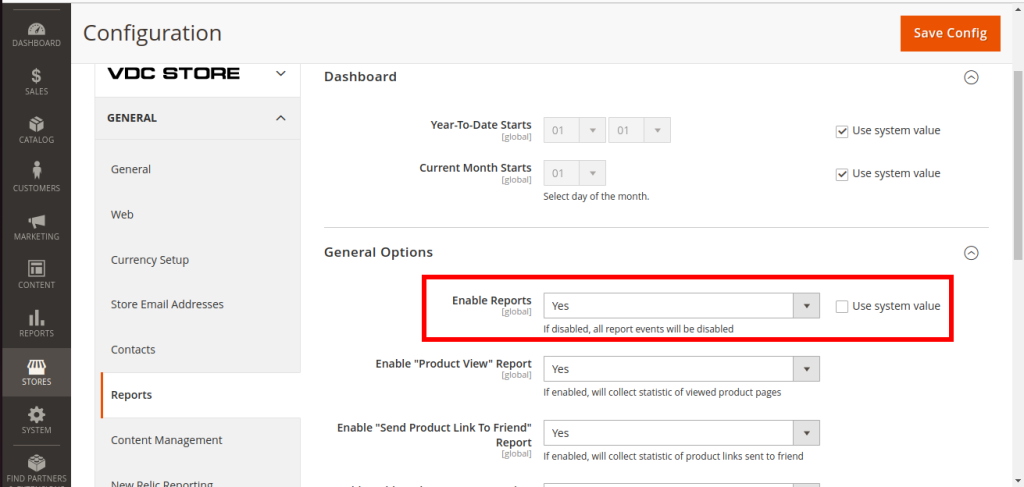
- Go to VDC STORE > General > Reports
- Enable Reports: Enable Reports by selecting ‘YES .
- If you select ‘NO it means all your report events will be disabled.
- You can also select Use System Value .
- STEP 3
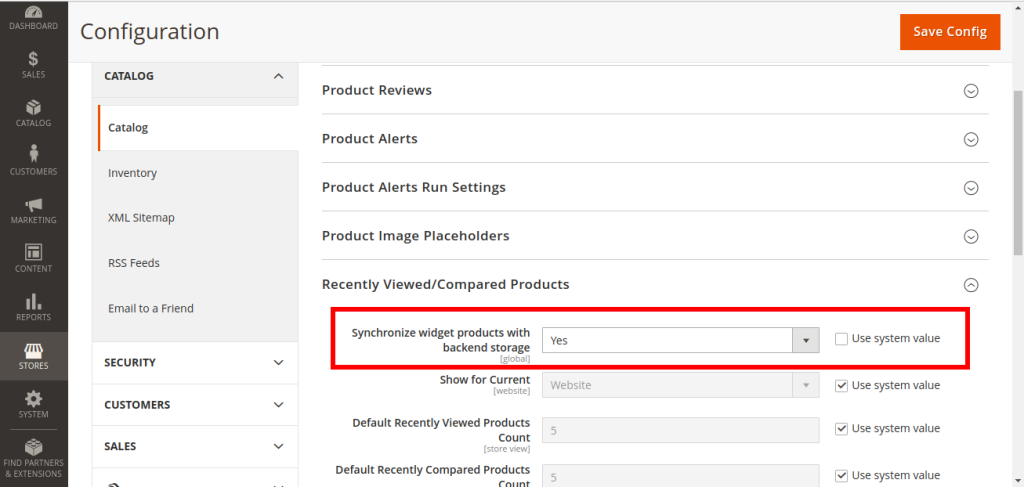
- Go to Stores > General Configuration > Catalog > Recently Viewed/Compared Products
- Synchronize widget products with backend storage:
- Select ‘YES and Save Config.
- STEP 4
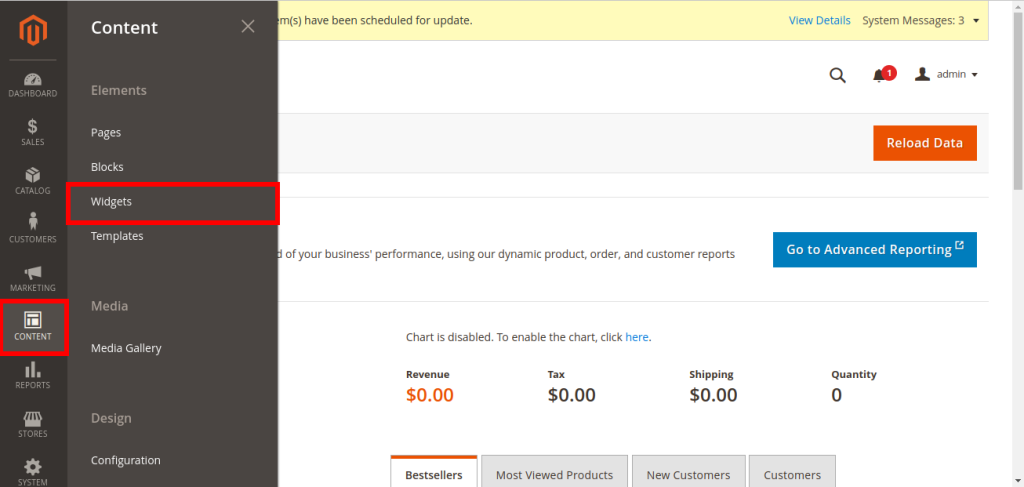
- Go to Admin > Content > Widgets
- STEP 5
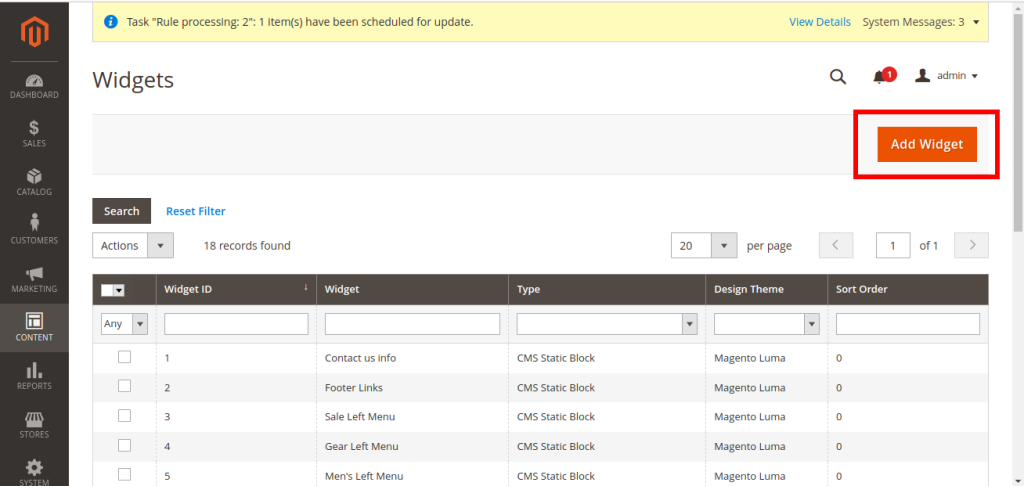
- Here you will see a list of data like Widget ID, Widget, Type, Design Theme,and Sort Order.
- You can add a new widget by clicking on Add Widget.
- STEP 6
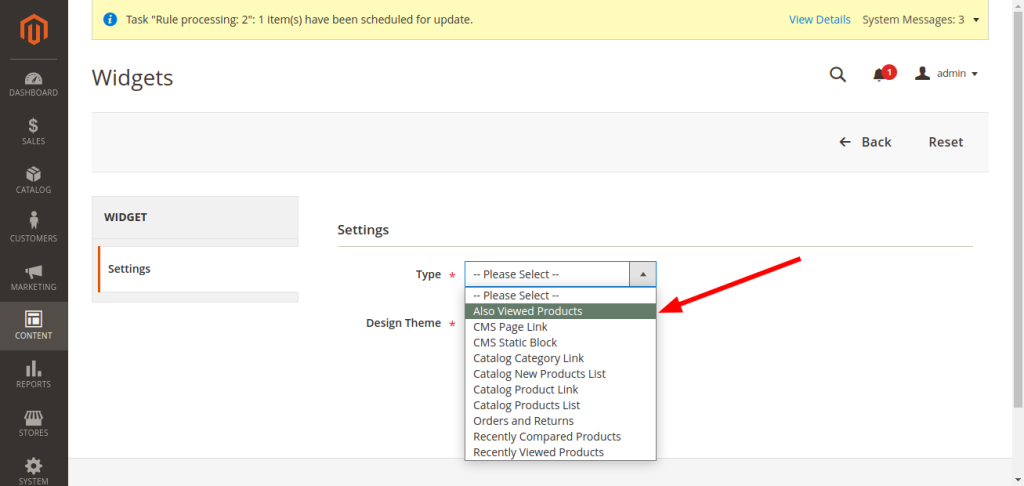
- Widget > Settings
- Type: Select Also Viewed Products.
- STEP 7
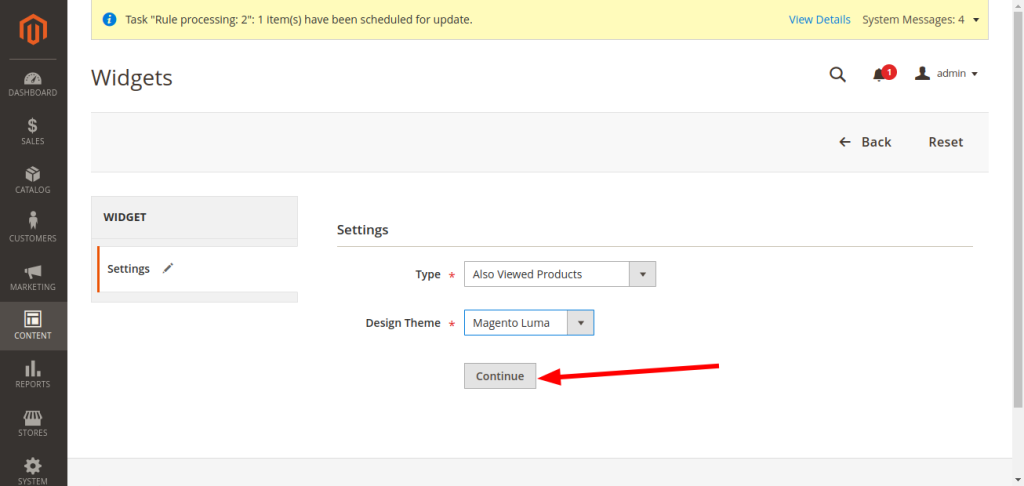
- Design Theme: Select your design theme.
- Magento Siders
- Magento Luma.
- Click on continue and proceed.
- STEP 8
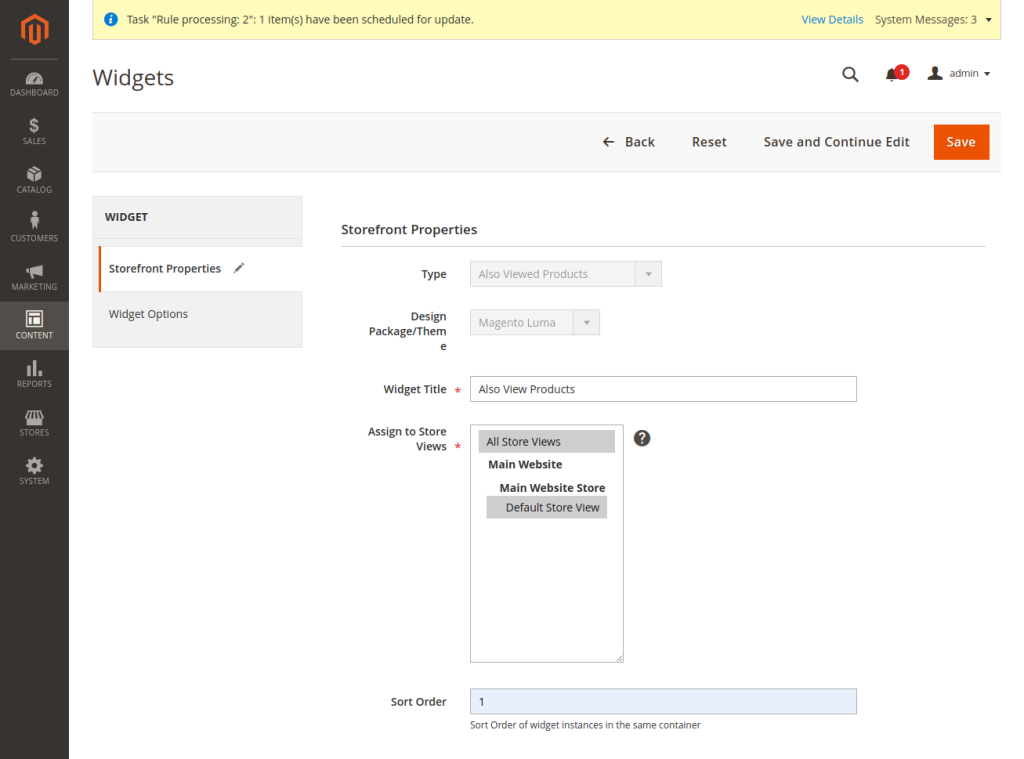
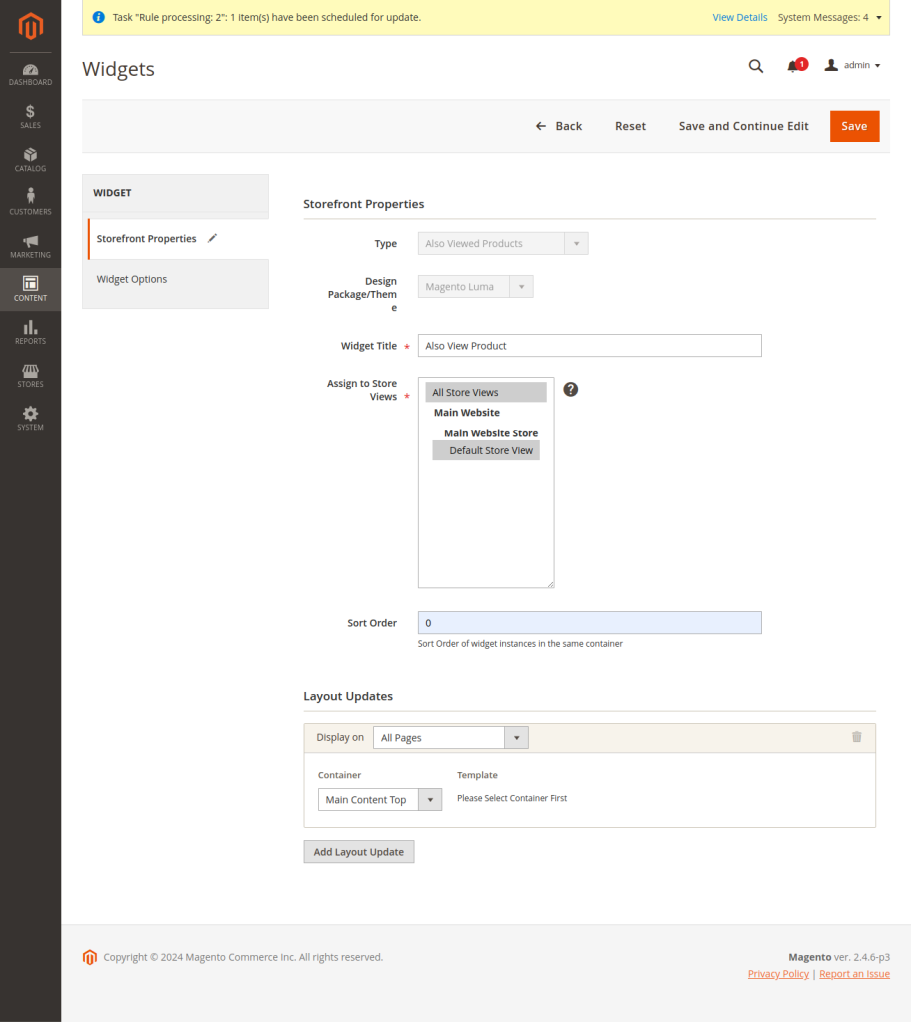
- VDC STORE > Content > Widget > Storefront Properties
- Widget Title: Enter a title/name for the widget.
- Assign to Store Views: Select your store view.
- All Store Views
- Main Website
- Main Website Store
- Default Store View
- Sort Order: Enter a number that will specify the order of this widget in the same container.
- STEP 9
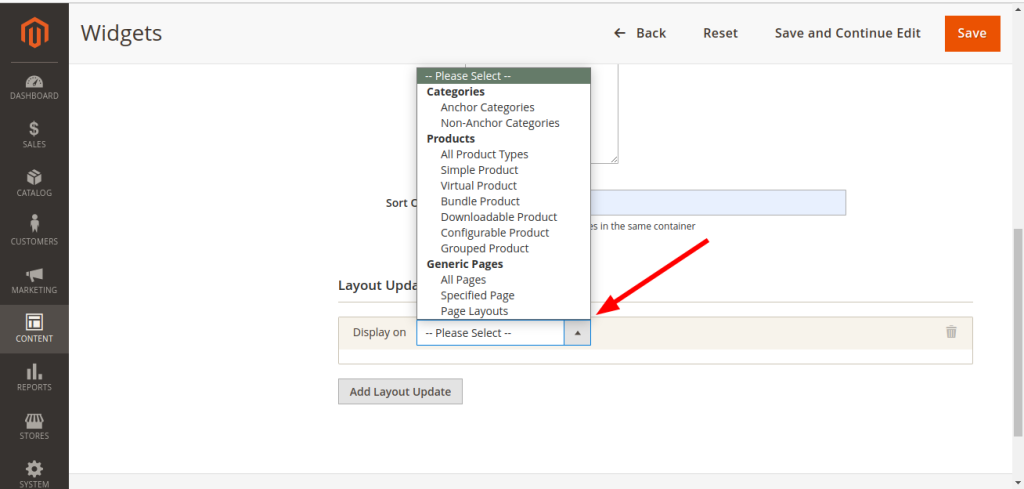
- Layout Updates: Click on Add Layout Updates to show display options. after that select Display on the option:
- Categories:
- Anchor Categories
- Non Anchor Categories
- Products:
- All Product Types
- Simple Product
- Virtual Product
- Virtual Product
- Downloadable Product
- Configurable Product
- Grouped Product
- Generic Pages:
- All Pages
- Specified Page
- Page Layout
- STEP 10
- VDC STORE > Content > Widget > Widget Options
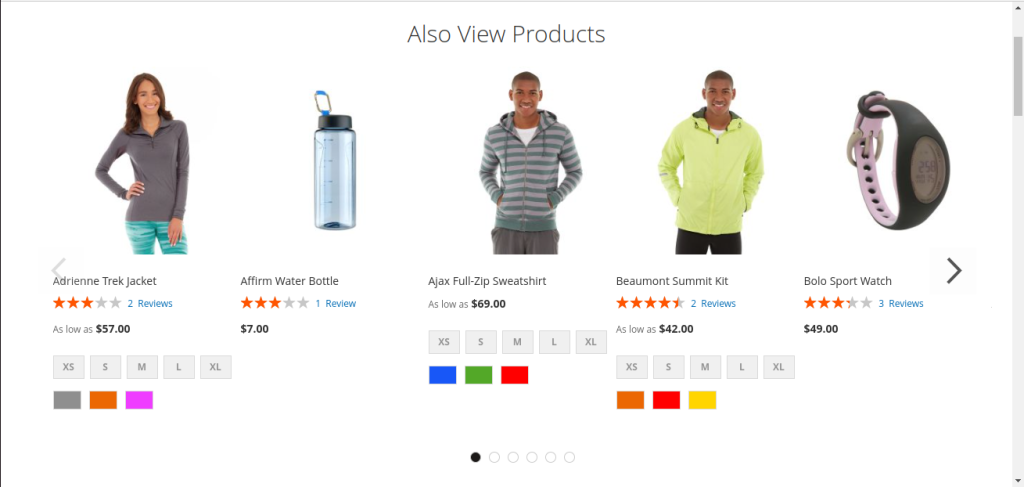
- Title: Edit title for Customer Also Viewed Products which will be shown on the frontend side.
- Only Show Products from the Same Category: Select ‘Yes to see Also Viewed Products on the frontend.
- Limit Number of Products to Be Shown: Enter a number to set the number of products that will be shown on the Also Viewed Product. If you don t fill the value then the default value willbe set to 10 automatically.
- Display as: You can select your display as Slider or ‘Grid .
- Number of Products per View: Set the number of items to be displayed.
- Sort by: Select the categories such as:
- Random
- Product Name (A-Z)
- Product Name (Z-A)
- Product Price (High Low)
- Product Price (Low High)
- Show in Stock Products only: select ‘YES to show in stock products, if you select ‘NO thenit will show you both in stock products and out of stock products.
- Enable Add to Cart Button: Select ‘YES to display cart buttons or if you select ‘NO it willdisable them
- Enable Add to Wishlist: Select ‘YES to display wishlist products or if you select ‘NO it willdisable them.
- Enable Add to Compare: Select ‘YES to enable to compare products with each other or ifyou select ‘NO it will disable them.
- Enable Reviews Link: Select ‘YES to enable review links or if you select ‘NO it will disablethem.
- STEP 11
- Enable Reviews Link: Select YES to enable review links or if you select NO it will disable them.
