Harness ourvAI Content Builder for Magento 2 to automatically generate actionable content for your online store, maximizing productivity and efficiency. Expand your audience and increase sales with highly relevant product descriptions and metadata tailored to your store’s unique characteristics and business needs. The AI Content Generator is a lightweight solution designed to help store owners boost productivity and save significant time by automatically creating compelling descriptions and metadata for their online pages.
Table of Content
Features
- Content Generation: Create engaging content for product, category, and CMS pages.
- SEO Meta Data: Easily add meta data for improved visibility.
- Mass Action Editing: Quickly update content and metadata for multiple products and CMS pages.
- Page Builder Integration: Craft dynamic texts with our Page Builder.
- Multilingual Support: Generate content in various languages.
- Store View Variations: Customize content for different store views.
- Blog Pro Compatibility: Enhance content marketing with Blog Pro.
- Email Templates (PRO): Design professional email and newsletter templates.
- Advanced AI Support: Utilize GPT-3, GPT-4, GPT-4o, and GPT-4 Turbo for
- top notch content.
Steps:
- Extension Installation Guide
- Configuration
- Frontend
- Extension Installation
- Download the zip file
- Extract and put it into /app/code/
- Open Cli in the Magento directory and follow the below commands:
- php bin/magento s:up
- php bin/magento s:d:c
- php bin/magento s:s:d -f
- php bin/magento i:rei
- php bin/magento c:f
- php bin/magento cron:install
- php bin/magento cron:run
- Configuration:
- Now let’s proceed with AI Content Generator general settings.Stores > Configuration > VDCStore => AI Content Generator
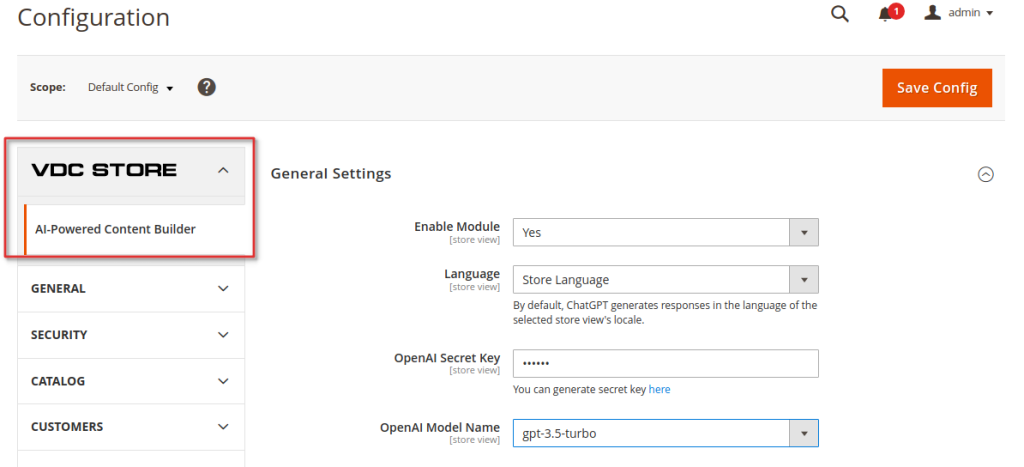
- Enable Module set to ‘Yes’ to activate the module.
- Language by default, the VDC generates responses in the language of the selected store view locale. However, you can choose a different language from the dropdown menu
- OpenAI Secret Key: You can enter your generated secret key
- OpenAI Model Name: For now, the following models are available within the module:
gpt-a
gpt-4
gpt-4-turb
gpt-3.5-turbo, etc.

- Generate Content Based on Selected Product Attributes: Here, you can multi-select the attributes that will be used as the basis for the product description. The maximum limit is 1000 attributes.
- Generate Content Based on Custom Attributes: If the desired attributes aren’t available, simply enter the needed attribute codes separated by spaces.

- Temperature: This indicator affects the model’s creativity. A value closer to 2 results in more diverse and random responses, while a value closer to 0 leads to more straightforward and less creative suggestions.
- Short Description Maximum Length This setting for OpenAI determines the maximum number of length for generating short descriptions. You can specify a value between 1 and 3100 length. If using the model text-ada-001`, the limit is up to 2000 lengths.
- Description Maximum Length This setting specifies the maximum number of length for generating descriptions. You can choose a number between 1 and 3900 lengths. If using the model text-ada-001`, the limit is up to 2000 lengths.
- Meta Title Maximum Length This setting controls the maximum number of length for generating meta titles. You can specify a number between 1 and 256 lengths.
- Meta Keywords Maximum Length This setting is for generating meta keywords and allows you to specify a value between 1 and 256 length.
- Meta Description Maximum Length This setting determines the maximum number of length for generating meta descriptions. You can choose a number between 1 and 1024 lengths.

- Replace the Empty Image Tag with a Product Image
When AI generates a description with an empty tag, enabling this setting will replace it with the product image. - Remove the Image Tag
If enabled, this setting will automatically remove the empty tag generated by AI. - Remove the Title
Set to ‘Yes’ to exclude the title from the product description, which is usually the product name. - Stop
This setting defines a sequence of length to limit the length of the generated text. When the model encounters a stop token, it will cease generation and return the current output. - Strings to Exclude
Enter a list of words, separated by spaces, that should be excluded from the generated content. - Content Generation Settings for Category
- Temperature
A temperature closer to 2 results in more random responses, while a temperature closer to 0 leads to more focused and less creative suggestions. - Description Maximum Length
This setting defines the maximum number of length for generating descriptions, ranging from 1 to 3900 length. For the text-ada-001 model, the limit is 2000 length. - Meta Title Maximum Length
Specifies the maximum number of length for generating meta titles, with a range of 1 to 256 length. - Meta Keywords Maximum Length
Defines the maximum number of length for generating meta keywords, also ranging from 1 to 256 length. - Meta Description Maximum Length
Sets the maximum number of length for generating meta descriptions, with a range from 1 to 1024 length. - Stop
This setting designates a sequence of length to limit the length of generated text. When the model encounters a stop token, it will cease generation and return the output generated up to that point. - Content Generation Settings for CMS
-> Temperature This indicator affects the model’s creativity. A value closer to 2 results in more random responses, while a value closer to 0 yields less creative and more focused suggestions.
-> Description Maximum length This setting defines the maximum number of length for generating descriptions. You can specify a value between 1 and 3900 length. If using the model text-ada-001`, the limit is up to 2000 lengths.
-> Meta Title Maximum length This setting controls the maximum number of length for generating meta titles. You can specify a number between 1 and 256 lengths.
-> Meta Keywords Maximum length This setting is used for generating meta keywords, allowing you to specify a value between 1 and 256 length.
-> Meta Keywords Maximum length This setting is used for generating meta keywords, allowing you to specify a value between 1 and 256 length.
-> Stop This setting specifies a sequence of length that, when encountered, will halt further text generation. It helps control the length of the output and prevents the model from producing excessively long responses. When the model encounters a stop token, it will cease generation and return the text generated up to that point.
STEP 1

Go to Catalog > Products > Description > Edit with Page Builder
STEP 2
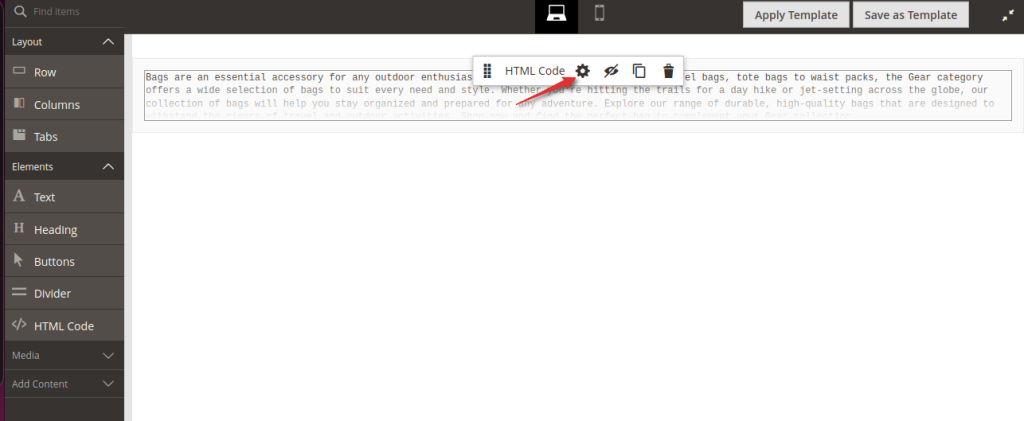
Here you can Edit/Setting your content description
STEP 3
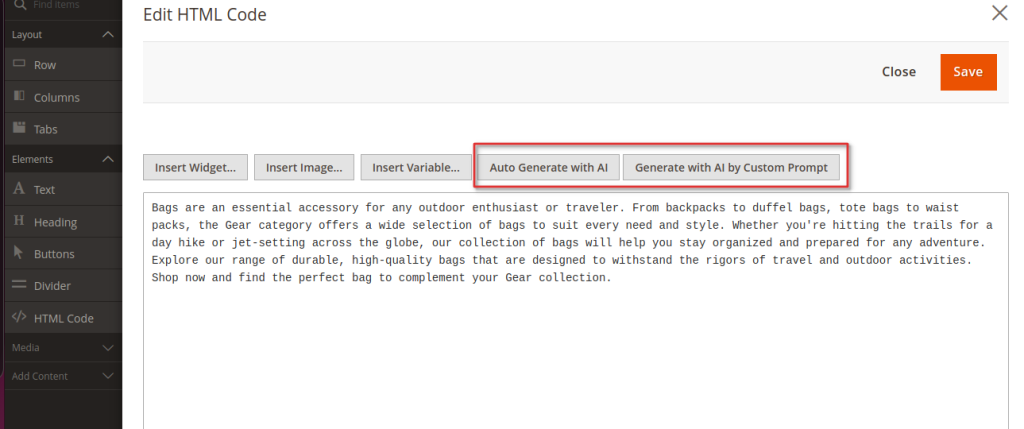
-> Auto Generate with AI Click to create a short product description based on selected attributes. If you have fewer than four attributes, a pop-up will prompt you to enhance your input. If none are filled, a pop-up will guide you to enter details.
-> Generate with AI by Custom Prompt Click to input a specific topic for a custom product description, offering more flexibility than using just attributes.
STEP 4

To get started, go to Catalog > Products > Select the desired product > Search Engine Optimization
URL Key: Enter your URL key such as products.
Meta Title: Enter a meta title for your product. You can either let AI generate a title automatically or create a custom title using your own prompt.
Meta Keywords: Input essential keywords. You can choose to have AI generate them automatically or create custom keywords using your own prompt.
Meta Description: Provide your product description. You can either allow AI to generate a description automatically or write a custom one using your own prompt.
STEP 5
FRONTEND
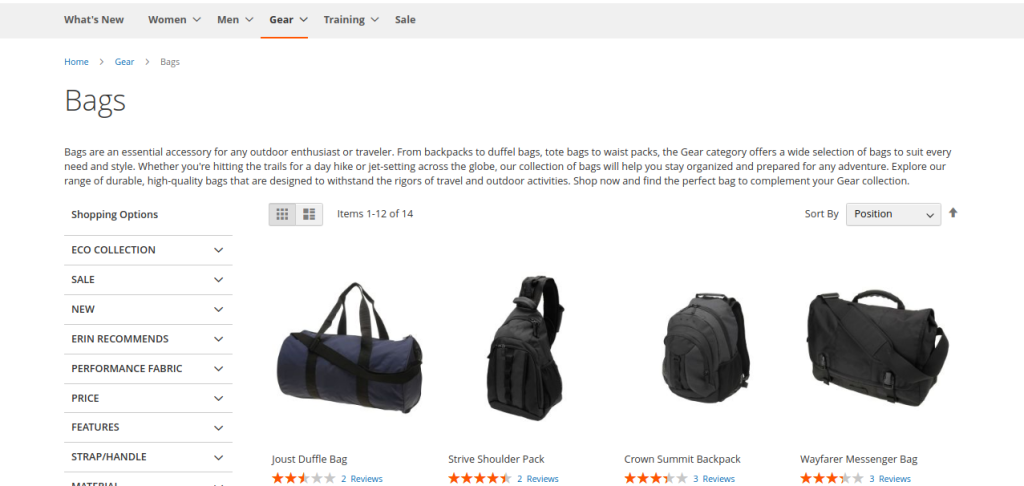
Any content you generate in content categories will be displayed on the frontend.
STEP 6
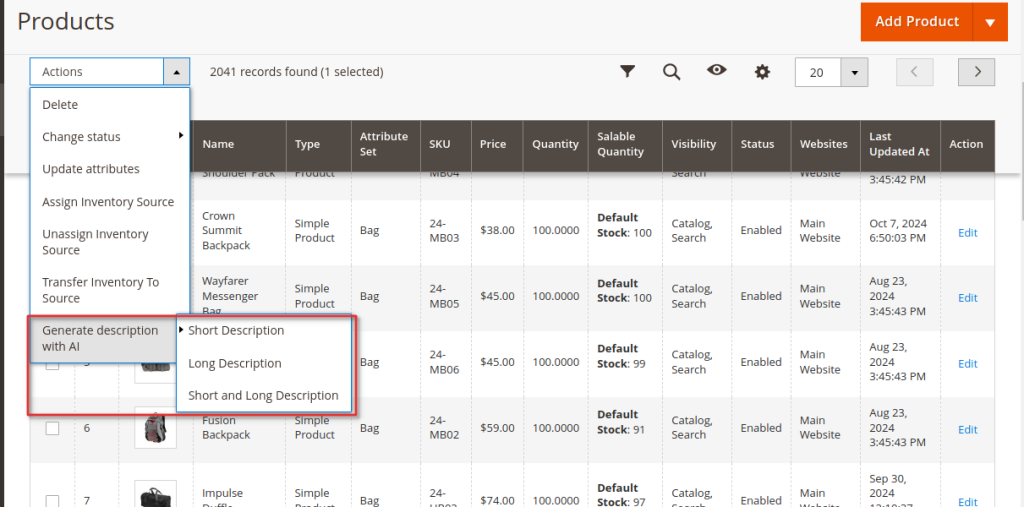
Adding Content to Product Pages via Mass Action
For the ChatGPT AI Content Generator extension, you can update multiple product pages at once. Simply navigate to Catalog => Products, select the products you want, and choose the desired action:
- Short Description
- Long Descriptio
- Short and Long Description
STEP 7

Here, you can create a short product description.
STEP 8

Custom Prompt: You can tailor your content based on the details you provide, including product description, color, and name.
STEP 9

To edit your content click on the Edit/Setting icon.
STEP 10
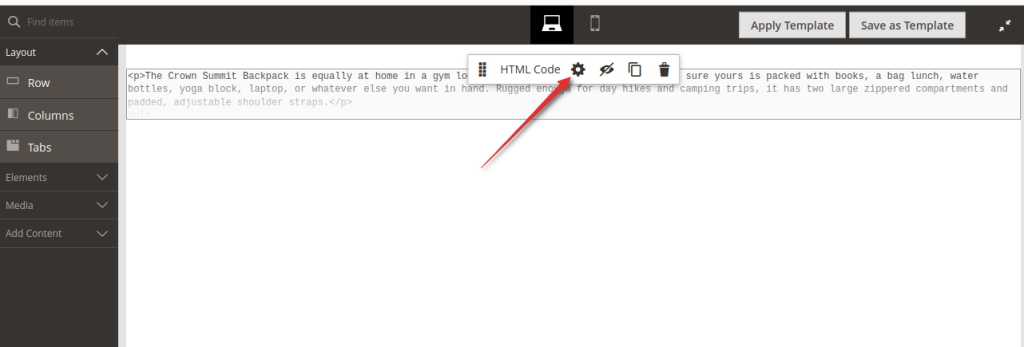
To edit your content click on the Edit/Setting icon.
STEP 11
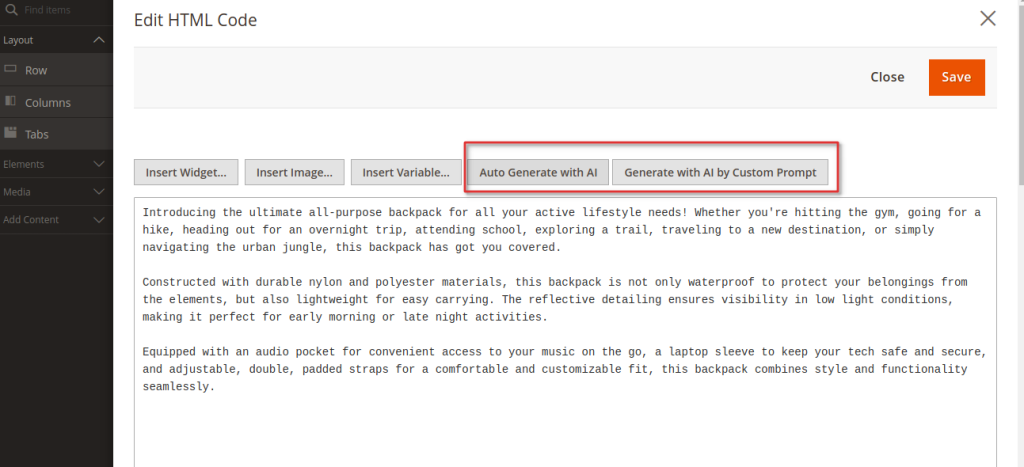
Auto Generate with AI Click this button to automatically create a description based on the category name.
Generate with AI by Custom Prompt Click this button to generate a description using custom input, as outlined in the product content section of this guide.
STEP 12
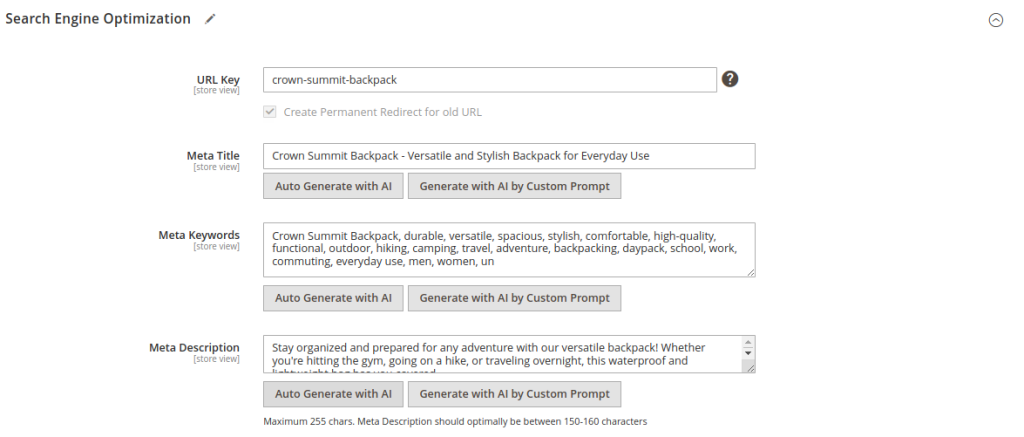
Go To Catalog > Categories > Select the desired category > Search Engine Optimization.
Auto Generate with AI Click this button to create the Meta Title, Meta Description, and Meta Keywords based on the category name.
Generate with AI by Custom Prompt Click this button to automatically generate the Meta Title, Meta Description, and Meta Keywords using custom input.
STEP 13
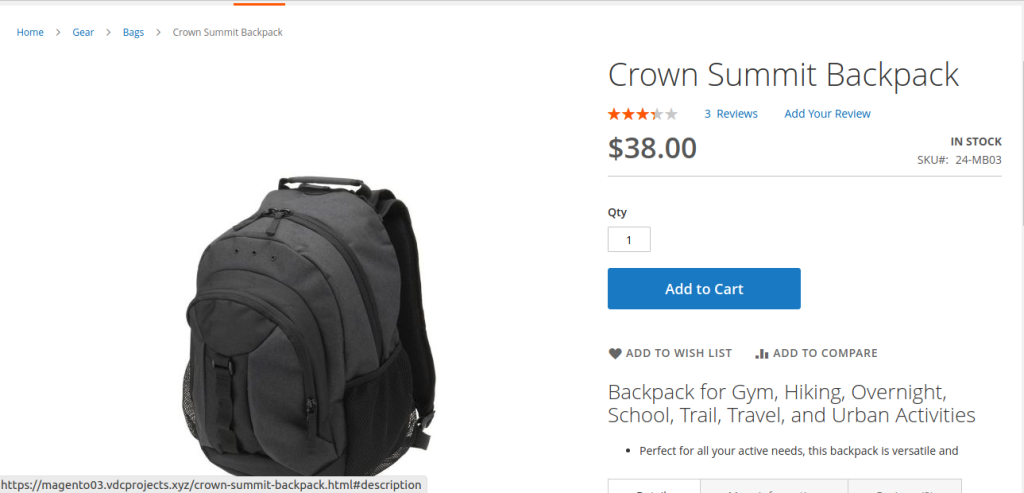
Product Page with Auto-Generated Content: Here s how your product page will look with content automatically generated by the AI.
STEP 14
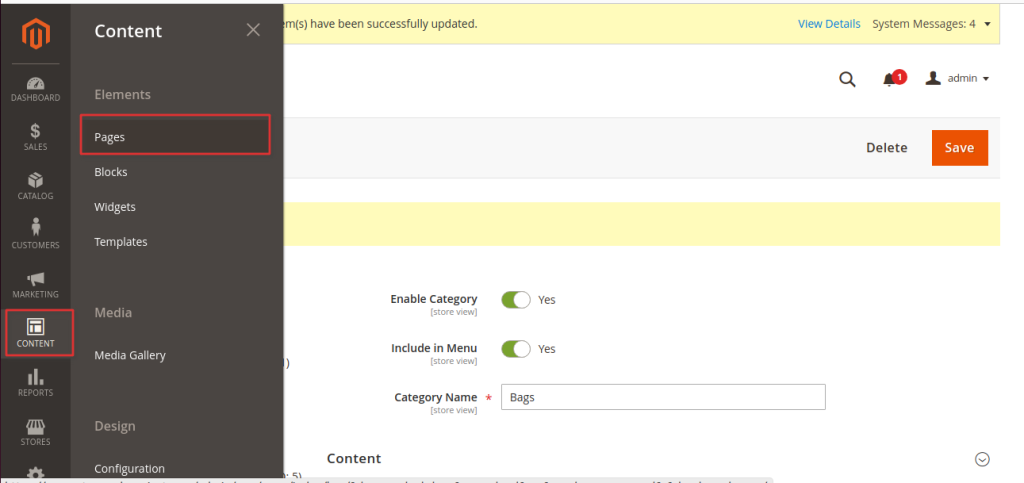
Go to Admin > Category > Pages
Enable Category: Select Yes to activate the category.
Include in Menu: Select Yes if you want to add this category to the menu.
Category Name: Enter the name of the category you are describing.
STEP 15

Content Heading:Enter the name of the product or content in the content heading. Click on Edit with Page Builder to modify your content.
STEP 16
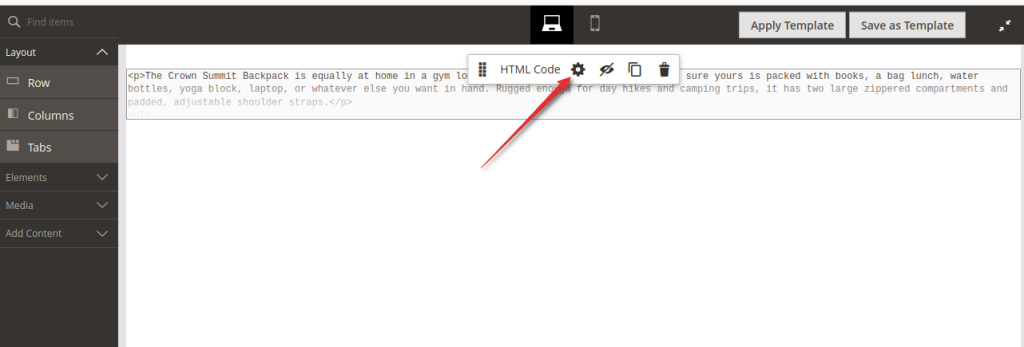
To edit your content click on the Edit/Setting icon.
STEP 17
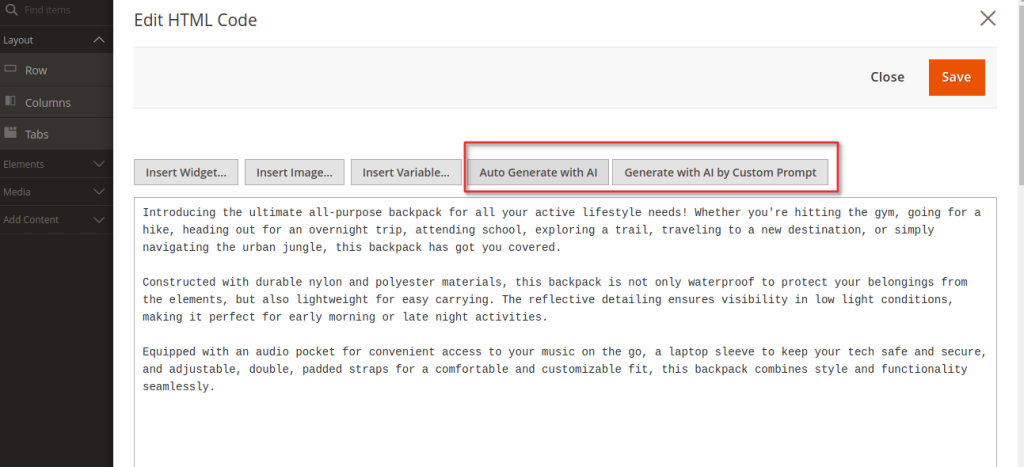
You can generate descriptions automatically using HTML or text elements.
STEP 18
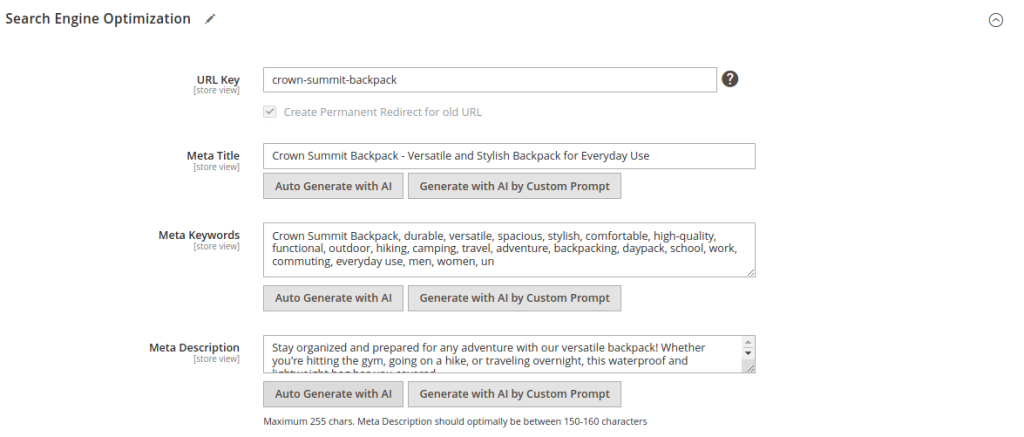
You can automatically add Meta Title and Meta Description to your CMS pages, enhancing their visibility to search engines and attracting more customers. To get started, navigate to Catalog > Content > Select the desired CMS Page > Search Engine Optimization.
STEP 19
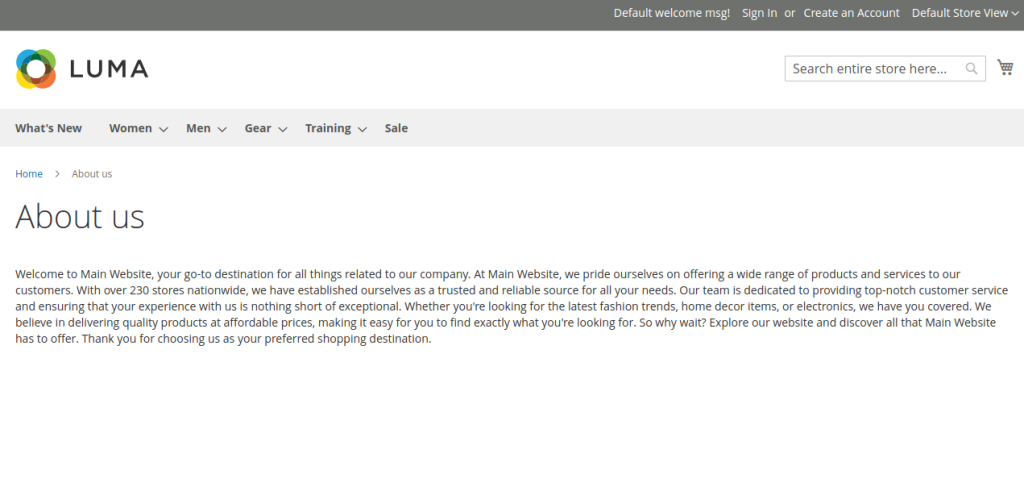
Frontend
The CMS Page with auto generated content or description.
